10. Install the lower bezel (see “Installing the lower bezel” on page 148).
11. Install the side cover (see “Installing the side cover” on page 146).
12. Lock the side cover if you unlocked it during removal.
13. Reconnect the external cables and power cords; then, turn on the attached
devices and turn on the server.
Thermal grease
The thermal grease must be replaced whenever the fan sink has been removed
from the top of the microprocessor and is going to be reused or when debris is
found in the grease.
When you are installing the fan sink on the same microprocessor that is was
removed from, make sure that:
v The thermal grease on the fan sink and microprocessor is not contaminated.
v Additional thermal grease is not added to the existing thermal grease on the fan
sink and microprocessor.
Note:
v Read the Safety information on page vii.
v Read the “Installation guidelines” on page 141.
v Read “Handling static-sensitive devices” on page 144.
To replace damaged or contaminated thermal grease on the microprocessor and
fan sink, complete the following steps:
1. Place the fan sink on a clean work surface.
2. Remove the cleaning pad from its package and unfold it completely.
3. Use the cleaning pad to wipe the thermal grease from the bottom of the fan
sink.
Note: Make sure that all of the thermal grease is removed.
4. Use a clean area of the cleaning pad to wipe the thermal grease from the
microprocessor; then, dispose of the cleaning pad after all of the thermal grease
is removed.
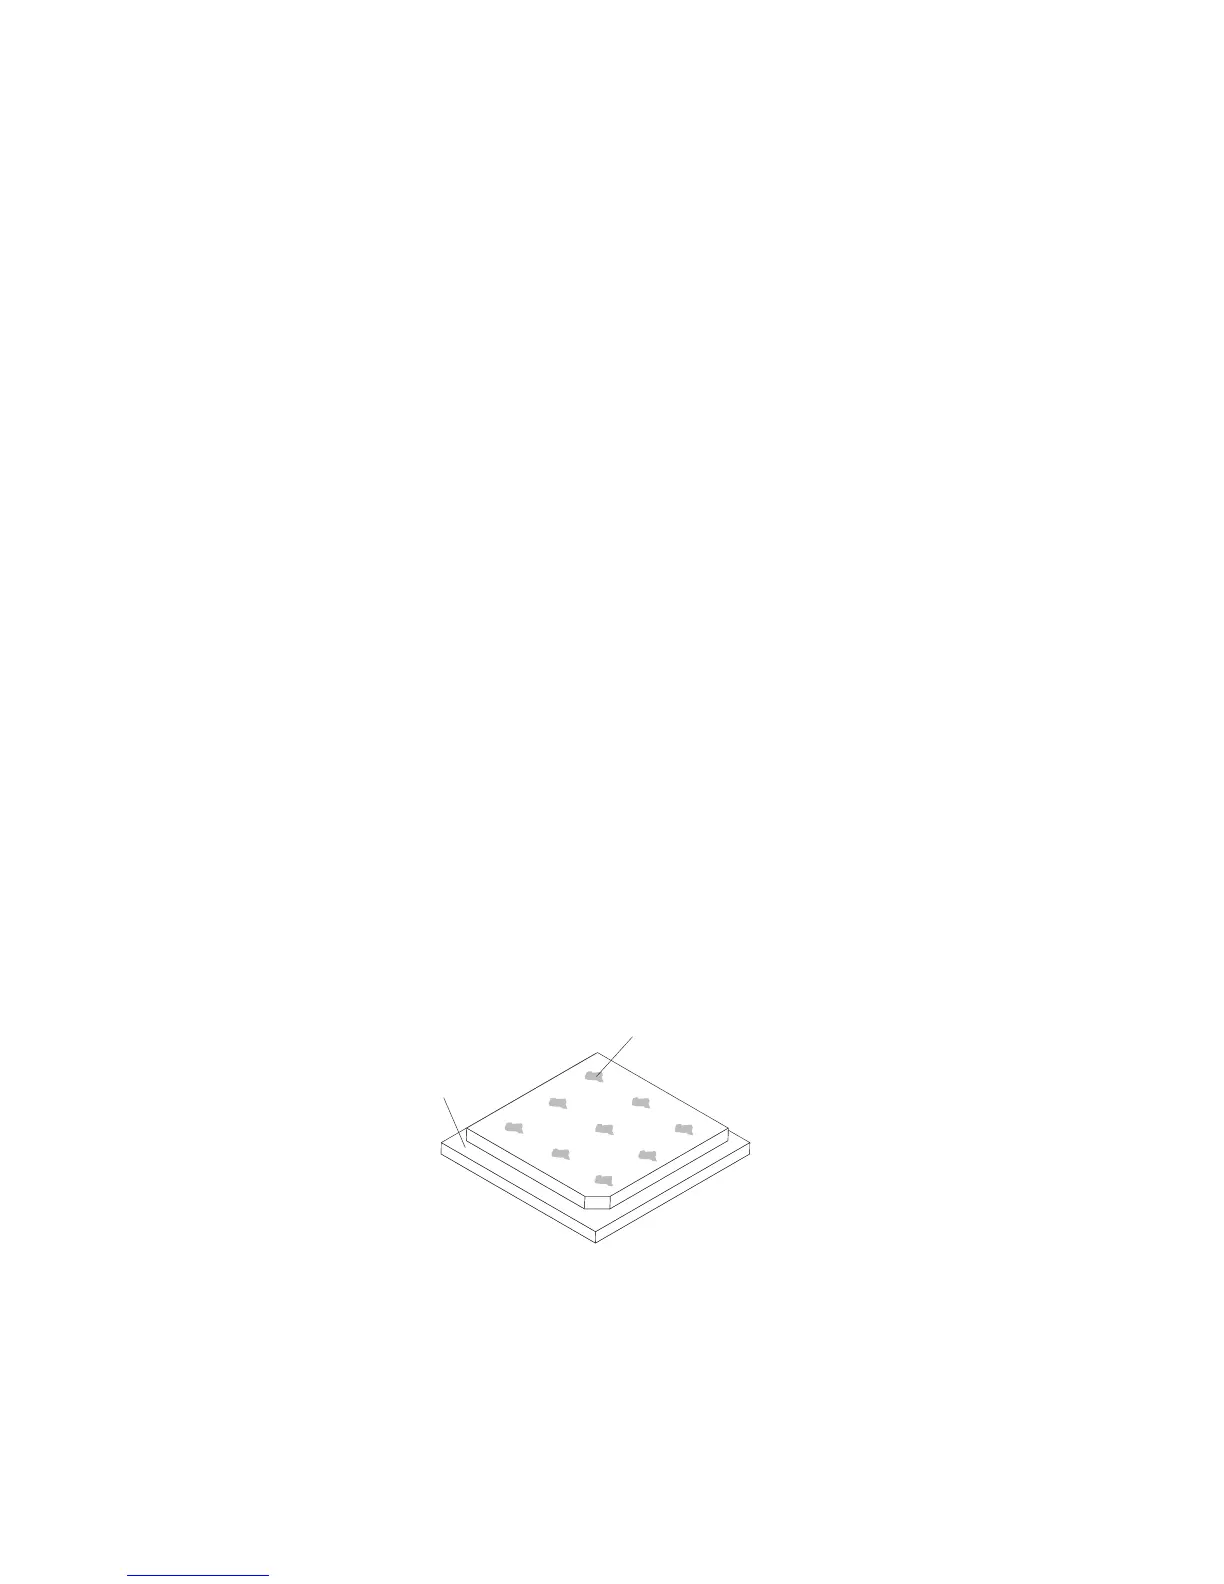
Microprocessor
0.02 mL of thermal
grease
5. Use the thermal-grease syringe to place 9 uniformly spaced dots of 0.02 mL
each on the top of the microprocessor. The outermost dots must be within
approximately 5 mm of the edge of the microprocessor, this is to ensure uniform
distribution of the grease.
Chapter 5. Removing and replacing server components 213
 Loading...