Maintenance Guide
4-1
㻌
To prevent any trouble caused by accidental machine start, always
shut-down the power before starting the maintenance and
adjustment work.
[4] OCC ASSEMBLY
4-1. Replacing the OCC Assembly
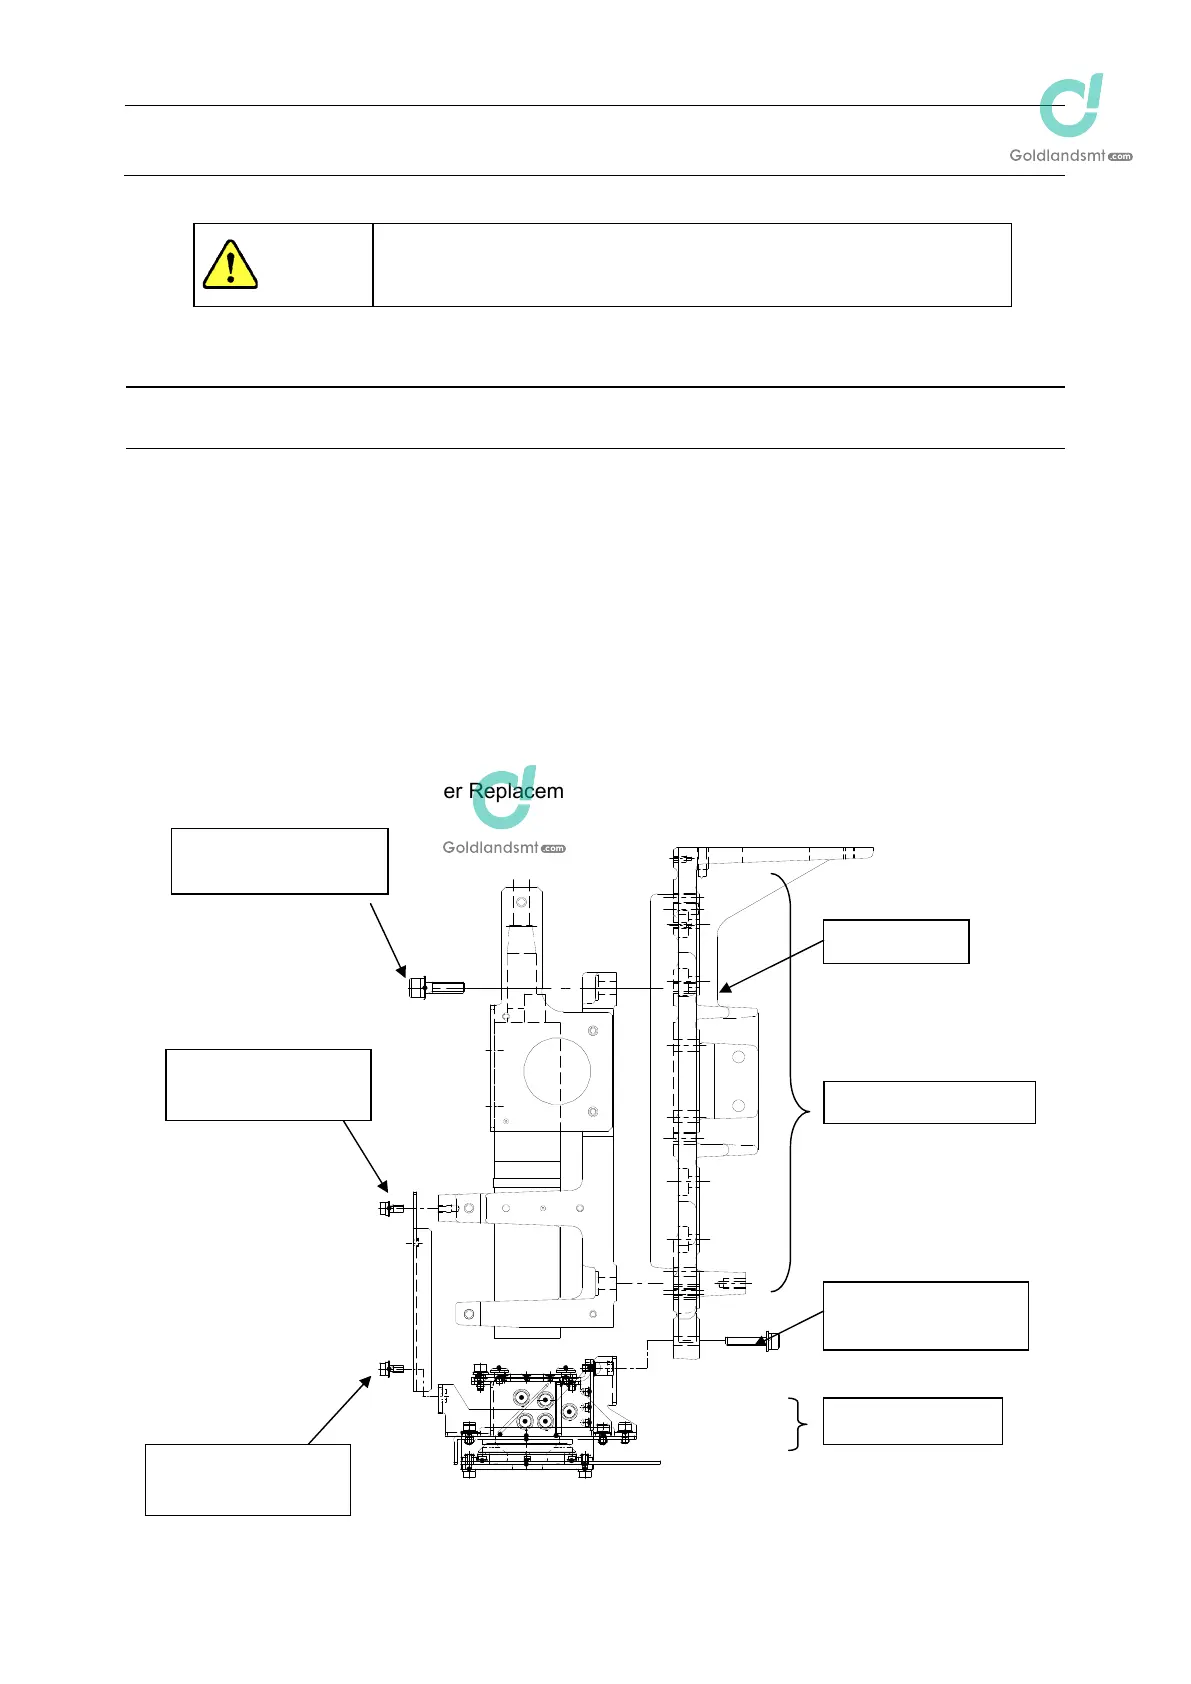
(1) Remove the SEMS cap bolts c , the head screws䷸ and detach the camera.
(2) The camera assembly has been secured with the SEMS cap bolts d while the light
assembly has been secured with the SEMS cap bolts e.
Disconnect the connectors and remove relevant mounting screws, and then replace the
camera assembly.
(3) Reassemble the components in the reverse order of disassembly.
(4) After the camera assembly has been replaced, adjust the focus and input the MS
parameters.
After the light assembly has been replaced, adjust the OCC light. (See also section 4-8, List
of Readjustment Items After Replacement.)
Figure 4-1-1 OCC Assembly
DANGER
e SEMS cap bolts
(u2)
Camera assembly
Light assembly
Head plate
d SEMS cap bolts
(u4)
䷸Head screws
(u1)
c SEMS cap bolts
(u3)
 Loading...


