− 51 −
1. If you change the pattern number with-
out pressing Ready key
❶ in
the aforementioned step 5), or turn the
power off, the set value you have input
will not be stored in memory.
2. The presser and the feed base operate.
Be careful that hands or ngers are not
being caught in them.
7. SETTING PROCEDURE OF THE SEWING DATA
In the case the sewing machine stops with its needle-bar rested in any position other than the upper
end when the READY key is pressed, Error (E030) will occur to stop the sewing machine.
In this case, turn the hand pulley to move the needle bar to its upper stop position. Error (E030)
will disappear when the upper stop position is reached. In this state, press the READY key
again to light up sewing LED A .
In addition, the needle bar will automatically return to the upper stop position when you press the
READY key even in the case the needle bar is not brought to its upper stop position as long
as the needle bar rests at any position between the upper stop position and a point short of the
lower dead point.
For the standard sewing patterns No. 90 to No. 99, the sewing speed and the thread tension can be
changed. However, the pattern shape cannot be changed. To change the pattern shape, you have
to copy the pattern to a different pattern number.
Refer to "9-7. Copying the pattern data" p. 77 for the procedure.
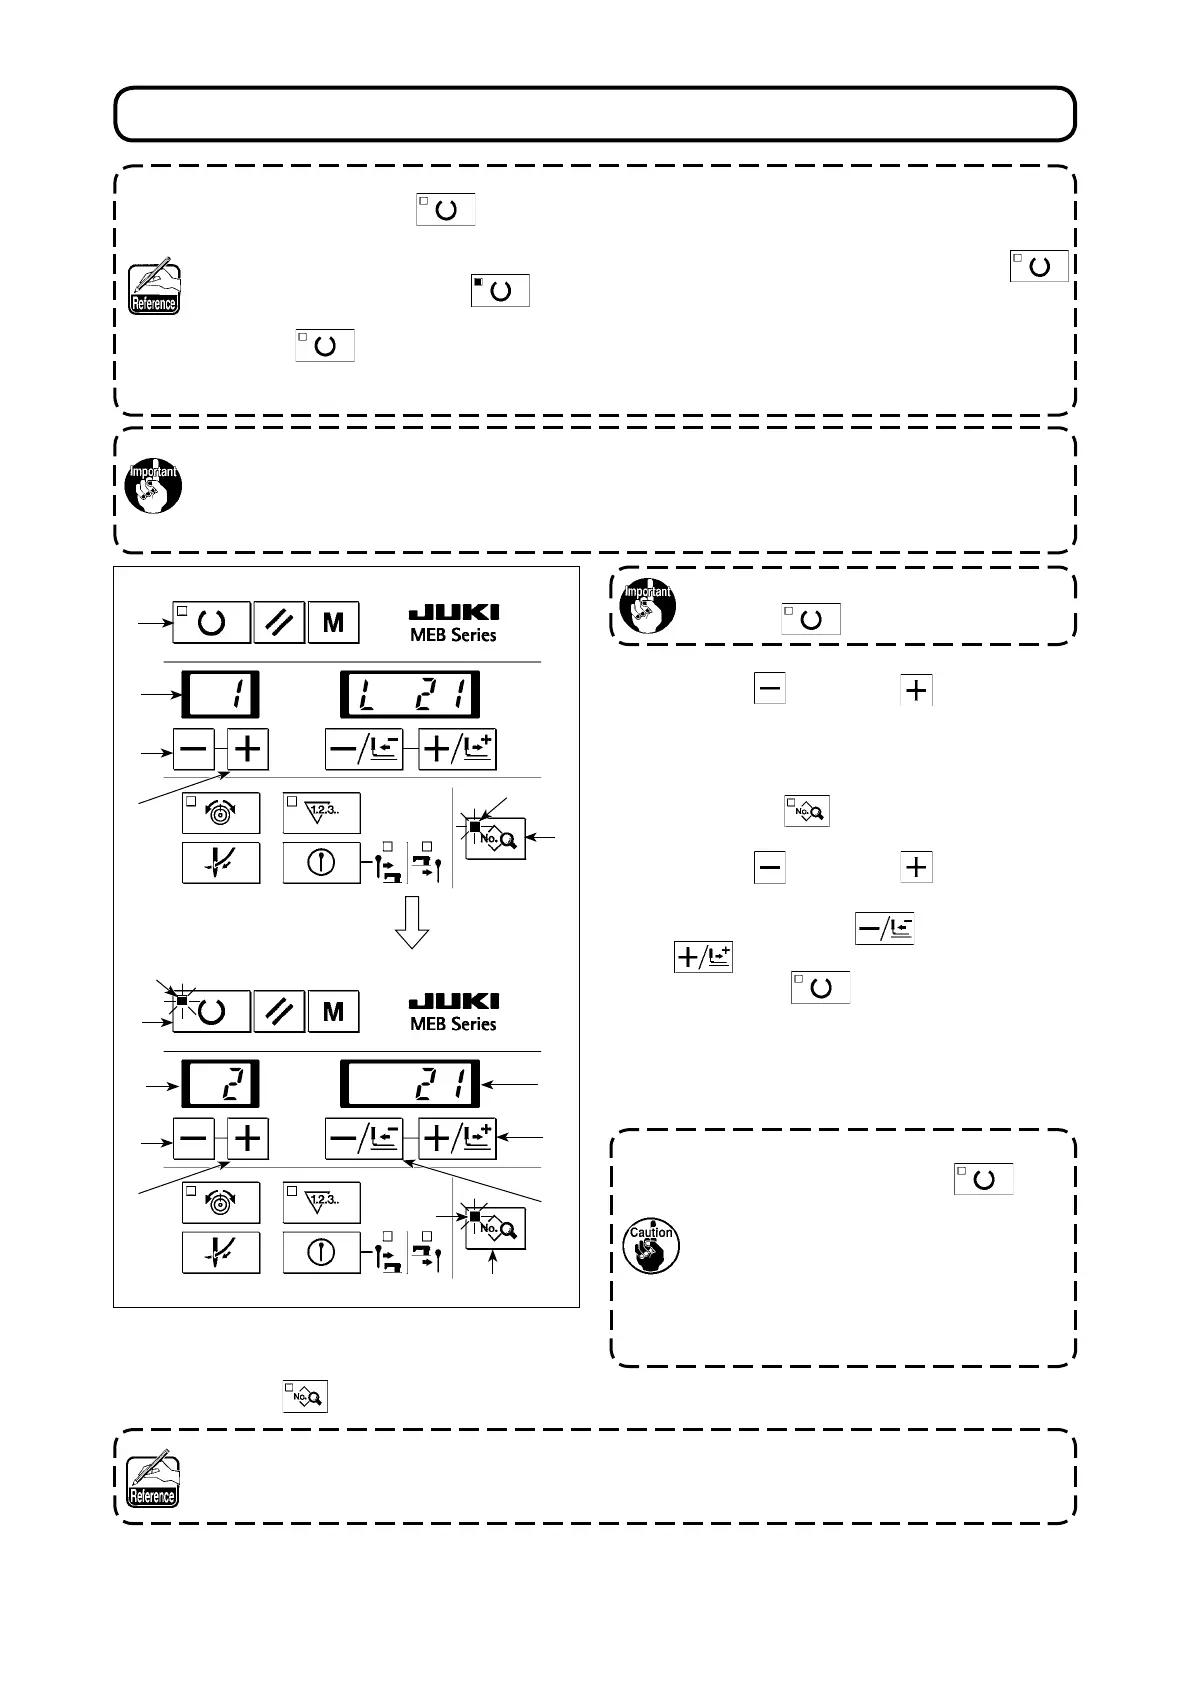
If the Sewing LED stays ON, press the
Ready key ❶ to turn it OFF.
1) Press – key ❹ or + key ❺ to select the
pattern number B sewing data of which you want
to change. (Any number to which the pattern data
is not registered is not displayed.)
2) Press Data key to light up Data LED H.
The LED displays the set value of data.
3) Press – key ❹ or + key ❺ to select the
data number B to display the set value C of data.
4) Press –/BACKWARD key ❻ or +/FORWARD
key ❼ to set a new set value C of data.
5) Press Ready key ❶ to light up Sewing LED
A. At this time, the sewing data is stored in memory.
At the same time, the presser foot comes down and
the feed base and needle bar retrieve the respective
origins.
6) Press Data key while Data LED H stays ON to return the screen to the normal display.
It is possible to prohibit the data setting from being changed in the aforementioned step 4) by setting
memory switch No. 16 "Data setting prohibition" to "1". Refer to "13. MEMORY SWITCH" p. 101 for
the procedure.
H
H
A
B
C
B
❹
❺
❹
❺
❶
❼
❻
❶
 Loading...