TP-6881 7/15 113Section 6 Disassembly/Reassembly
6.3 Reassembly
Attaching the Mounting Plate and Silencer
1. Install the exhaust system. See Figure 6-12.
Note: Use new exhaust gaskets when re-installing
the silencer.
a. Using new gaskets, connect the engine
exhaust silencer to the engine at the flanges.
Do not completely tighten the mounting
hardware at this time.
b. Secure the silencer bracket to the adapter
plate.
c. Torque the nuts securing the engine silencer
flange to the engine to 24.4 Nm (18 ft. lb.).
2. Reinstall the adapter plate onto the engine, if
necessary, using four 3/8-16 x 1-1/4 in. hex cap
bolts and washers.
Note: Correctly aligning the adapter plate to
engine is critical when remounting the
engine. Realign the engine and adapter
plate using the pen marks made when
removing the adapter.
a. Torque the bolts to 53 Nm (39 ft. lb.).
3. Attach the mounting plate using four hex cap bolts
and nuts.
a. Torque the bolts to 45 Nm (34 ft. lb.).
Assembling the alternator
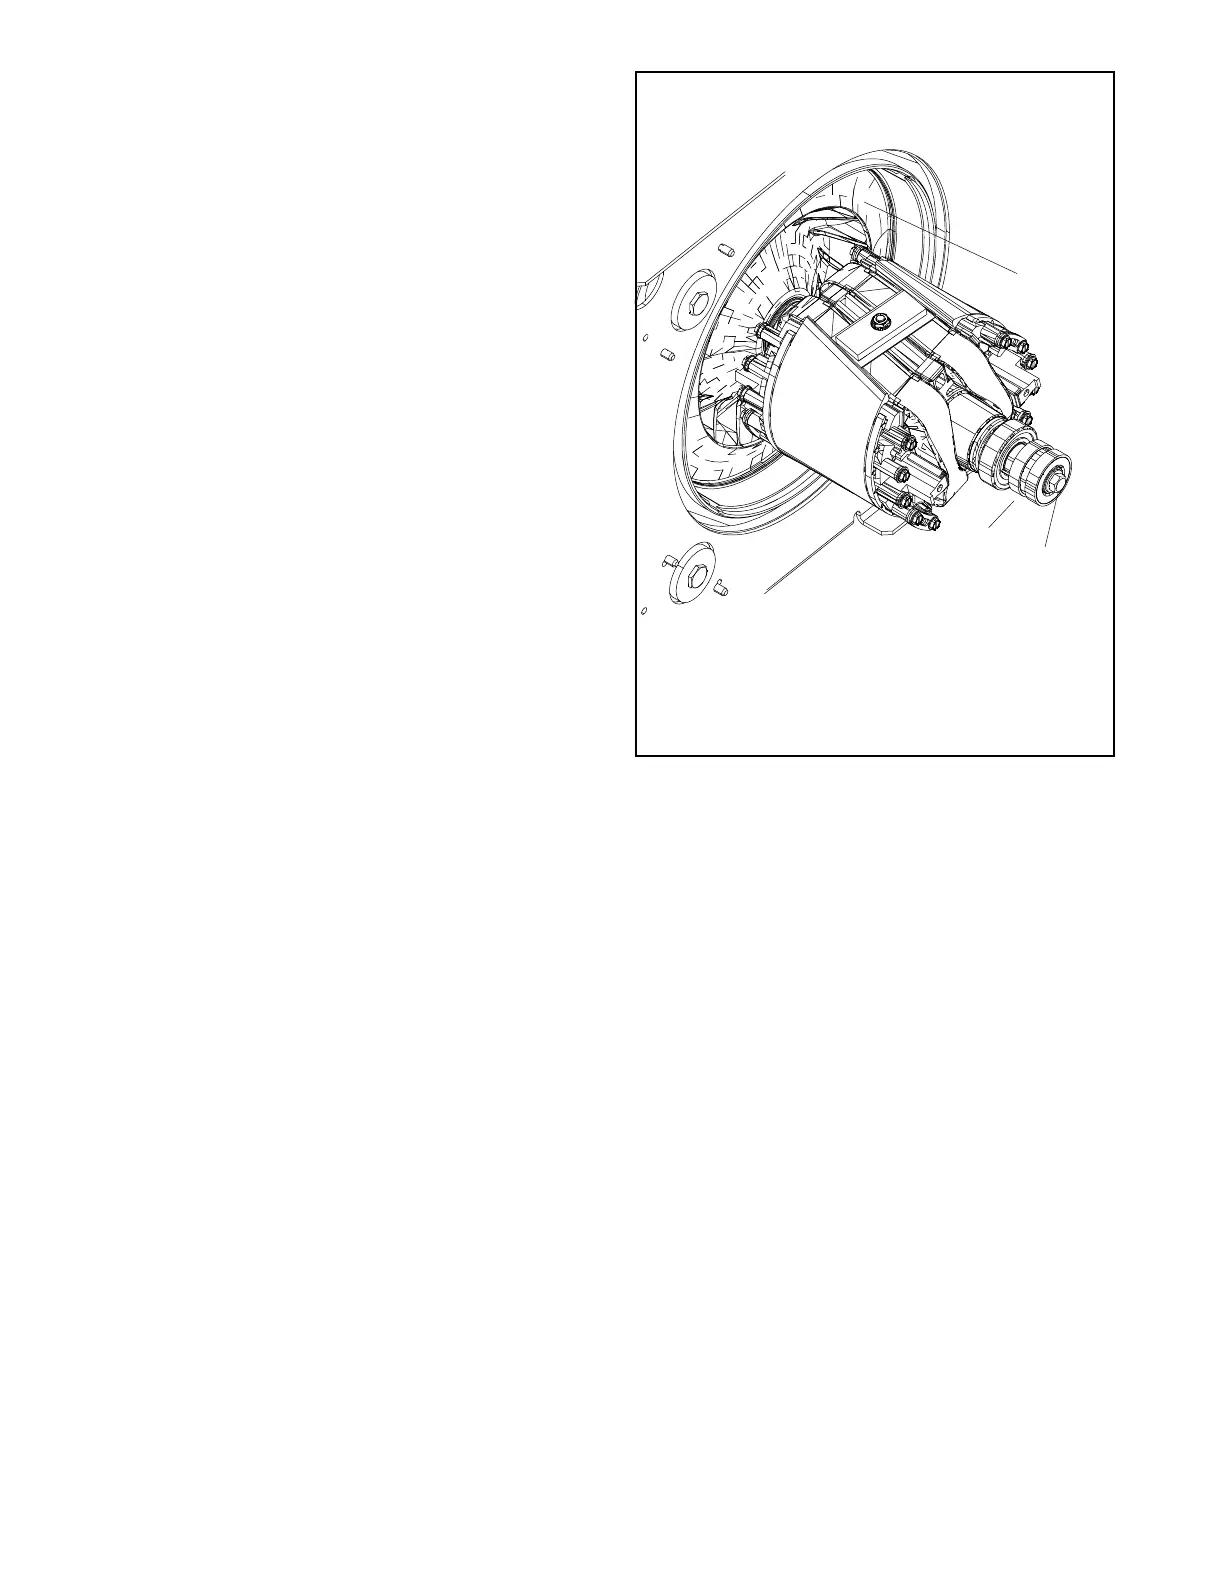
4. Install the rotor. See Figure 6-13.
a. Clean the crankshaft stub and mating surface
on the fan hub. Do not use antiseize compound
when reassembling the rotor.
b. Install the rotor onto the engine crankshaft.
c. Thread the thrubolt with hardened washer
through the actuator and rotor into the
crankshaft. Do not tighten the thrubolt at this
time.
TP6881
3
1. Adaptor Plate
2. Slip rings
3. Rotor thrubolt
2
1
Figure 6-13 Rotor Assembly with Thrubolt
5. Install the stator and end bracket.
a. Align and install the stator assembly around the
rotor.
b. Route the leads connected to the alternator
end bracket through the opening in the base of
the alternator frame.
c. Place the end bracket onto the stator assembly,
lining up the alignment marks on the top of the
stator and end bracket. See Figure 6-14.
d. Thread the four overbolts with washers through
the end bracket and into the adapter plate. See
Figure 6-14.
e. Tighten the four alternator assembly overbolts
to 23 Nm (17 ft. lb.).
 Loading...