.
ATTACHMENTS, OPTIONS
HANDLING PAYLOAD METER
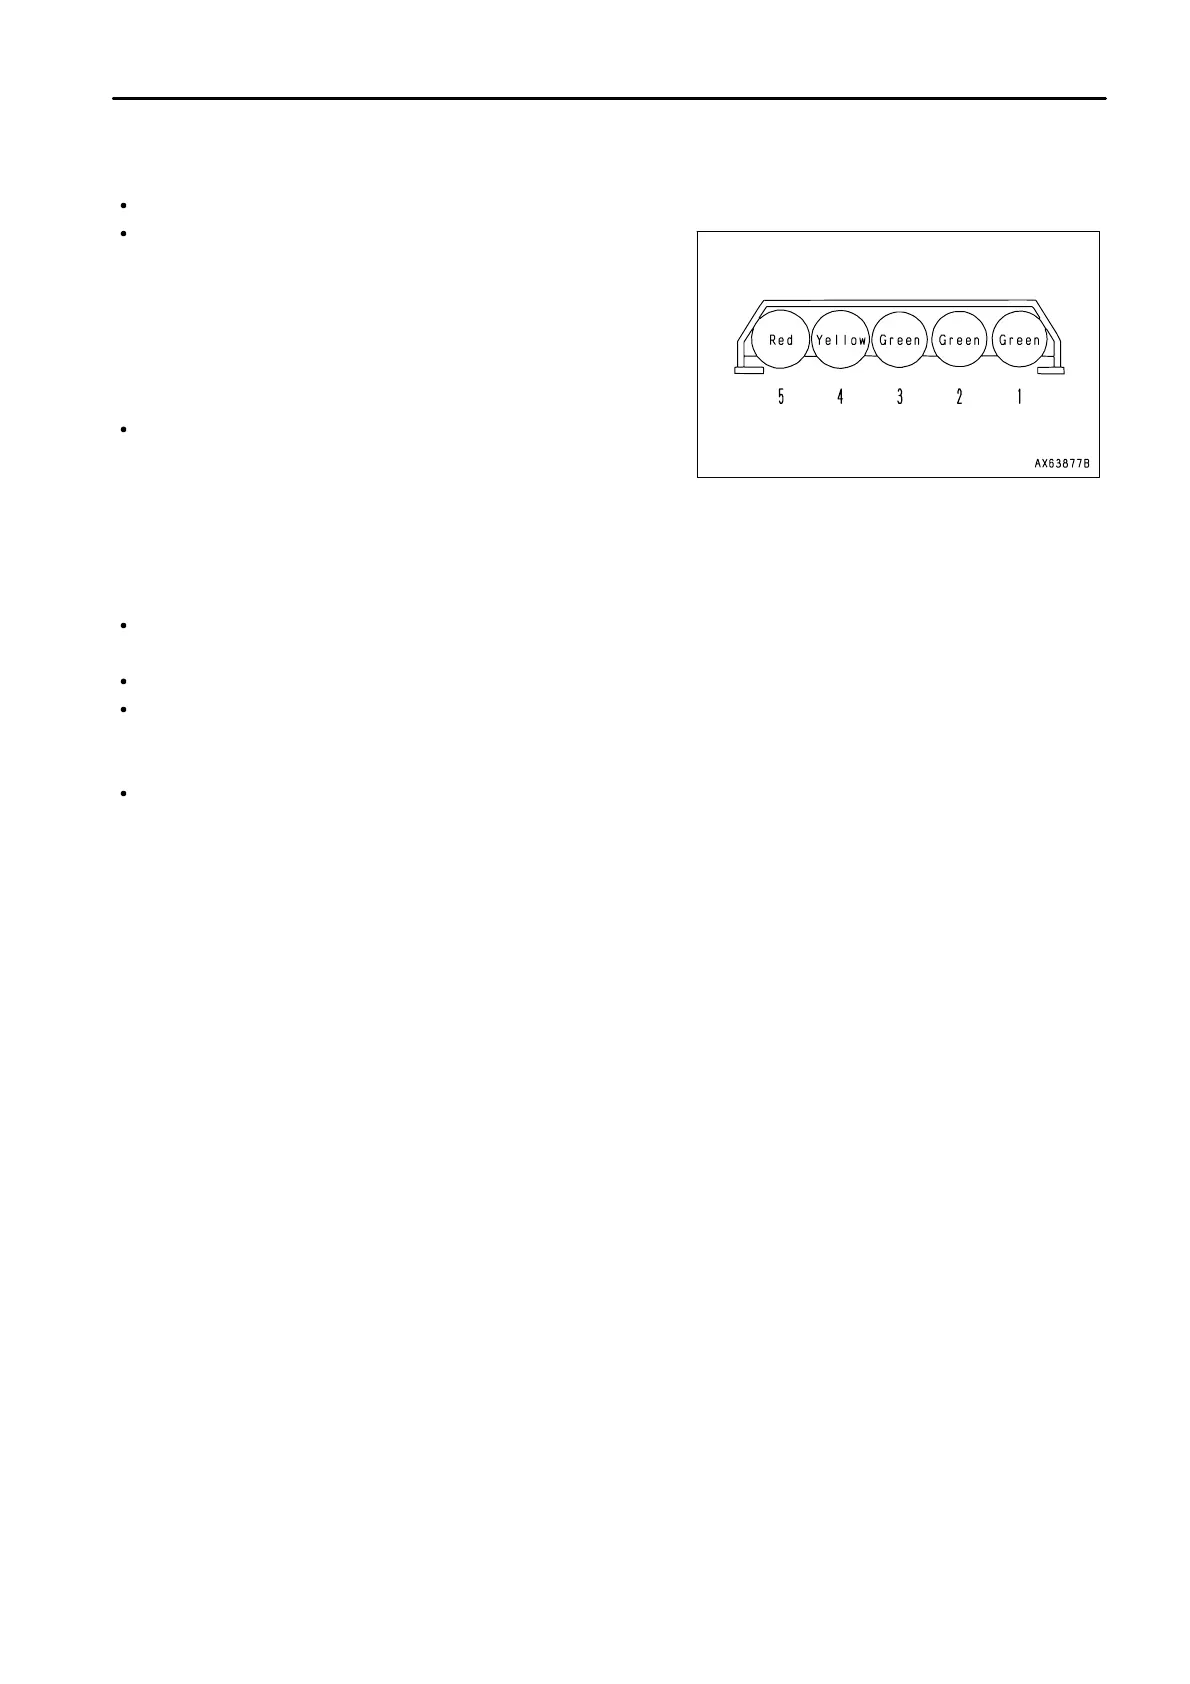
EXTERNAL DISPLAY LAMPS
When the actual load is displayed, the lamps light up as follows.
HD325, HD325 of 4WD specifications
Lamp 1 (green): Displays load between 10 tons and 14 tons
Lamp 2 (green): Displays load between 14 tons and 29 tons
Lamp 3 (green): Displays load between 29 tons and 35 tons
Lamp 4 (yellow): Displays load between 35 tons and 38 tons
Lamp 5 (red): Displays load over 38 tons
HD405
Lamp 1 (green): Displays load between 12 tons and 18 tons
Lamp 2 (green): Displays load between 18 tons and 36 tons
Lamp 3 (green): Displays load between 36 tons and 40 tons
Lamp 4 (yellow): Displays load between 40 tons and 42 tons
Lamp 5 (red): Displays load over 42 tons
If the shift lever is not at neutral and the dump lever is not at the FLOAT position, none of the display lamps light
up.
All the lamps light up for 10 seconds after the power is turned ON.
To prevent overloading, use the lamps for loading up to the point where the 3 green lamps light up.
PREDICTION DISPLAY
In the case where the weight of the load changes as each bucket is emptied into the dump body, the average
weight of the load up to that point is calculated to predict what the weight of the load will be if one more bucket
is loaded. The appropriate lamp flashes, so it is possible to adjust the weight of the next load when operating the
loader.
The prediction display for the load level and the actual load display are shown at the same time.
Example (HD325, HD325 of 4WD specifications):
1st bucket: 6.5 tons
2nd bucket: 8 tons (14.5 tons)
3rd bucket: 8 tons (22.5 tons)
4th bucket: 8 tons (30.5 tons)
Example (HD405):
1st bucket: 8 tons
2nd bucket: 8 tons (16 tons)
3rd bucket: 7.5 tons (23.5 tons)
4th bucket: 8 tons (31.5 tons)
5th bucket: 8 tons (39.5 tons)
If the load changes as above, the external display lamps will give the display in the table below.
6 - 3
 Loading...