6.2 Initial Settings
6
Di2010/Di2510/Di3010/Di3510 6-5
Administrator Management Operations Chapter 6
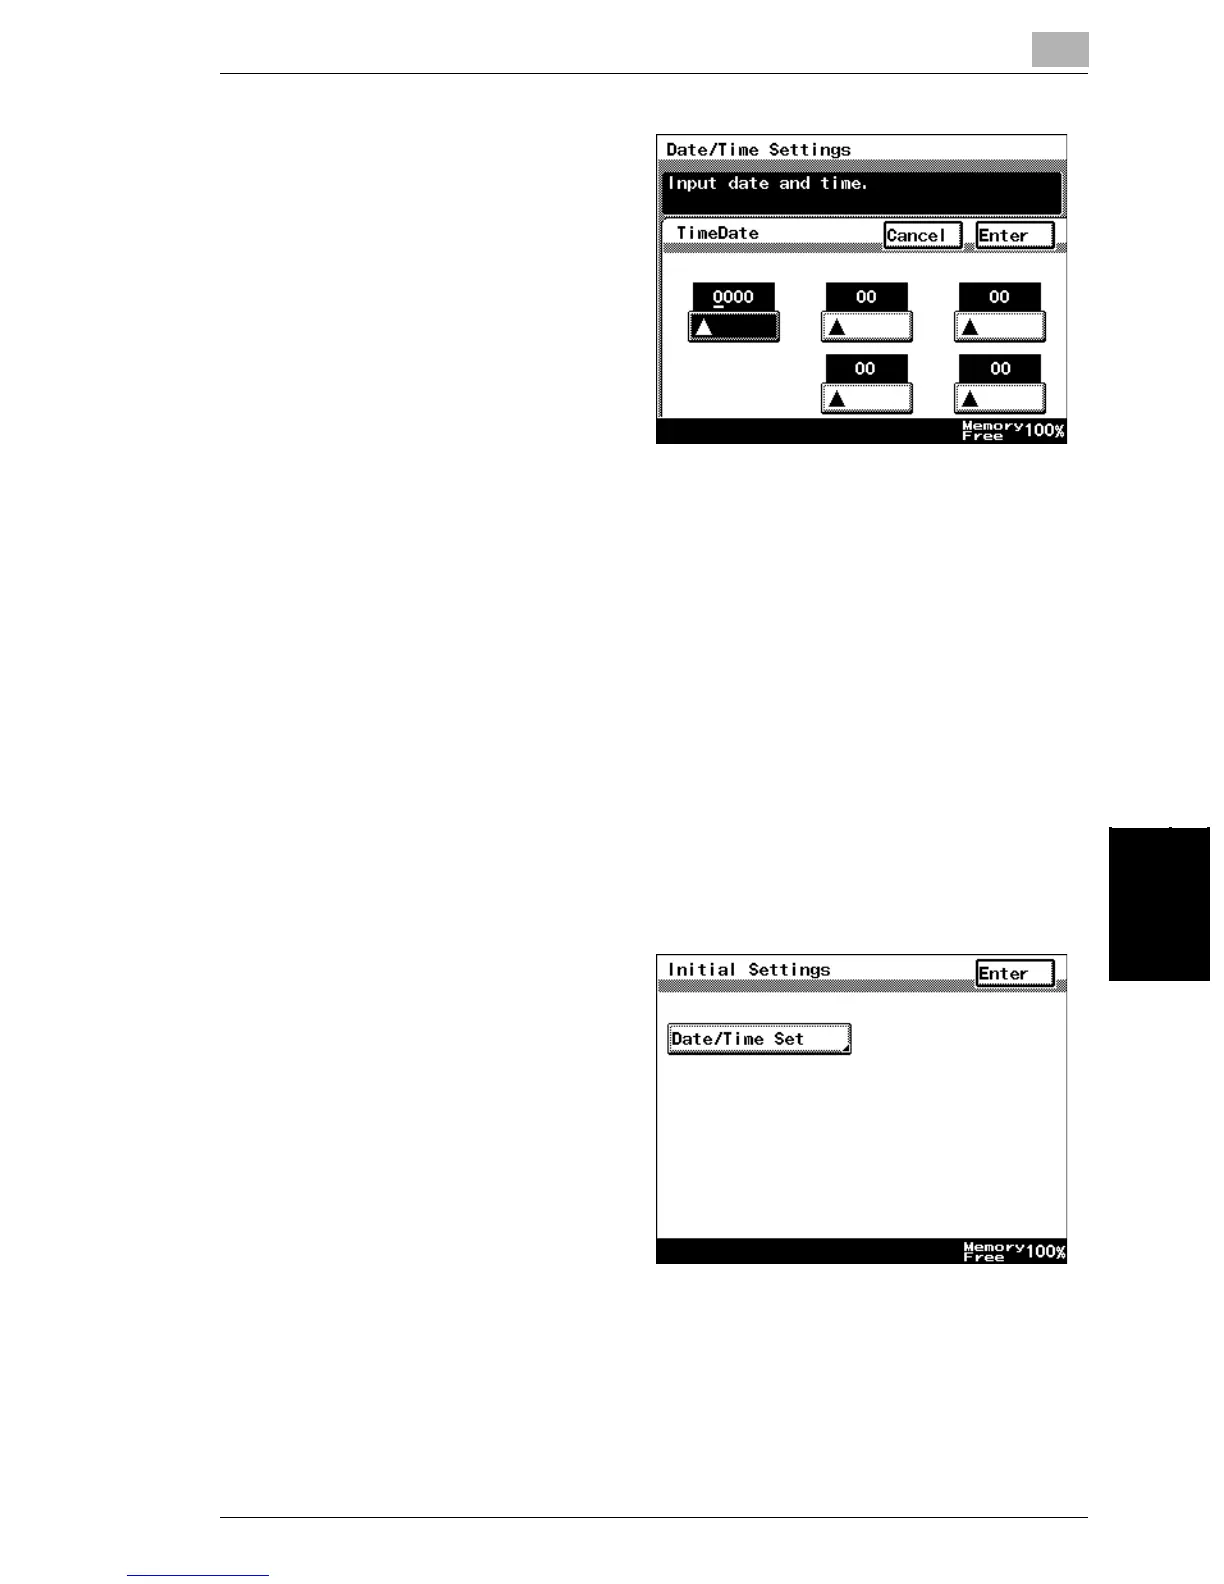
5 Use the 10-Key Pad to type in the
current date and time, and then
touch [Enter].
❍ To re-enter the entered value,
press the [C] key.
❍ Touch the button for the year,
month, day, hour or minutes,
and then use the 10-Key Pad
to enter the value.
❍ Enter four digits for the year.
❍ Enter the time in the 24-hour
format.
6 Continue touching [Enter] to return to the Utility screen, and then touch [Exit] to
return to the Basics screen.
Specify the time zone
Specify the time difference from Greenwich Mean Time, which is added to the
header of mails that are sent.
To set the time zone
1 Follow the procedure described in “To display the Administrator Management
screens” on page 6-2 to display the Administrator Management screen.
2 Touch [Admin. 1], and then touch [Initial Settings].
3 Touch [Date/Time Set].
 Loading...