Action Result
☞
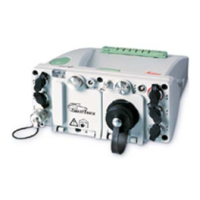
If an image was not used for the
calculation of the 3D coordinates
of the picked point, the sym-
bol will appear in the selec-
ted image. The symbol marks
the approximate position of the
measured point in the selected
image.
5. To remove an image from the
measurement, select the image
with Previous or Next and press
Remove.
The coordinates and its CQ val-
ues will be re-calculated auto-
matically after the image has
been removed from the meas-
urement.
6. To add an image to the meas-
urement, select the image with
Previous or Next. Pick the point
in this image and press Add.
The image will be added to the
measurements.
The coordinates and its CQ val-
ues will be re-calculated auto-
matically after the image has
been added to the measure-
ment.
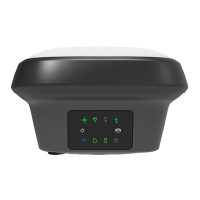
7. Store
When the point is stored, the
point symbol appears in all
images of the image group.
4.6 LED Indicators on GS18
Description
The GS18 instrument has Light Emitting Diode indicators. They indicate the
basic instrument status.
LED indicators
Operation 45
 Loading...