Manitowoc Published 12-05-17, Control # 032-23 4-67
18000 OPERATOR MANUAL SET-UP AND INSTALLATION
Remove Carbody Counterweight
Carbody counterweights may be removed with the live mast.
Reverse steps under Install Carbody Counterweight topic on
page 4-39
.
Mast can be used as a boom with mast hoist control for
disassembly. Use mast as a boom within 114°–160°
operating range.
NOTE The mast will stop lowering, the operating limit alert
will come on, and MAST TOO FAR FWD will
appear on the digital display if the mast is lowered
to 160°.
Deploy Rear Rotating Bed Jacks
NOTE The front rotating bed jacks remain stored. Do not
deploy them at this time.
Perform steps 2a through 2d on page 4-12
and steps 3 and 4
on page 4-14
for both rear rotating bed jacks.
WARNING
Falling Mast Hazard!
Prevent mast from falling:
• Do not use limit bypass to lower mast below 160°.
Mast will fall suddenly. Connect an assist crane to
end of live mast when it is necessary to lower it
below 160°.
• Mast assist arms must remain raised while using live
mast as a boom. Mast will fall over backwards if
raised to vertical when arms are down.
CAUTION
Jack Damage!
Prevent damage to jacks:
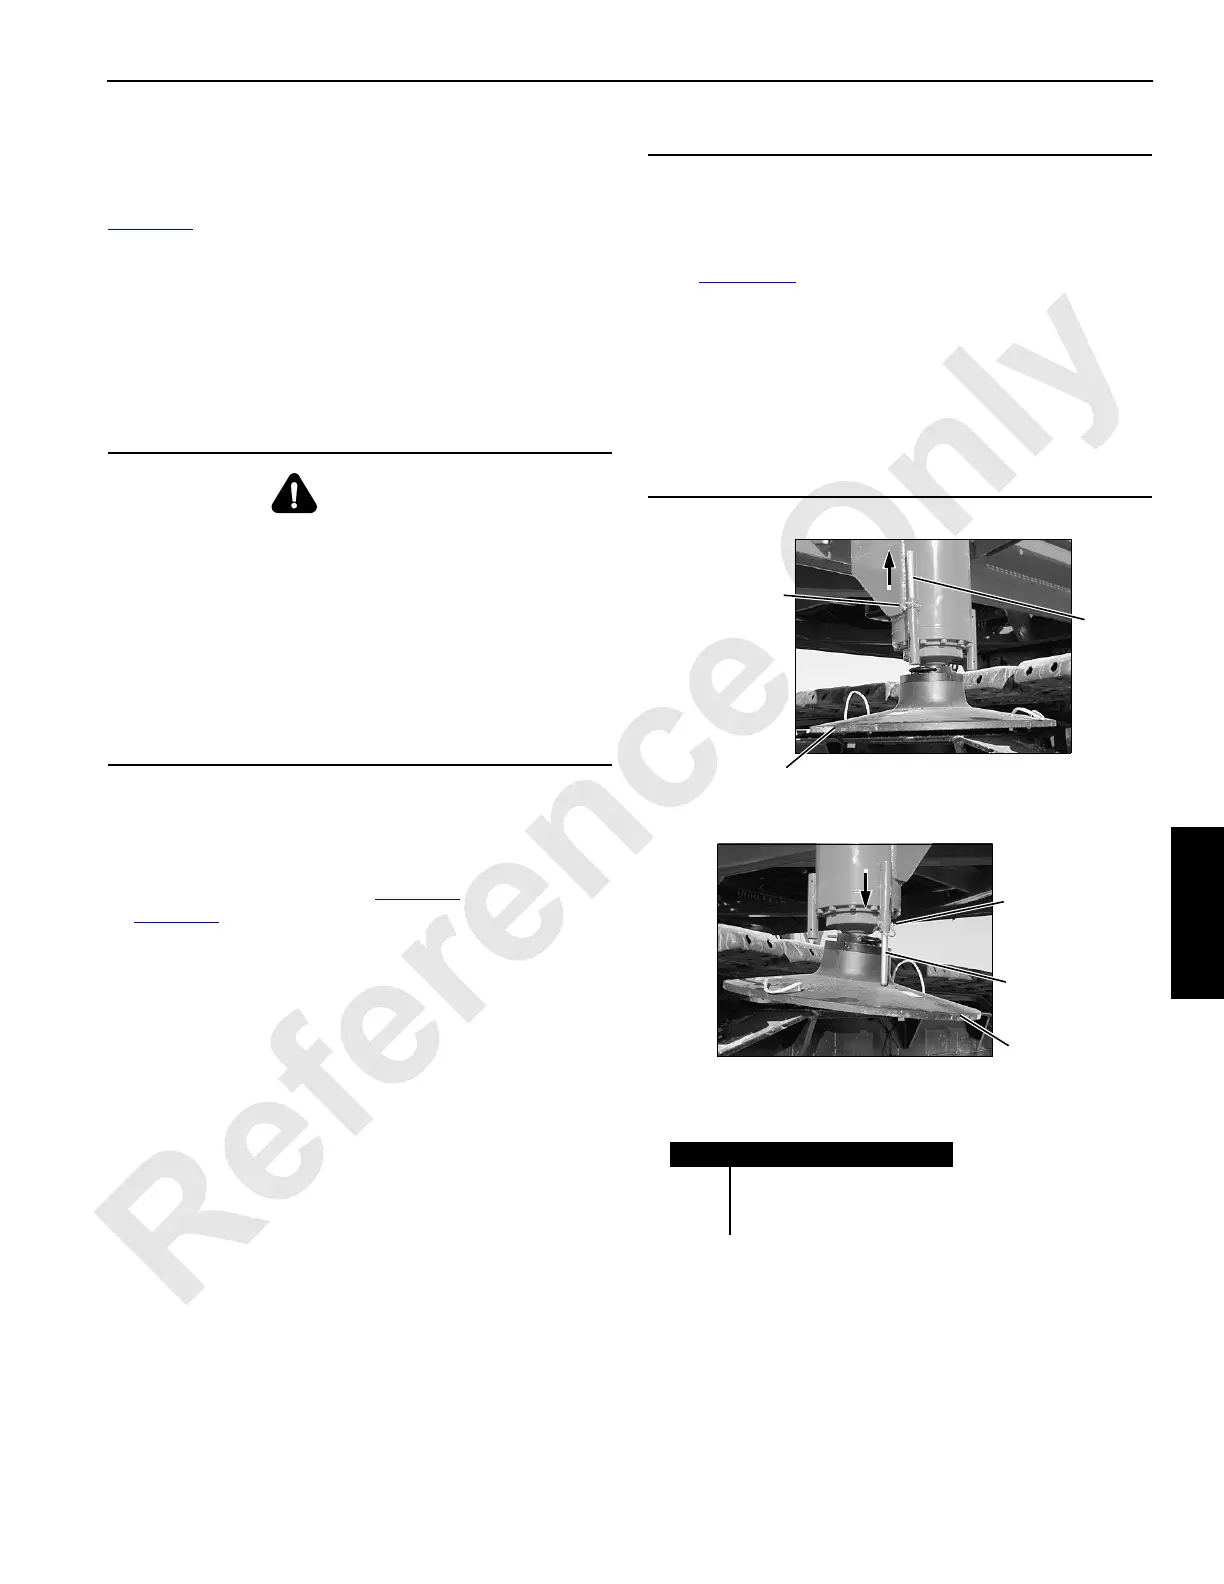
See Figure 4-35
for the following steps.
• BEFORE JACKING:
pin jack pad support rod (2, View A) in retracted
position so jack pad is level.
• BEFORE SWINGING with crawlers installed:
pin jack pad support rod (2, View B) in extended
position so jack pad is tilted. Damage will occur if
this step is not performed. Jack pad will strike
crawlers while swinging crane.
Item Description
1Jack Pad
2 Jack Pad Support Rod
3 Hair-Pin Cotter
P1962
1
Tilted
P1961
1
Level
View A
Jacking Position
View B
Swinging Position
3
Pin Here to
Tilt Pad
3
Pin Here to
Level Pad
2
2
FIGURE 4-35

 Loading...


