16
1
Bright-Field Microscopy
6
x
6
S
T
A
G
E
J
A
P
A
N
F
.
STOP A
STOP
BF
DF
1
0
0
0
01
0
0
I
NO
U
T
6
x
6
S
T
A
G
E
J
A
P
A
N
F
.
STOP
A
.
STOP
BF
DF
1
0
0
0
01
0
0
IN O
U
T
4
5
2
6
4
5
8
1
2
3
3
6
7
1
2. Set the microscope for
bright-field microscopy
If accessories for DIC
microscopy (*1 to *3)
are in place, pull them
out of the optical path.
Push in.
BF (bright-field) (p.33)
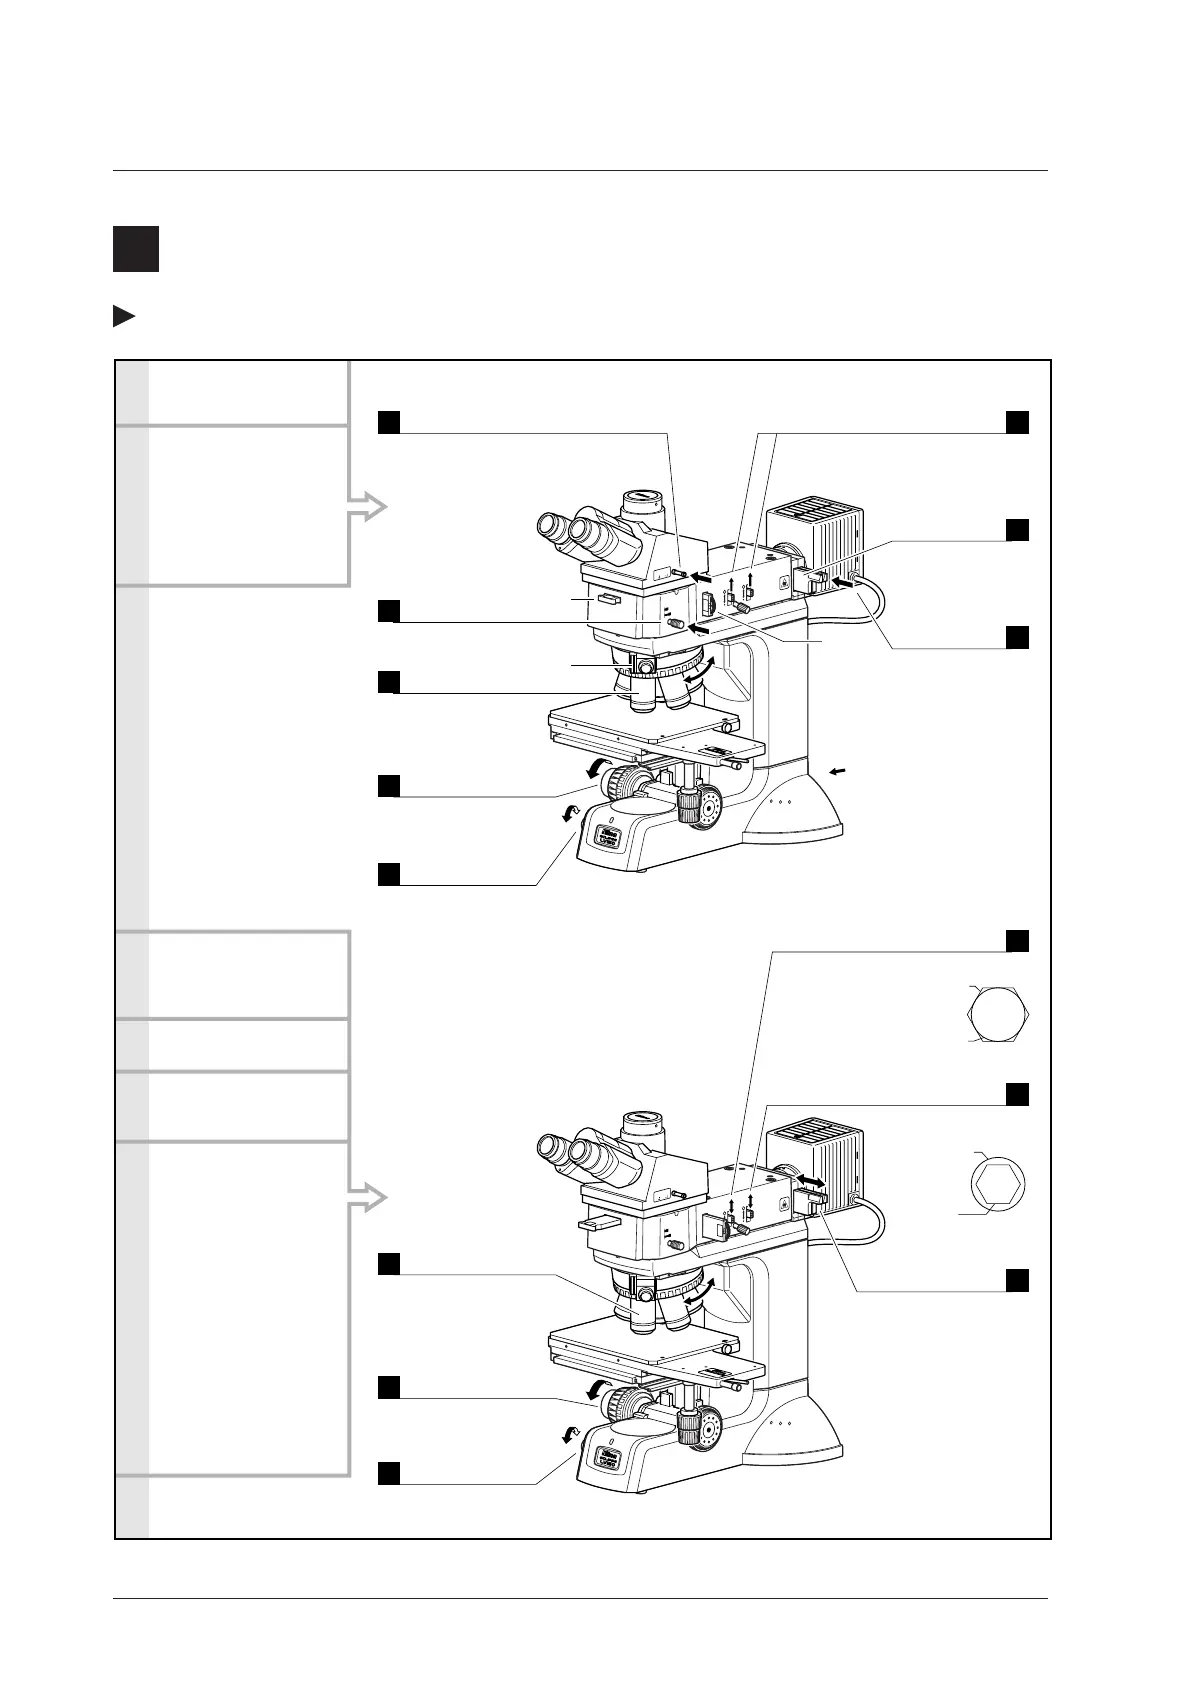
1. Turn on the power.
Adjust the
brightness.
ND filter
(p.26)
3. Place the sample on the
stage and focus on it.
(p.27)
4. Adjust the diopter. (p.30)
5. Adjust the interpupillary
distance. (p.30)
6. Change the magnification
and observe the sample.
Hint:
It may be difficult to
focus on a sample with
small contrast, such on a
polished surface. In a
case like this, stop down
the field diaphragm so
that its image can be
seen in the viewfield,
and try to focus on the
rim of the diaphragm
image. When the rim is
in focus, the sample is in
focus just as well.
Adjust the
brightness.
Brightness control
knob (p.26)
Lower the stage
as far as it will go.
Coarse focus knob
(p.27)
Adjust the
brightness.
Brightness control
knob (p.26)
Adjust
the brightness.
ND filter
(p.26)
Image of field diaphragm
Viewfield
Objective’s
pupil
Image of
aperture
diaphragm
Adjust to 70 to 80% of
the objective’s N.A.
Aperture diaphragm
(p.32)
Adjust to circumscribe
the viewfield.
Field diaphragm (p.31)
Push in.
Binocular eyepiece: 100% (P.29)
*1
*2
*3
Select the
10x objective.
On the LV150A,
use the nosepiece
rotation buttons. (p.35)
Raise the levers.
Push in the
NCB11 filter.
To fully open the field and
aperture diaphragms.
(p.31 and p.32)
To compensate
color temperature.
(p.26)
Select the
10x objective.
On the LV150A,
use the nosepiece
rotation buttons.
(p.35)
Power switch
Finely adjust
the focus.
Coarse/fine focus
knob (p.27)
When configured with the LV-UEPI

 Loading...