7368 ISAM ONT G-240W-J Product Guide Install a G-240W-J indoor ONT
Issue: 01 3FE-48009-AAAA-TCZZA 65
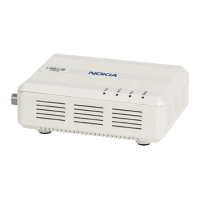
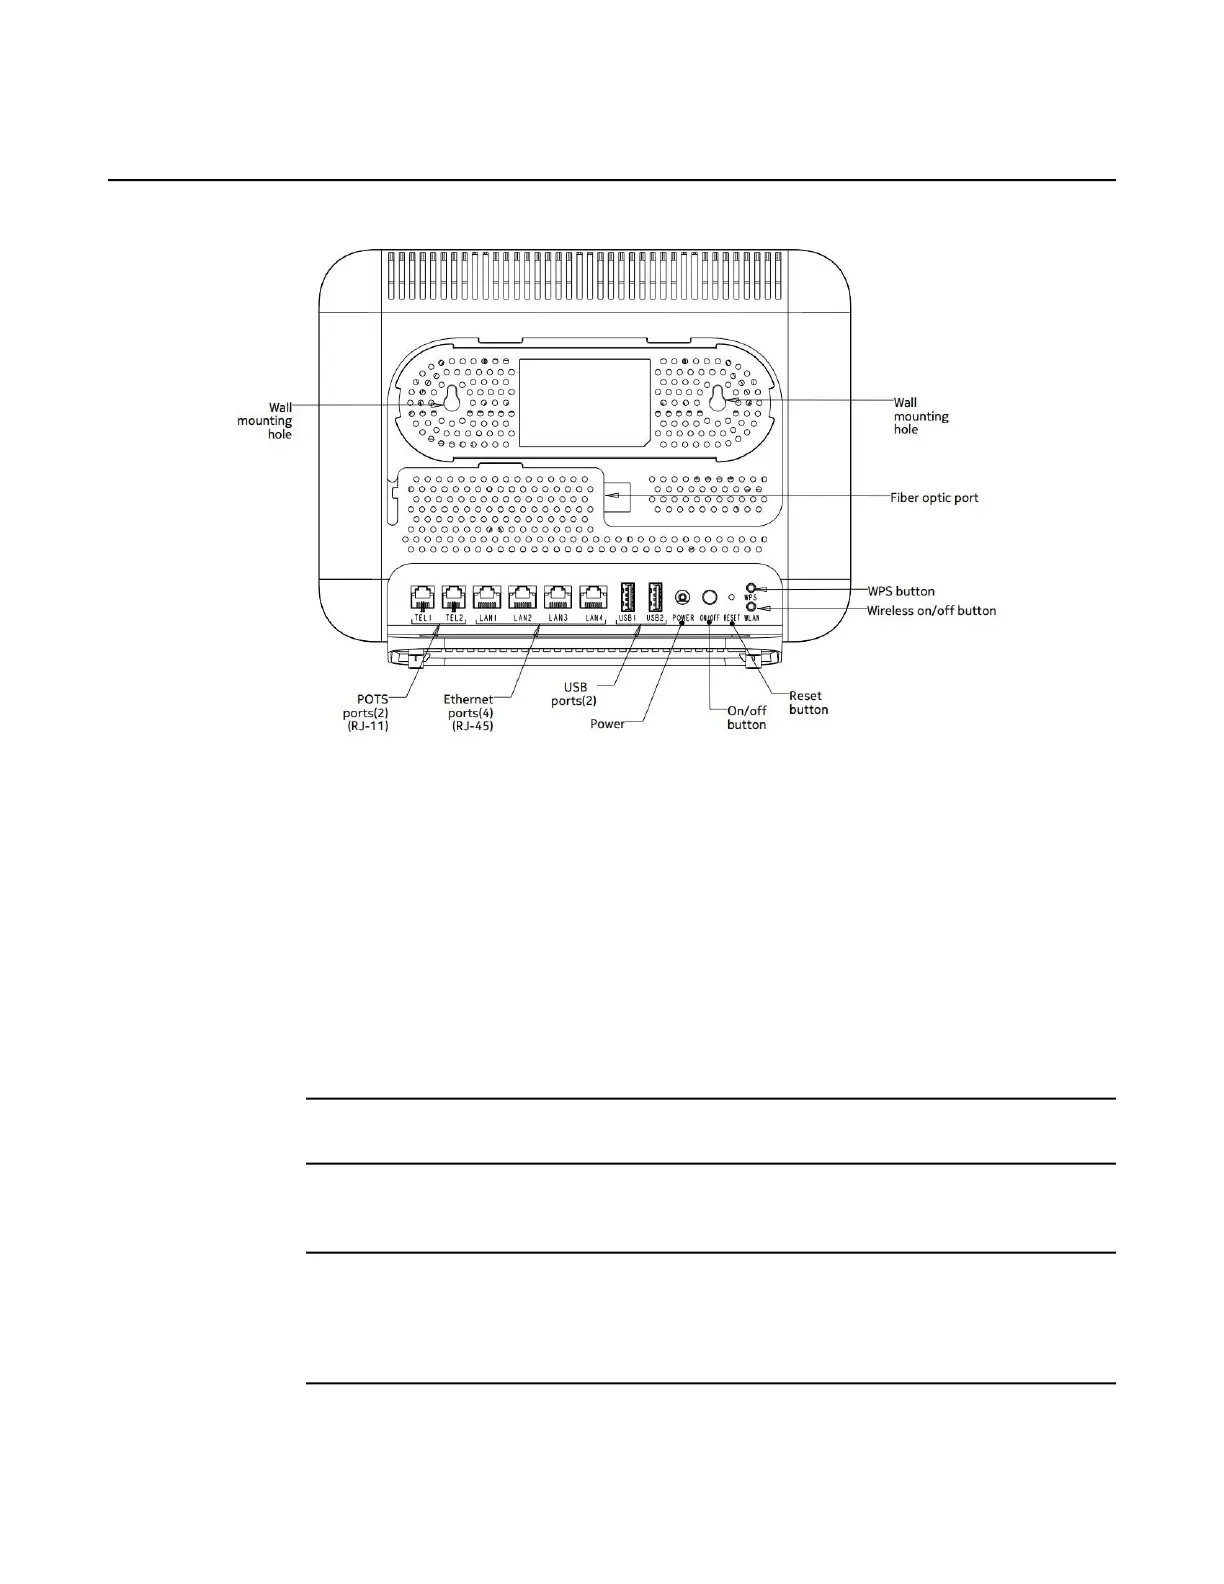
Figure 16 G-240W-J ONT with connections and key mounting holes
i Attach the wall mounting keyholes on the ONT.
ii Drill two holes into the wall where the ONT will be mounted. If possible, mount the
ONT on a wall stud.
Do not drive the screw into the wall completely. Leave approximately 1/8 in. (6 mm)
between the screw head and the wall surface.
iii Drive the mounting screws into the holes.
The recommended length of the mounting screw is 1.15 in. (3.8 cm).
iv Slide the wall mount keyholes on the ONT enclosure down over the mounting screws
until the ONT is securely seated.
3 Review the connection locations, as shown in Figure 16.
4 Connect the Ethernet cables to the RJ-45 ports; see Figure 16 for the
location of the RJ-45 ports.
5 Route the POTS cables directly to the RJ-11 ports as per local practices.
The POTS port to the left is labeled 1 for Line 1 while the port on the right is labeled 2 for
Line 2, as shown in Figure 16.
 Loading...