DAA2 & DAX — P/N 53265:A1 8/24/2011 101
Installation DAA Digital Audio Amplifiers
CAB-4 Series
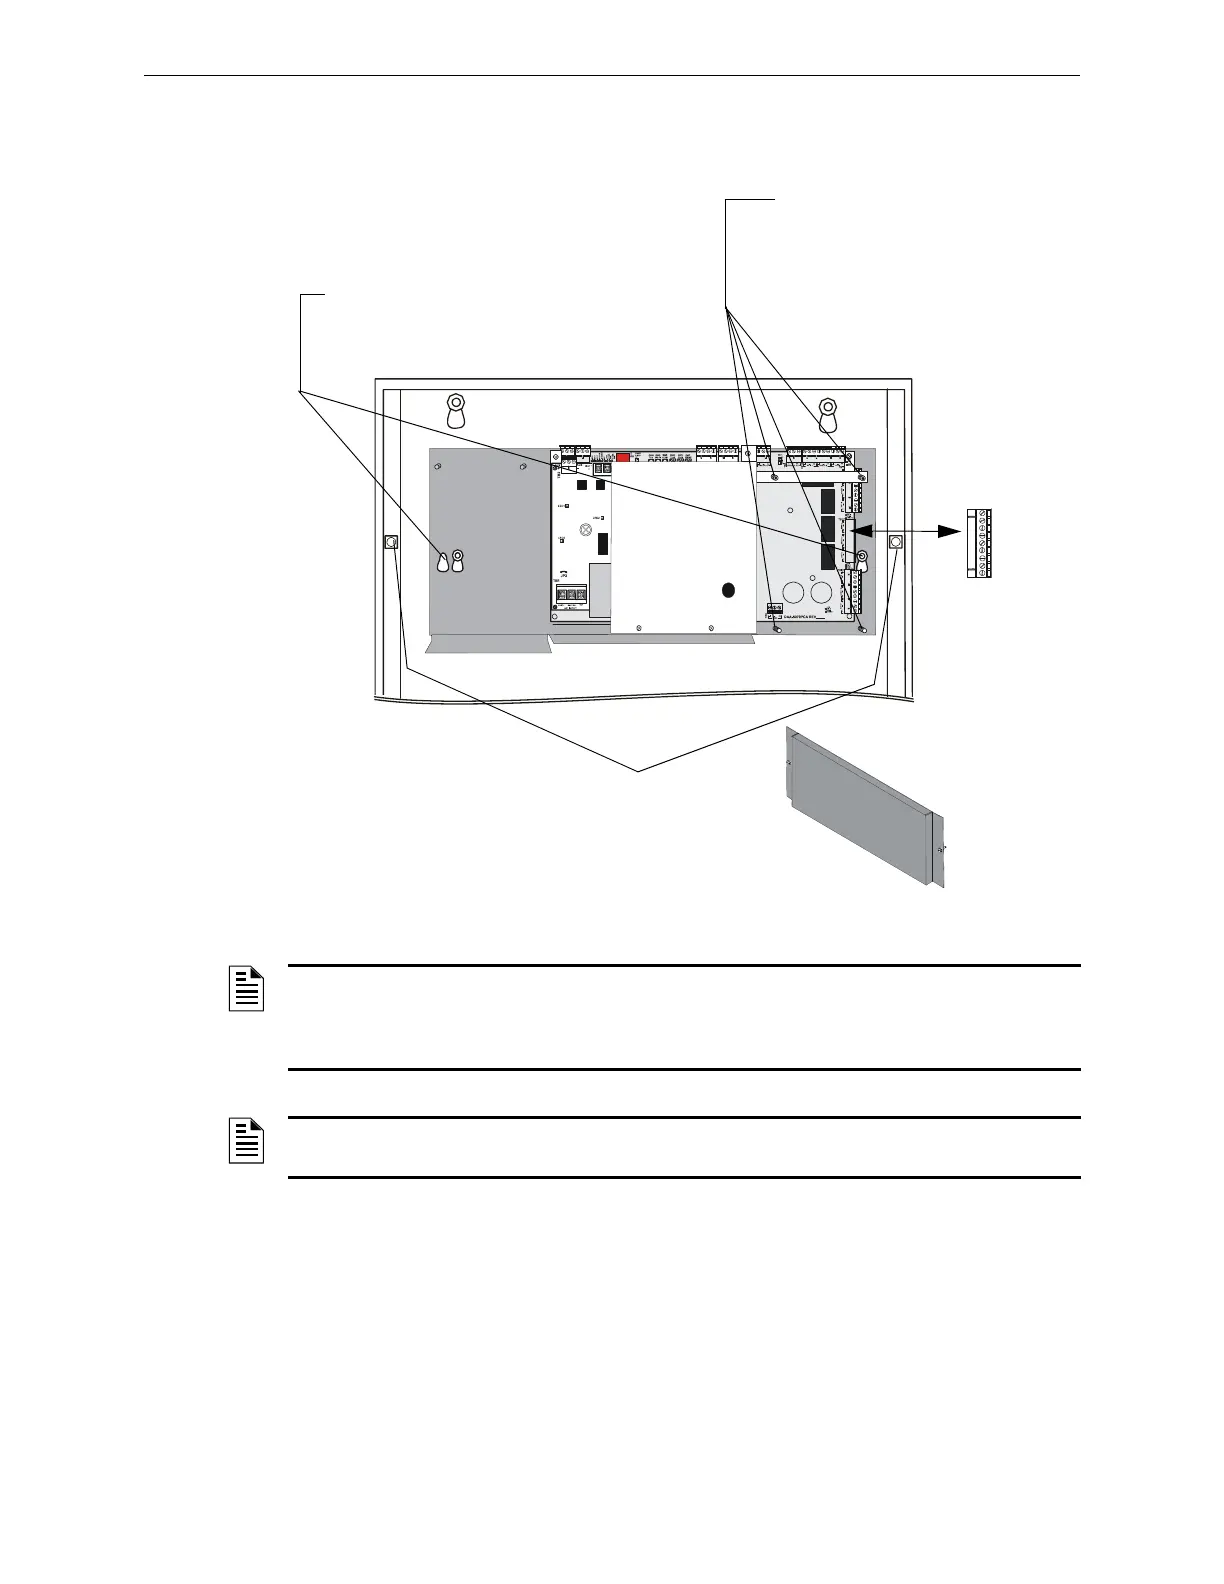
Figure C.7 illustrates a typical DAA installation. A DP-1B dress panel, ordered separately, can be
used to cover the row.
Figure C.7 DAA Cabinet Installation.
EQCAB Series Cabinets
The EQCAB cabinets come in CAB-4 B, C, and D sizes. The row spacing is different, allowing DAA
amplifiers as well as other digital audio devices and power supplies to be mounted in any row, and the
doors are equipped with ventilated panels for heat dissipation. The cabinets were designed so that all
DAA boards manufactured after the DAA PCA (e.g., the DAAPCB), can be used in any or all cabinet
rows. DAAPCA boards may be mounted in these cabinets if a row is skipped between each one. Refer to
Figure C.2 on page 94 for how to determine board type. Batteries other than the 12 AH batteries in the
DAA chassis must be accommodated in separate cabinets or battery backboxes.
The following models are available:
1. If necessary, cut right backbox stud as
indicated in Figure C.6.
2. Remove the TB12 connector from the DAA to
allow access to the chassis standoffs.
3. Place the DAA chassis over the chassis
standoffs at the locations indicated. Secure
with two 10/32 nuts.
4. Replace the TB12 connector for wiring.
DAAcnctrremovd.wmf
DAAmtgCAB4a.eps
TB12
connector
Using the hardware that
comes with the DP-1B
dress panel, attach it at the
points indicated.
DP-1B
DP-1B.wmf
Optional NCM-W/F Mounting:
An NCM module may be installed on the
DAA.
1. Fasten two 2 3/4” aluminum 4-40
male/female standoffs ( P/N 42163,
included with the DAA) at the bottom of
the chassis.
2. Position the NCM over the 4 fastening
points and secure with four 4-40 screws (
P/N 38134, included with the NCM).
NOTE: Digital amplifiers can produce significant heat during their duty cycles. Different cabinets
can handle different amounts of heat. Refer to the Heat Dissipation Calculation document (53645)
to determine dissipation figures for the equipment you are installing, and match it with an
appropriate cabinet.
NOTE: Fiber versions of the DAA must be installed in the top row of a CAB-4 Series cabinet, or
below an empty row, to allow installation of the fiber cable.
 Loading...