24
En
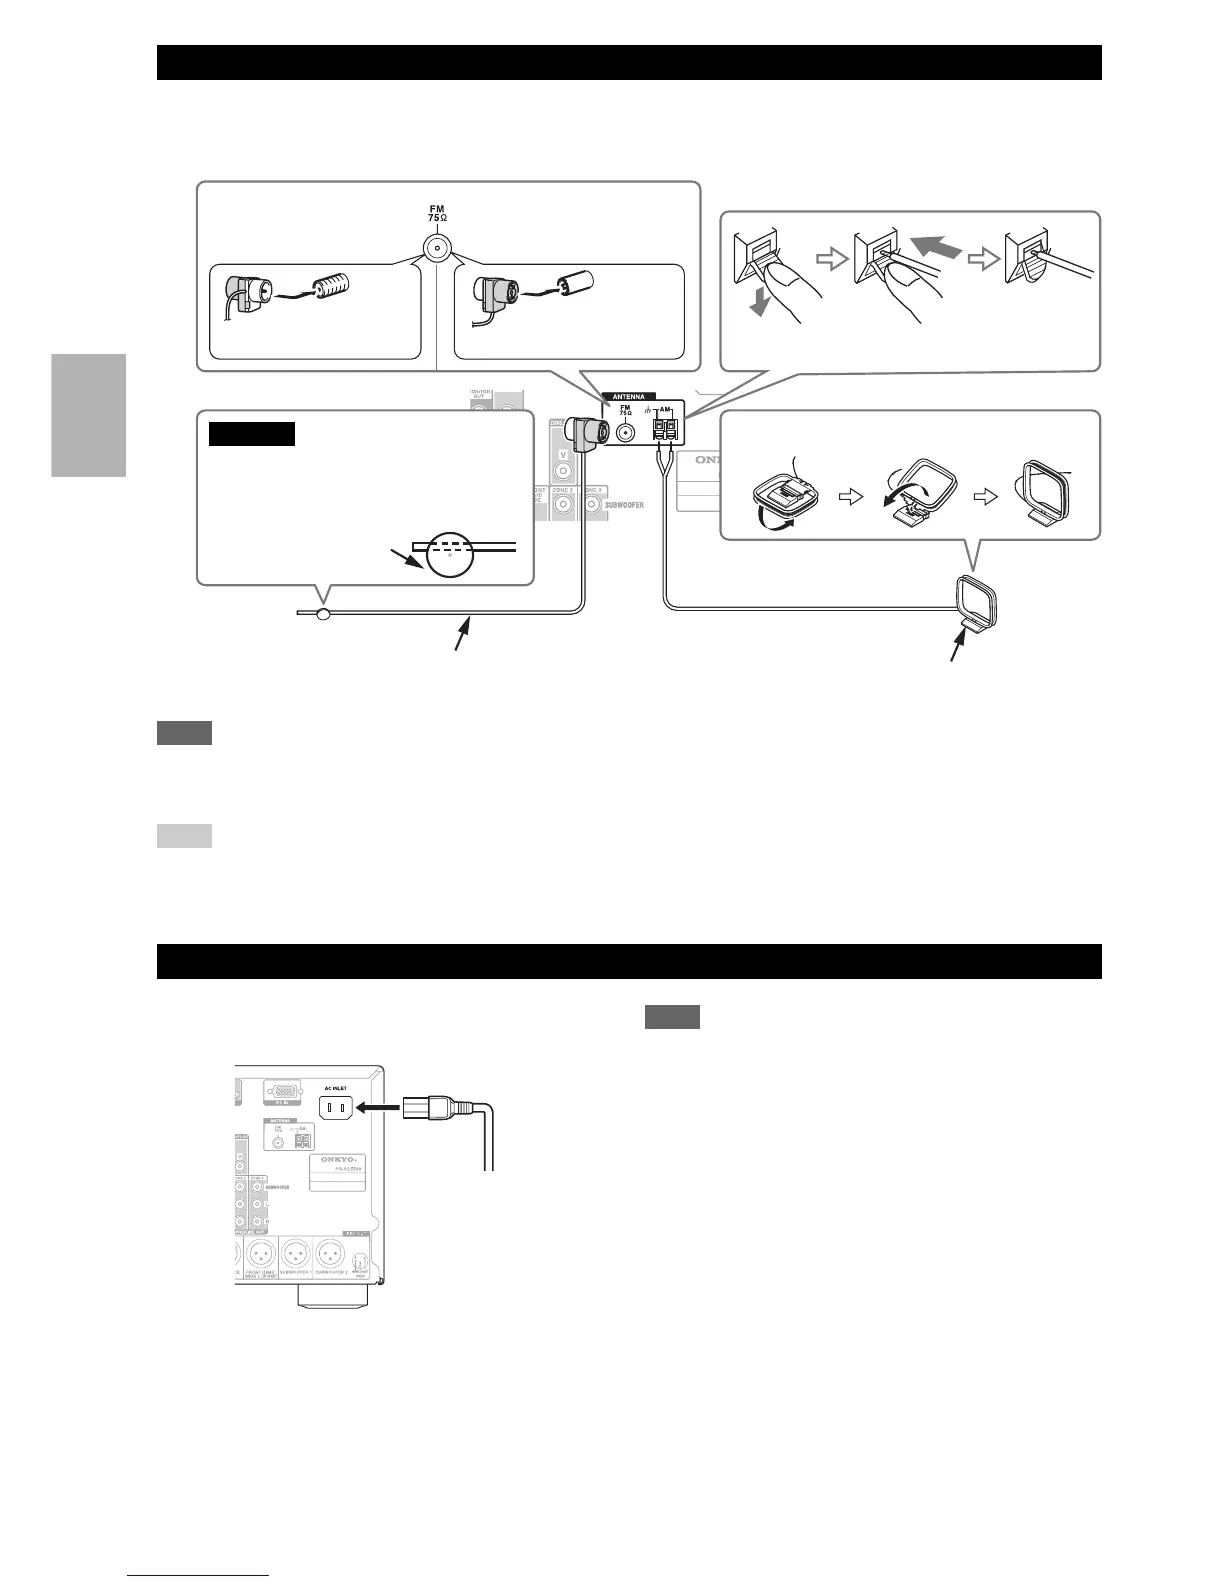
This section explains how to connect the supplied indoor FM antenna and AM loop antenna.
The AV controller won’t pick up any radio signals without any antenna connected, so you must connect the antenna to
use the tuner.
Note
• Once your AV controller is ready for use, you’ll need to tune into a radio station and position the antenna to achieve the best possible
reception.
• Keep the AM loop antenna as far away as possible from your AV controller, TV, speaker cables, and power cords.
Tip
• If you cannot achieve good reception with the supplied indoor FM antenna, try a commercially available outdoor FM antenna instead.
• If you cannot achieve good reception with the supplied indoor AM loop antenna, try using it with a commercially available outdoor
AM antenna.
Note
• Before connecting the power cord, connect all of your
speakers and AV components.
• Turning on the AV controller may cause a momentary power
surge that might interfere with other electrical equipment on the
same circuit. If this is a problem, plug the AV controller into a
different branch circuit.
• Do not use a power cord other than the one supplied with the AV
controller. The supplied power cord is designed exclusively for
use with the AV controller and should not be used with any other
equipment.
• Never disconnect the power cord from the AV controller while
the other end is still plugged into a wall outlet. Doing so may
cause an electric shock. Always disconnect the power cord from
the wall outlet first, and then the AV controller.
Connecting the Antennas
Connecting the Power Cord
Insert the plug fully
into the jack.
Insert the plug fully
into the jack.
Push. Insert wire. Release.
Assembling the AM loop antenna
Indoor FM antenna (supplied)
AM loop antenna (supplied)
North American models European and Asian
models
Caution
• Be careful not to injure yourself
when using thumbtacks.
Thumbtacks, etc.
1
Connect the supplied power cord to the AV
controller’s AC INLET.
2
Plug the power cord into an AC wall outlet.
To AC wall outlet
 Loading...