7.40
FINAL DRIVE
CV Joint / Boot Replacement
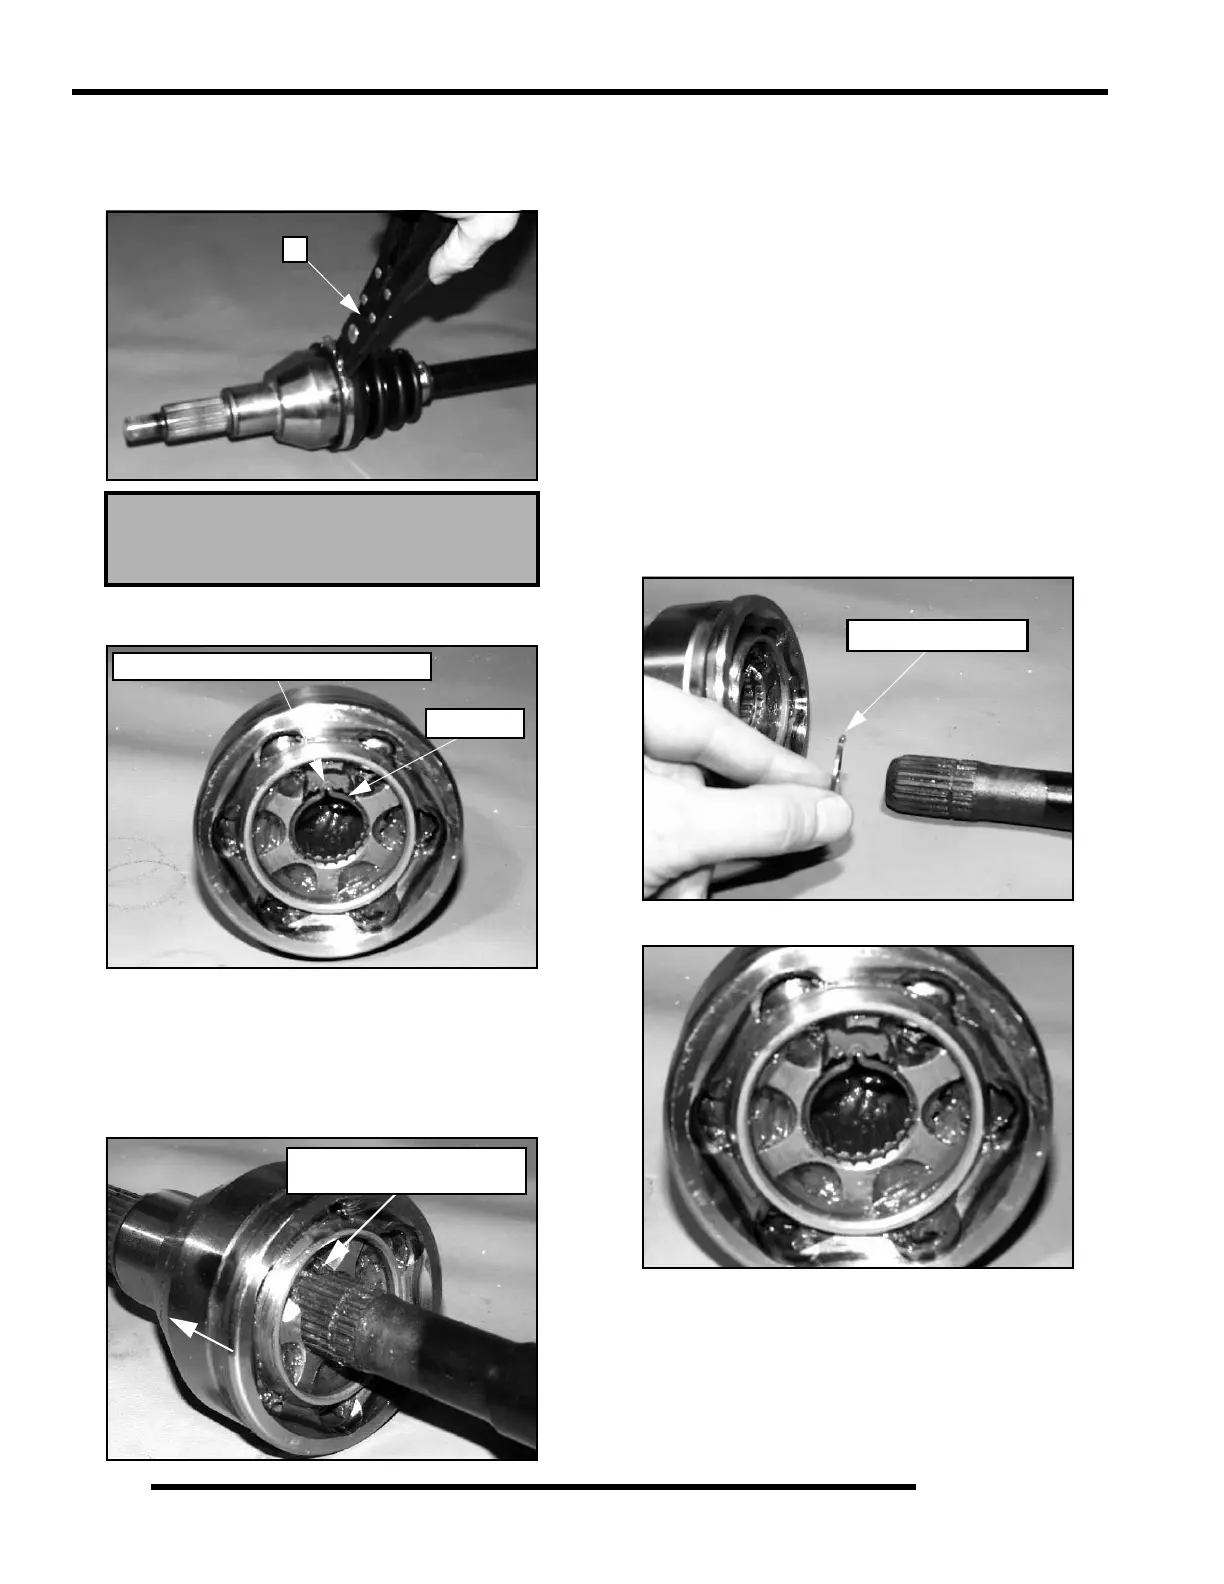
1. Remove clamps from rubber boot(s) using the CV Boot
Clamp Pliers (PN 8700226) (A).
2. Remove the large end of the boot from the CV joint and
slide the boot back.
NOTE: Photo above is shown without shaft for
clarity. Wipe grease away from recess in CV joint
inner hub to locate snap ring
3. Open the snap ring using a snap ring pliers or small needle
nose pliers. Tap CV housing off shaft with a soft faced
hammer while holding snap ring open.
NOTE: When replacing a damaged boot, check the
grease for contamination by rubbing it between two
fingers. A gritty feeling indicates contamination. If
the grease is not contaminated, the boot can be
replaced without cleaning the CV joint. Use the
recommended amount of grease for boot
replacement only.
4. Remove boot from the shaft.
5. Thoroughly clean and dry the CV joint and inspect ball
tracks and cages for wear, cracks or other damage.
NOTE: Shiny areas in ball tracks and on the cage
spheres are normal. Do not replace CV joints
because parts have polished surfaces. Replace CV
joint only if components are cracked, broken, worn
or otherwise unserviceable.
6. Place a new snap ring in the groove of the CV joint inner
hub, with tabs facing the shaft as shown.
7. Before you assemble the CV joint, slide the new boot (small
end first) and clamp over the splined shaft.
CV Boot Clamp Pliers:
Earless Type - 8700226
A
Snap ring
Snap ring located in recessed area
Spread ends of snap ring
to remove joint from shaft
Tabs face the shaft
 Loading...