10.18
ELECTRICAL
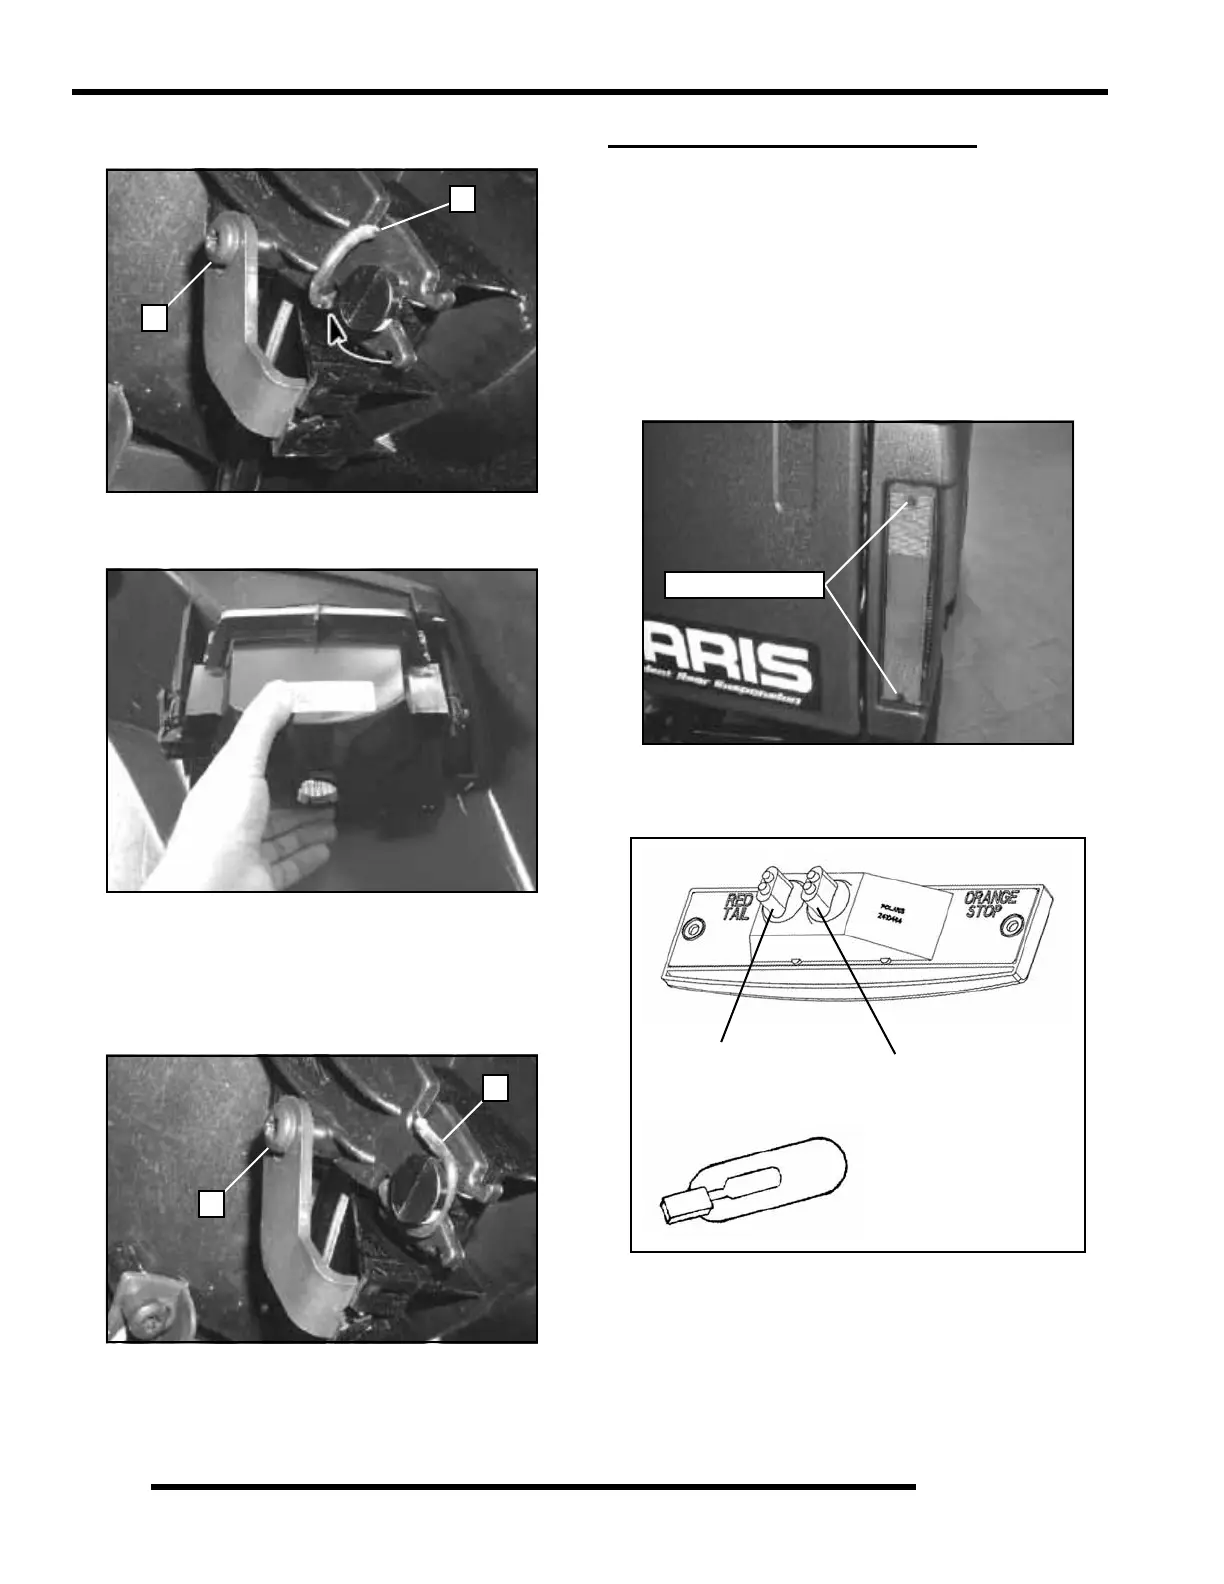
3. Remove the O-ring (A) from the headlamp brackets (both
sides)
4. After the O-rings are removed from the headlamp, Remove
the adjustment screw (B) and pull the headlamp from the
brackets.
Headlamp Housing Installation
1. To install the headlamp housing, press the headlamp tabs
back into the brackets.
2. Secure the headlamp housing with the rubber O-rings on
each side (A). Install the adjustment screw (B).
3. Reconnect wire harness or re-insert bulb if previously
removed.
4. Adjust headlights using the “High Beam Headlight
Adjustment” procedure on the previous page.
TAIL LIGHT / BRAKE LIGHT
Lamp Replacement
Before replacing the tail light, use a digital multi-meter to test
the harness to ensure the lamp is receiving 12 volts and that a
ground path is present.
If the tail light / brake light does not work the lamp assembly
may need to be replaced.
1. From the rear of the tail light remove two screws holding
lens cover in place and remove lens cover. (T-20 Torx)
2. Remove lamp by turning the rubber base 1/4 turn and
pulling the bulb out. Replace it with recommended lamp.
Apply Dielectric Grease (PN 2871329).
3. Reinstall the lens cover removed in Step 1.
4. Test the tail light / brake light to see it is working.
A
B
B
A
Tail Light Screws
Tail Light
Brake Light
OG and RD
RD and BN
Replacement Bulbs
PN 4030040

 Loading...