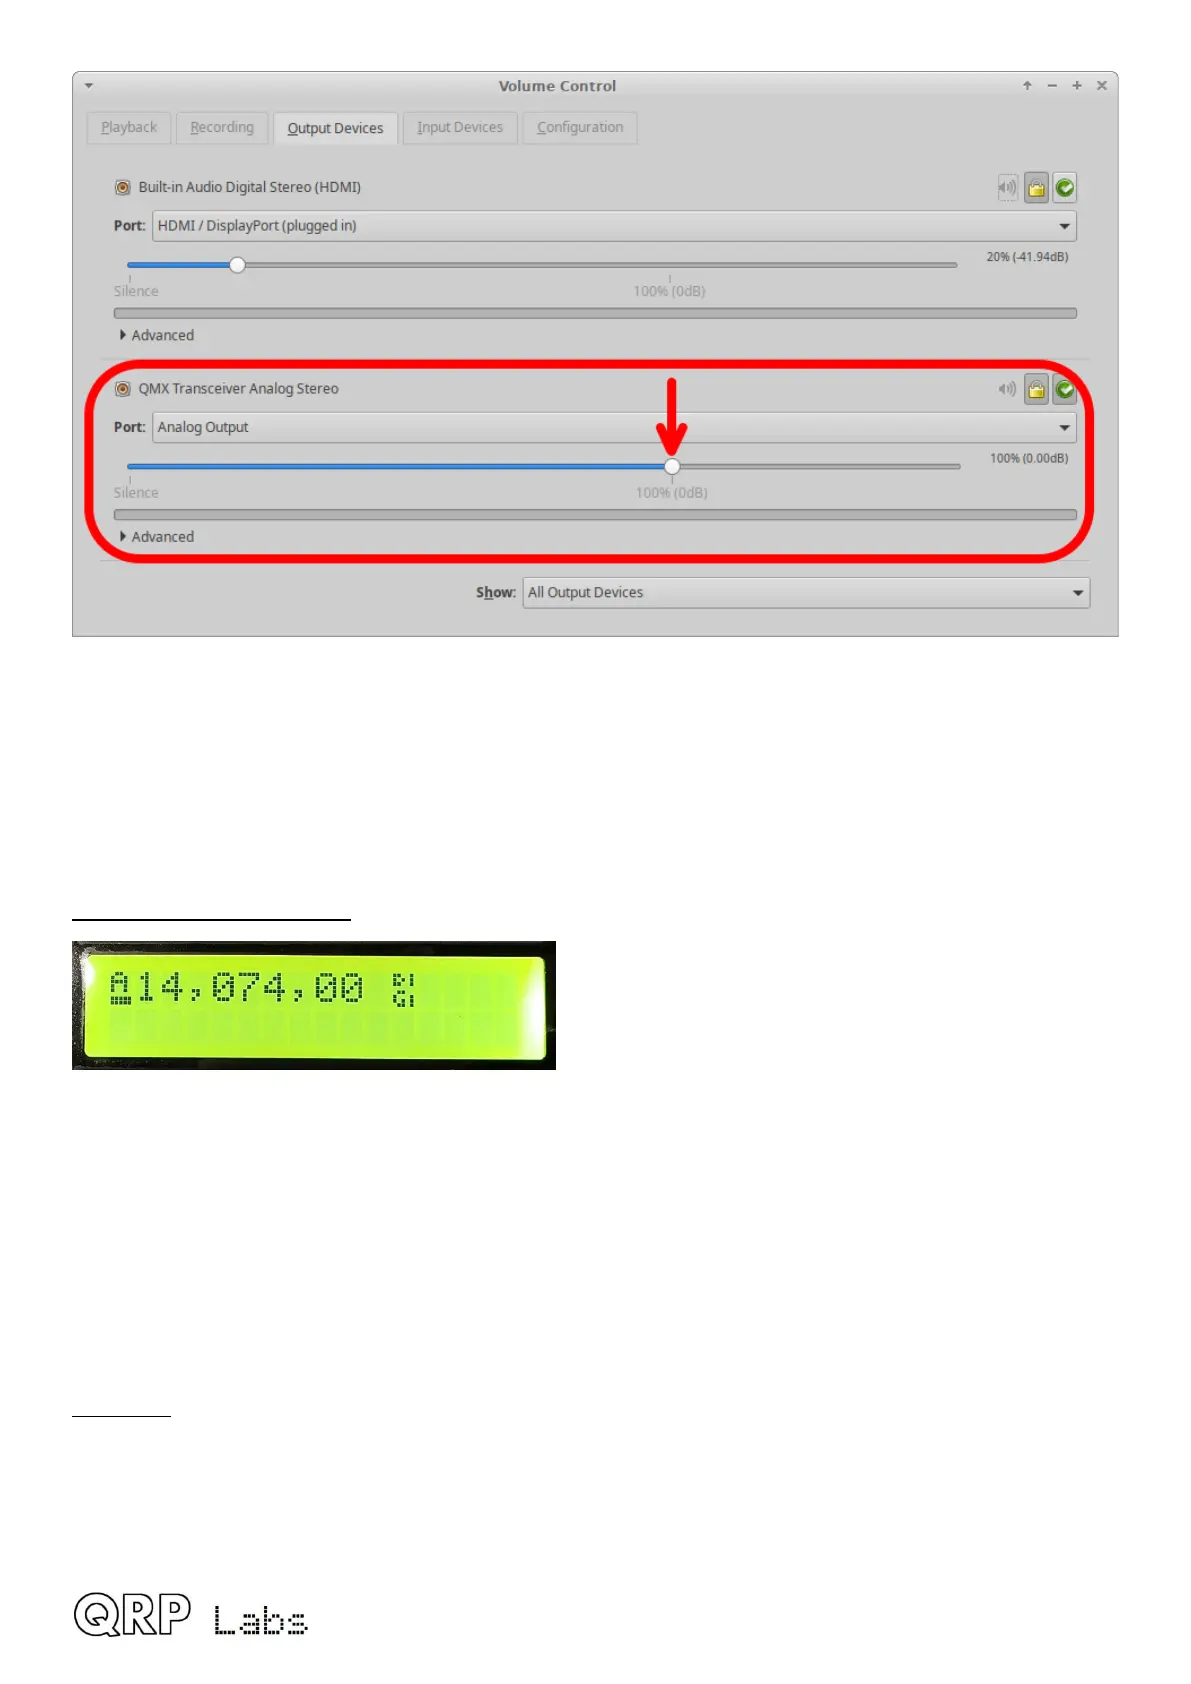
3. The “Master Volume” control of the PC should also be set to 100%. There is such a setting in
both Windows and Linux (and most likely Mac too). In Linux, clicking the loudspeaker icon at
the bottom right of the screen shows which audio device is being used for the default sound
output; selecting QMX will show you the master volume level, and it needs to be set to 100%
(not more, not less). There’s a similar thing on Windows OS.
3. TX status is a solid line:
Everything is fine! TX state, enough audio, and so you should have RF Power output! If you are
STILL not getting power output then this indicates a hardware problem, either with QMX, or with
the connections to your power meter.
QMX transmitter hardware problems are often the result of failure to properly remove the enamel
from the enameled copper wire on the toroids and/or binocular core, resulting in no electrical
connection.
Further troubleshooting is available on the QMX web page http://qrp-labs.com/qmx
Operate!
Once CAT is configured and working, and the QMX sound card is chosen, just operate WSJT-X as
you would normally! You can choose the desired band 80m, 60m, 40m, 30m or 20m from the
WSJT-X screen and WSJT-X will communicate with QMX via CAT, to cause QMX to switch in the
correct filters.
QMX operang manual; rmware 1_00_012 55

 Loading...