Chapter 1: Components
4U56 Drive System
QX and QXS Setup Guide 21
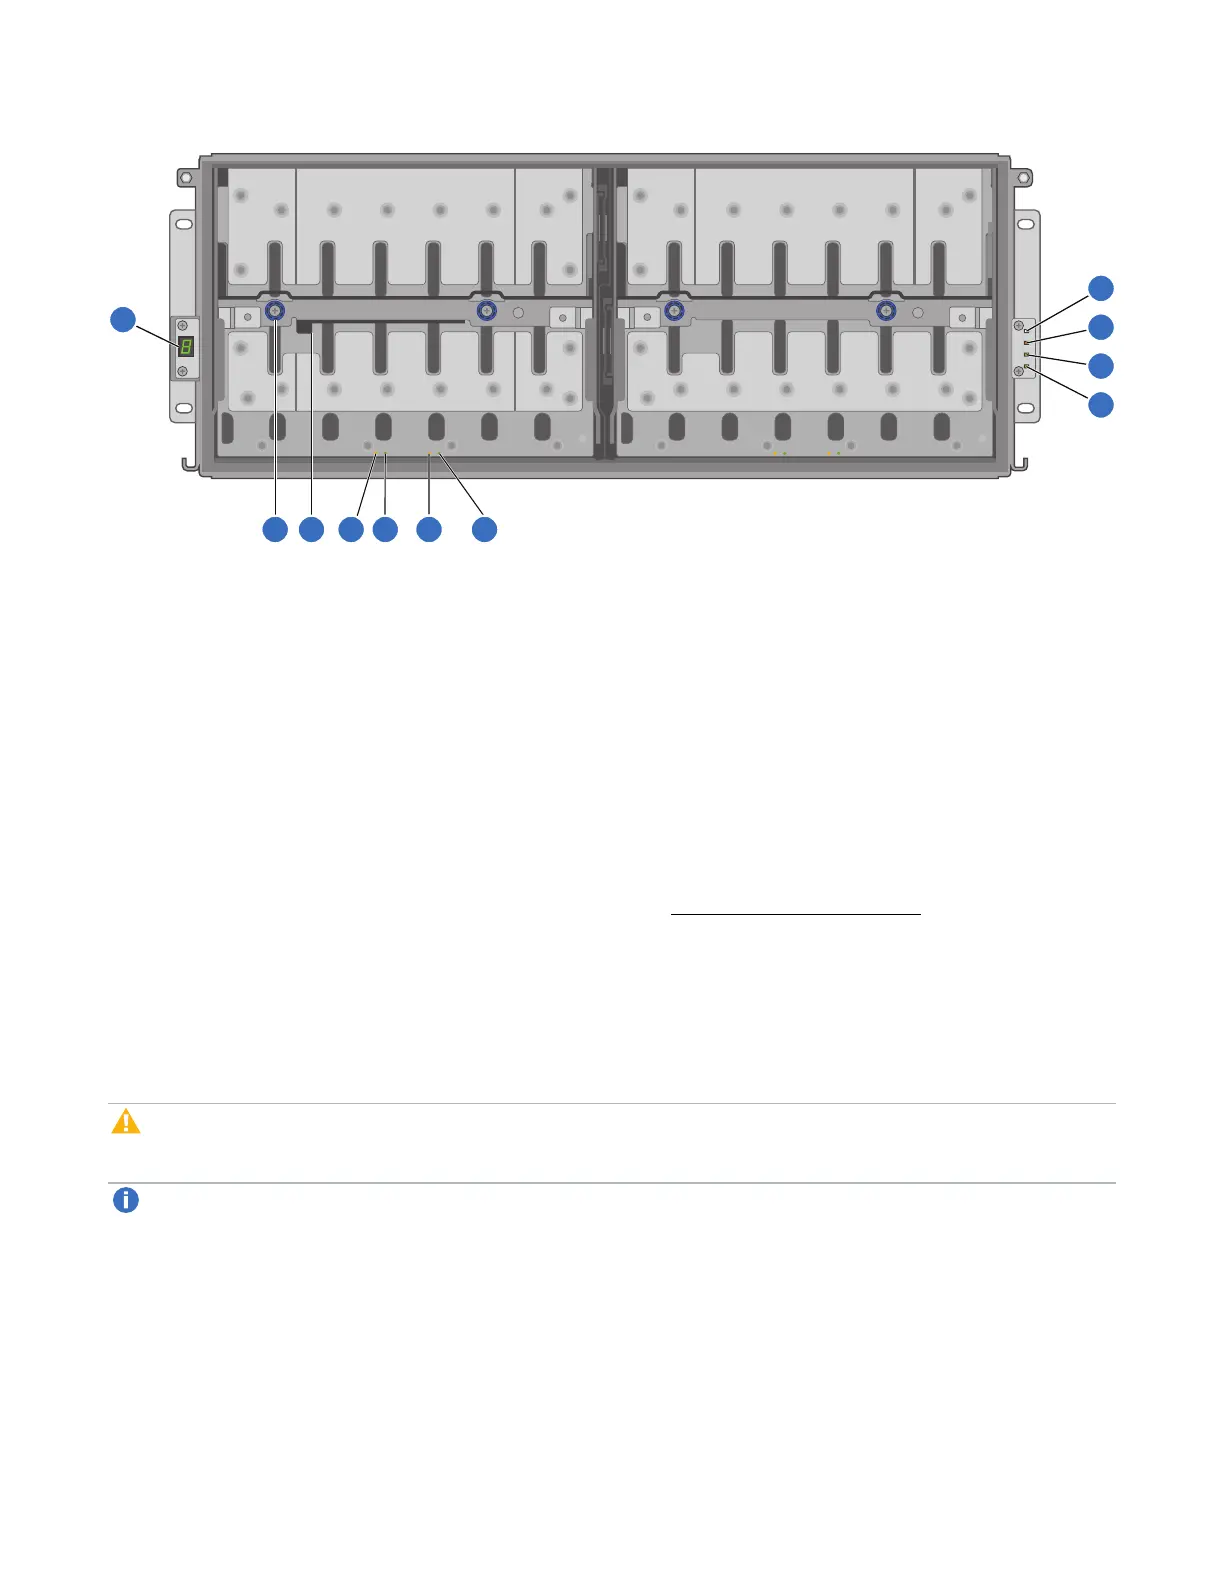
1. ChassisIDLED
2. Thumbscrew(forsecuringoraccessingdrawer)
3. DrawerHandle(showninstowedposition)
4. DrawerStatusLED:UnitLocator
5. DrawerStatusLED:OKtoRemove
6. DrawerStatusLED:Fault/ServiceRequired
7. DrawerStatusLED:FRUOK
8. ChassisStatusLED:UnitLocator
9. ChassisStatusLED:Fault/ServiceRequired
10. ChassisStatusLED:FRUOK
11. ChassisStatusLED:TemperatureFault
4U56 Drive Chassis Drawers
You can open the chassis drawers to access the drives (see Figure 29 on the next page). Drawers 0 and 1
provide access to drives that are oriented vertically, such that the back face of the drive faces down, and is
inserted into the drawer drive slots from above. A single drawer diagram is used to describe the numbering
scheme.
The 4U56 drive chassis is shipped with the drawers installed, but they are not populated with drives. Air
Management Solution (AMS) inserts are not installed within the chassis. Locate the box containing your
sledded drives in preparation for populating the drive slots.
Caution:The 4U56 drive chassis must be populated with a minimum of 14 drives. Populate slots 0-6 in
Drawer 0; and, populate slots 28-34 in Drawer 1.
Note:Drive slot numbering is also provided on the label that is laminated to the sheet metal housing
(side face) on each drawer. Refer to the drawer label when installing drives into the drawer.
 Loading...