40
eRev. [Major Version]1.01.0 8/9/2023
KrosFlo® KR2i Real-Time Process Management (RPM™) System
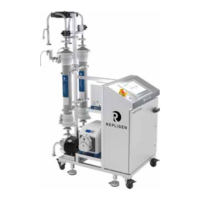
Figure 39. Front of KONDUiT
3. Assemble TFF flowpath and place Cond/Temp and/or UV in-line sensors at the correct position in the flowpath; see sensor
descriptions below for details.
Conductivity Sensor
The sensors can be placed in either the permeate line or the recirculation line when used for the Diafiltration end point control.
Note: Conductivity sensors need to be filled with the initial starting buffer prior to starting the automated sequence. When the
sensor is placed on the permeate line, this buffer should be the same buffer that sample is in. This will eliminate any
potential early shutdown of the auto mode.
If the conductivity setpoint is lower than the starting value, the system will stop the sequence when the lower value is reached.
If the conductivity setpoint is higher than the starting setpoint, the system will stop the sequence at the higher value.
The system will only track in the linear range either positive or negative from the starting conductivity.
UV Sensor
For UV alarms, the sensors are usually placed on the permeate line to detect sample breakthrough.
Note: Fill UV inline sensor with buffer and press the physical "Tare" button on UV box prior to starting the sequence. For UV
Diafiltration control on the permeate line the molecule of interest should be detected in the cell prior to starting the
automated sequence.
Note: Do not place heavy weight on top of UV fiber optic cables; do not fold UV fiber optic cables; fiber optic cables are very
fragile.
4. Connect all sensors to the corresponding ports.
5. After making all connections, wait at least one minute for KONDUiT to establish connection with the TFF System.
• Optional: Launch KrosFlo RPM Data Collection workbook for TFF System.
6. KONDUiT can be placed behind the KR2i system. No physical buttons or interfaces are necessary on the base unit. The UV
photometer has a tare button that needs to be accessible. Cables can be placed in the cable boxes provided with the KR2i
system.
10.4.3 Maintenance
Periodically clean KONDUiT base with damp cloth and/or mild detergent. Do not immerse or use excessive fluid. Inspect connectors
to make sure they are not damaged and they are securely fastened.

 Loading...