INSTALLATION
35
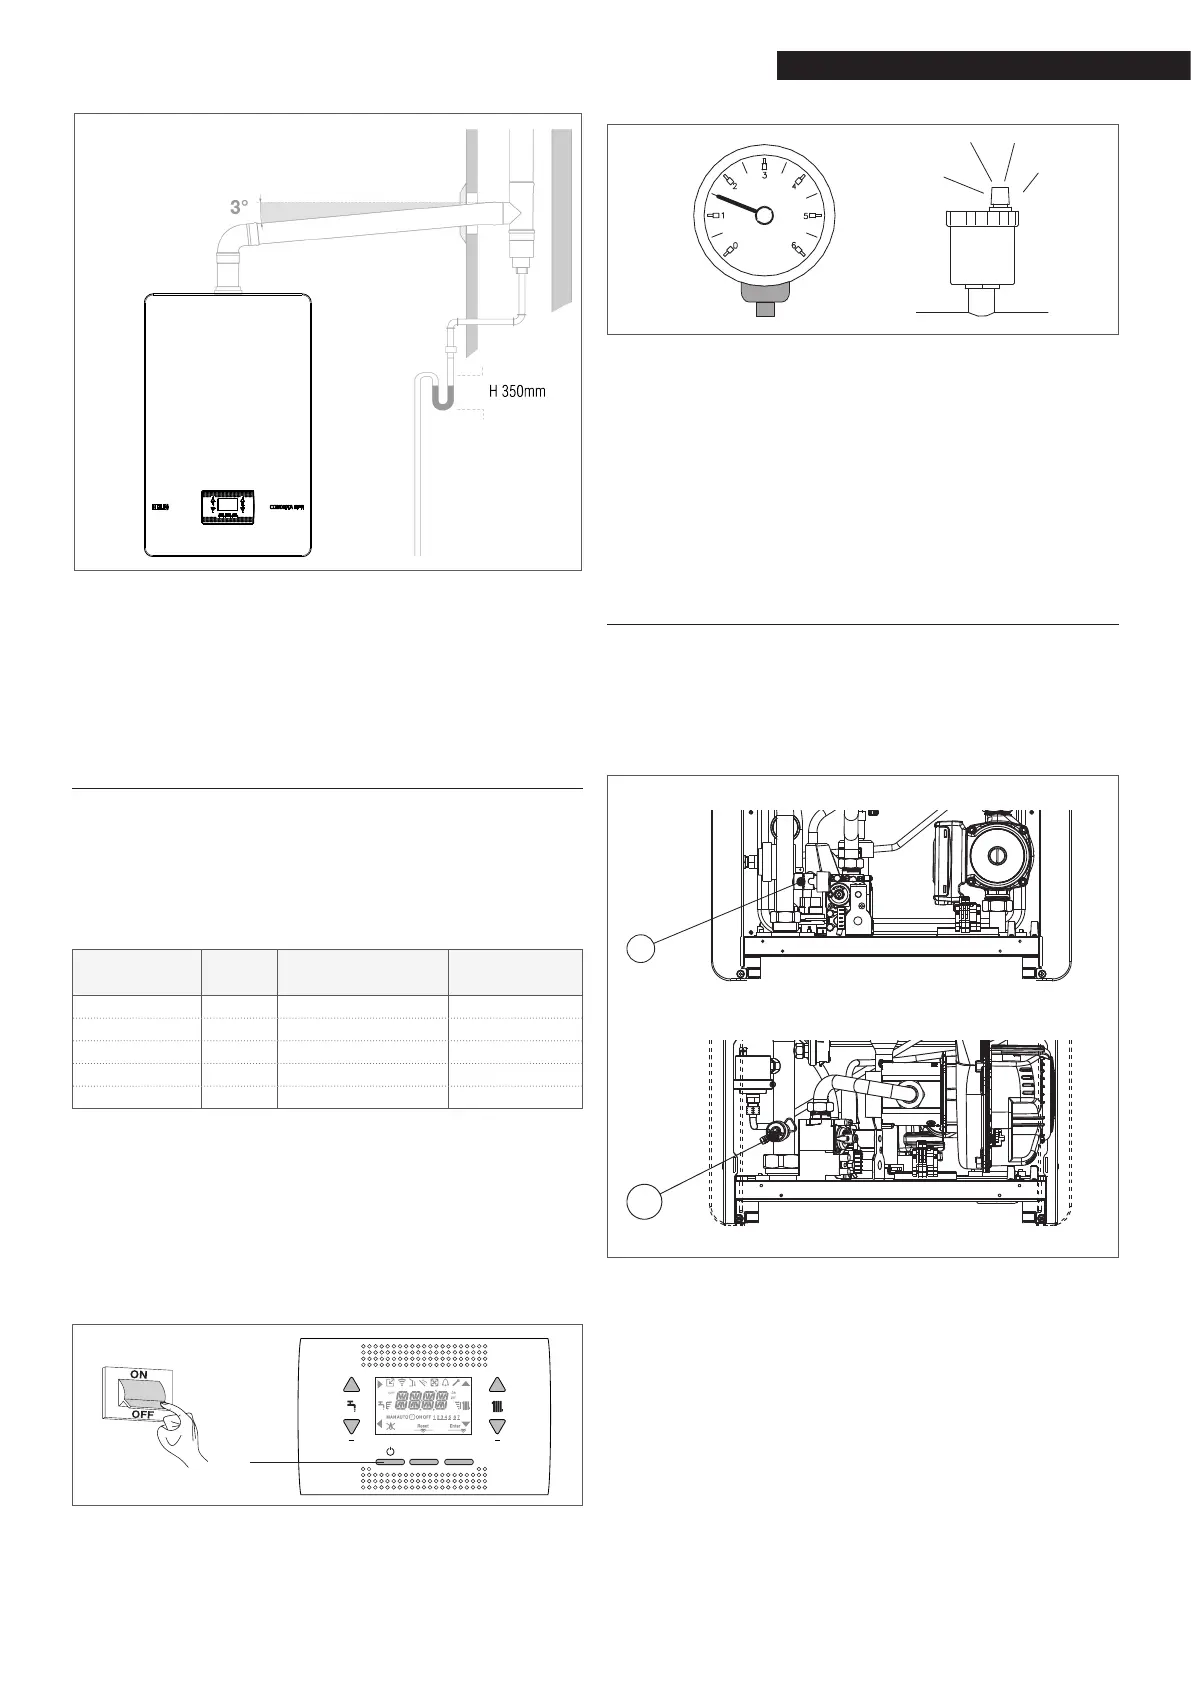
Fig. A
For changes of direction, use a T-tting with inspection
plug which allows easy periodic cleaning of the pipes.
Always ensure that the inspection plugs are hermetically
closed, with the corresponding gasket in good condition,
after cleaning.
2.14 Filling the heating system and
eliminating air
In the case of a new installation or replacement of the boil-
er, it is necessary to clean the heating system beforehand.
To ensure the device works well, after every cleaning inter-
vention remember to top up the additives and/or chemical
treatments (e.g. anti-freeze liquids, lming agents, etc.)
and check the parameters are within the values indicated
in the tables.
PARAMETERS UM
HEATING CIRCUIT
WATER
FILLING
WATER
pH value 7–8 -
Hardness °F - < 15
Appearance - clear
Fe mg/kg <0.5 -
Cu mg/kg <0.1 -
For the
Condexa HPR boiler, there must be a system ll-
ing line, preferably connected to the return line.
Before emptying or lling the system, disconnect the
appliance from the electricity supply. For changes of di-
rection, use a T-shaped tting with an inspection plug
that allows the piping to be easily cleaned periodically.
Always make sure that after cleaning the inspection
plugs are hermetically sealed with the relative gasket.
+ +
RESET
MENU
1
Before lling the system, make sure the air outlet plug
of the venting valve in the boiler is open (loosened)
Use the pressure gauge to check the pressure reaches
the value envisaged for the system (1.5-2.0 bar)
R
econnecting the electricity supply; the boiler will run
the automatic venting cycle
NOTA: every time the boiler is electrically powered, the auto-
matic venting cycle is run (it lasts 6 min).
NOTE: if there is a water alarm (E040, E041 or E042), the venting
cycle cannot be carried out.
If the system pressure is lower than 1 bar following the
venting cycle, ll the system again.
2.15
Emptying the heating system
Before draining, set the boiler to OFF and shut off the electrical
supply setting the main system switch to OFF.
Close the heating system taps (if present).
Connect a pipe to the system degassing/discharge tap (C),
then manually loosen the valve to let the water ow out.
After completing the operations, remove the pipe from the
system degassing/discharge tap (C) and close the valve.
C
C
 Loading...