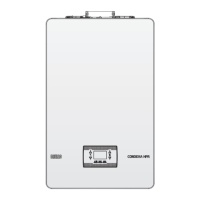
MAINTENANCE AND CLEANING
47
4 MAINTENANCE AND CLEANING
Regular maintenance is an obligation required by the
law and is essential to the safety, efciency and dura-
tion of the boiler.
Schedule maintenance in time
It allows for the reduction of consumption, polluting
emissions and keeping the product reliable over time.
Before beginning the maintenance tasks:
Turn off the fuel and water taps of the heating and
domestic hot water system.
To ensure product characteristics and efciency remain
intact and to comply with prescriptions of current reg-
ulations, it is necessary to render the appliance to sys-
tematic checks at regular intervals. When carrying out
maintenance work, respect the instructions given in the
“1 WARNINGS AND SAFETY”
chapter.
This normally means the following tasks:
removing an
y oxidation from the burner;
removing any scale from the heat exchangers;
checking electrodes;
checking and cleaning the drainage pipes;
checking the external appearance of the boiler;
checking the ignition, switch-off and operation of the
appliance, in both domestic water mode and heating
mode;
checking the seal on the couplings, gas and water and
condensate connecting pipes;
checking the gas consumption at maximum and min-
imum output;
checking the position of the ignition electrode;
checking the position of the detector electrode (see
specic paragraph);
checking the gas failure safety device.
9
The use of protective clothing is recommended dur-
ing the installation of the boiler, to avoid any risk
of personal injury.
9
After carrying out the necessary maintenance op-
erations, a ue gas analysis must be run to guarantee
correct operation.
9
If, after replacing the electronic board or carrying
out maintenance on the detection electrode or
burner, the ue gas analysis returns values outside
the tolerance range, it may be necessary to modify
them as explained in paragraph
“3.15 Combustion
check”.
NOTA: If the electrode is replace, there might be slight
variations in the combustion parameters that re-
turn within the nominal value range after a few
hours of operation.
9
Do not clean the appliance or its parts with inam-
mable substances (e.g. petrol, alcohol, etc.) .
9
Do not clean panels, painted parts and plastic parts
with paint thinner .
9
Panel cleaning must be carried out only with soapy
water .
Cleaning the primary heat ex
changer
Disconnect the electricity supply by turning the main
system switch to OFF.
Close the gas shut-off valve.
Remove the casing as explained in paragraph “2.10 Re-
moving the casing”.
Disconnect the connecting cables of the electrodes.
Disconnect the power cables of the fan.
Take out the clip (A) of the mixer.
Loosen the nut of the gas train (B).
Take out and rot
ate the gas train.
Remove the 4 nuts (C) that x the combustion unit.
Take out the air/gas conveyor assembly including the
fan and mixer, being careful not to damage the insu-
lating panel and the electrodes.
Remove the siphon connecting pipe from the conden-
sate drain tting of the heat exchanger and connect a
temporary collecting pipe. At this point proceed with
the heat exchanger cleaning operations.
Vacuum out any dirt residue inside the heat exchang-
er, taking care NOT to damage the retarder insulating
panel.
Clean the coils of the heat exchanger with a soft bris-
tled brush.
9
DO NOT USE METAL BRUSHES THAT COULD DAMAGE THE
COMPONENTS
Clean the spaces between the coils using a blade (0.4
mm thick), also available in a kit.
Vacuum away any residue produced by the cleaning
intervention.
Rinse with water, taking care NOT to damage the re-
tarder insulating panel.
Make sure the retarder insulation panel is undamaged
and replace it if necessary following the relative proce-
dure.
After completing the cleaning operations, carefully reas-
semble the components, following the above instruc-
tions in reverse order.
To close the xing nuts of the air/gas conveyor assem-
bly, use a tightening torque of 8 Nm.
Turn the power and gas feeding to the boiler back on.
9
If there are stubborn fuel gas deposits on the heat
exchanger surface, remove them by spraying with
natural white vinegar, taking care NOT to damage
the retarder insulating panel.
Leave it to work for a few minutes.
Clean the coils of the heat exchanger with a soft
bristled brush.
9
DO NOT USE METAL BRUSHES THAT COULD DAMAGE THE
COMPONENTS
Rinse with water, taking care NOT to damage the
retarder insulating panel.
Turn the power and gas feeding to the boiler back on.
Cleaning the burner
Switch off the electricity supply by turning the main
system switch OFF.
Close the gas shut-off valve.
Remove the casing as explained in paragraph “2.10
Removing the casing”.
Disconnect the connecting cables of the electrodes.
Disconnect the power cables of the fan.
Take out the clip (A) of the mixer.
Loosen the nut of the gas train (B).
Take out and rotate the gas train.
Remove the 4 nuts (C) that hold the combustion unit.
Take out the air/gas conveyor assembly including the
fan and mixer, being careful not to damage the ce-
ramic panel and the electrodes. At this point proceed
with the burner cleaning operations.
Clean the burner with a soft bristled brush, taking
care not to damage the insulating panel and the elec-
trodes.
9
DO NOT USE METAL BRUSHES THAT COULD DAMAGE THE
COMPONENTS
Check that the burner insulating panel and the seal-
ing gasket are undamaged and replace them if neces-
sary, following the relative procedure.
After completing the cleaning operations, carefully
reassemble the components, following the above in-
structions in reverse order.
To close the xing nuts of the air/gas conveyor assem-
bly, use a tightening torque of 8 Nm.
Turn the power and gas feeding to the boiler back on.
 Loading...