Chapter 5 Disassemble and Assemble RIGOL
DS1000B Sevice Guide
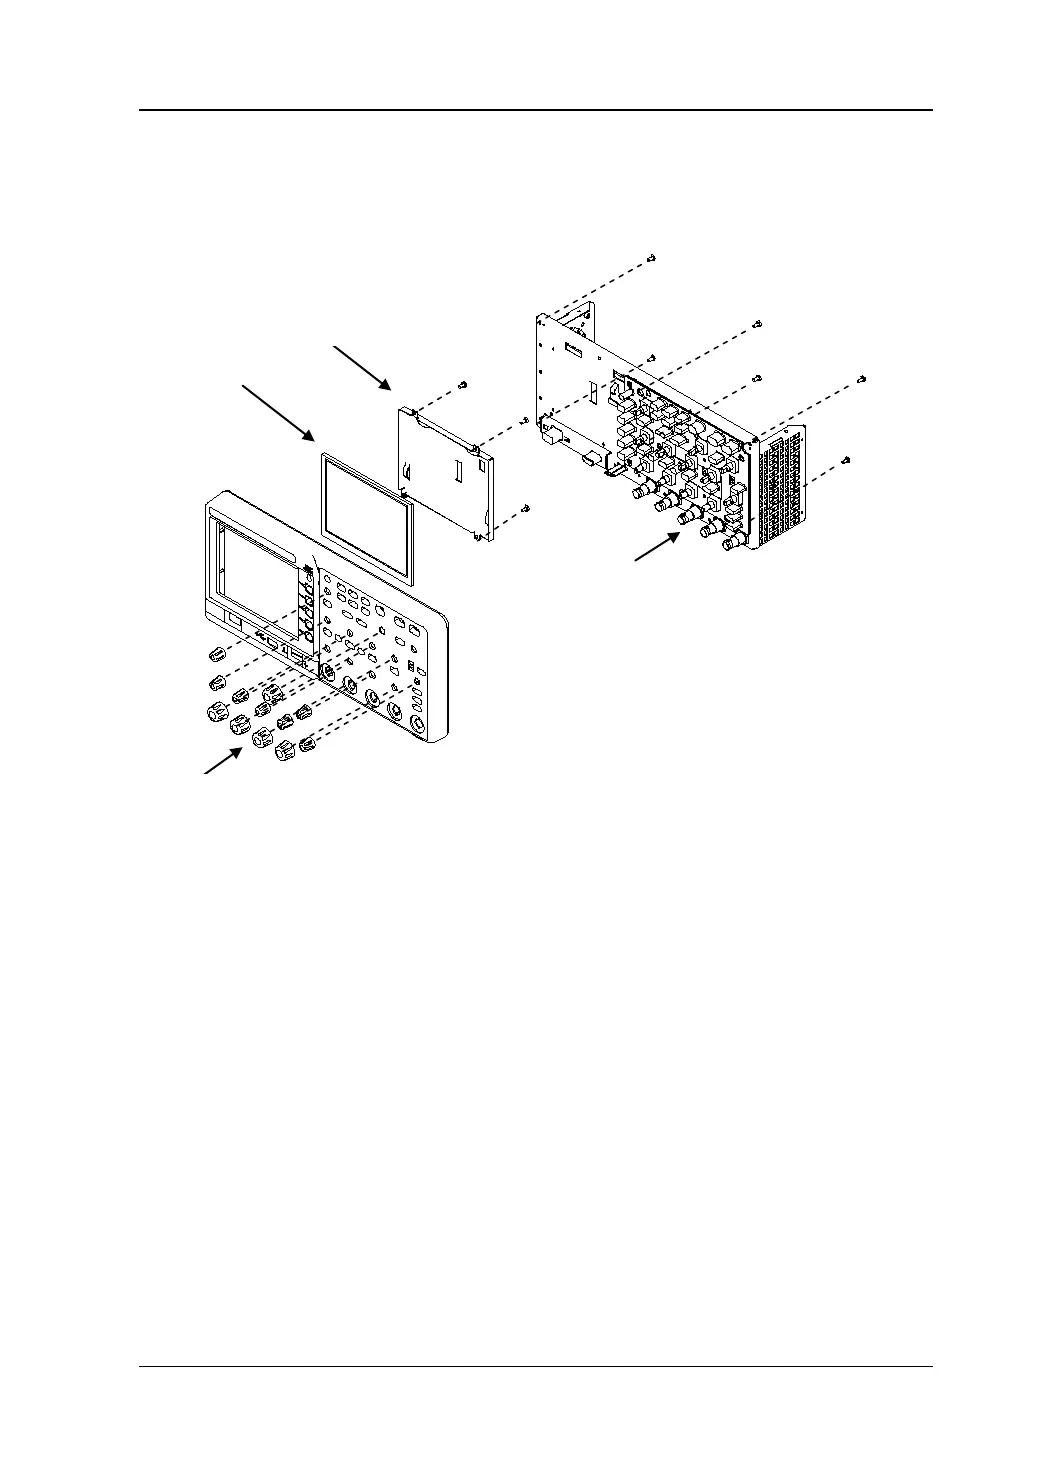
To Disassemble and Assemble the Panel and LCD
Figure 5-6 To Disassemble and Assemble the Panel and LCD
Part Explanations:
⑨ 7 small knobs
⑩ 5 large knobs
⑪ 6 screws (M3*8 pan head torx cutting self-
tapping screw) fixing the chassis and
front panel.
⑫ 4 screws (M3*8 pan head torx cutting self-
tapping screw) fixing the LCD fixing
frame and LCD (the positions of the screws are not marked out in the figure above
and please remove them according to their actual positions).
Disassemble steps:
1. Remove the LCD screen wire from the main board.
2. Remove the 7 small knobs (⑨) and 5 large knobs (⑩) (note: do not use hard
article to avoid damaging the panel).
3. Remove the 6 screws (⑪) using the screwdriver (T10). Then, remove the chassis.
4. Remove the 4 screws (⑫) using the screwdriver (T10). Then, remove the LCD
gently (pay attention to LCD screen wire and ground wire).
 Loading...