Publication 2098-IN005C-EN-P — March 2008
80 Commissioning Your Ultra3000 Drive
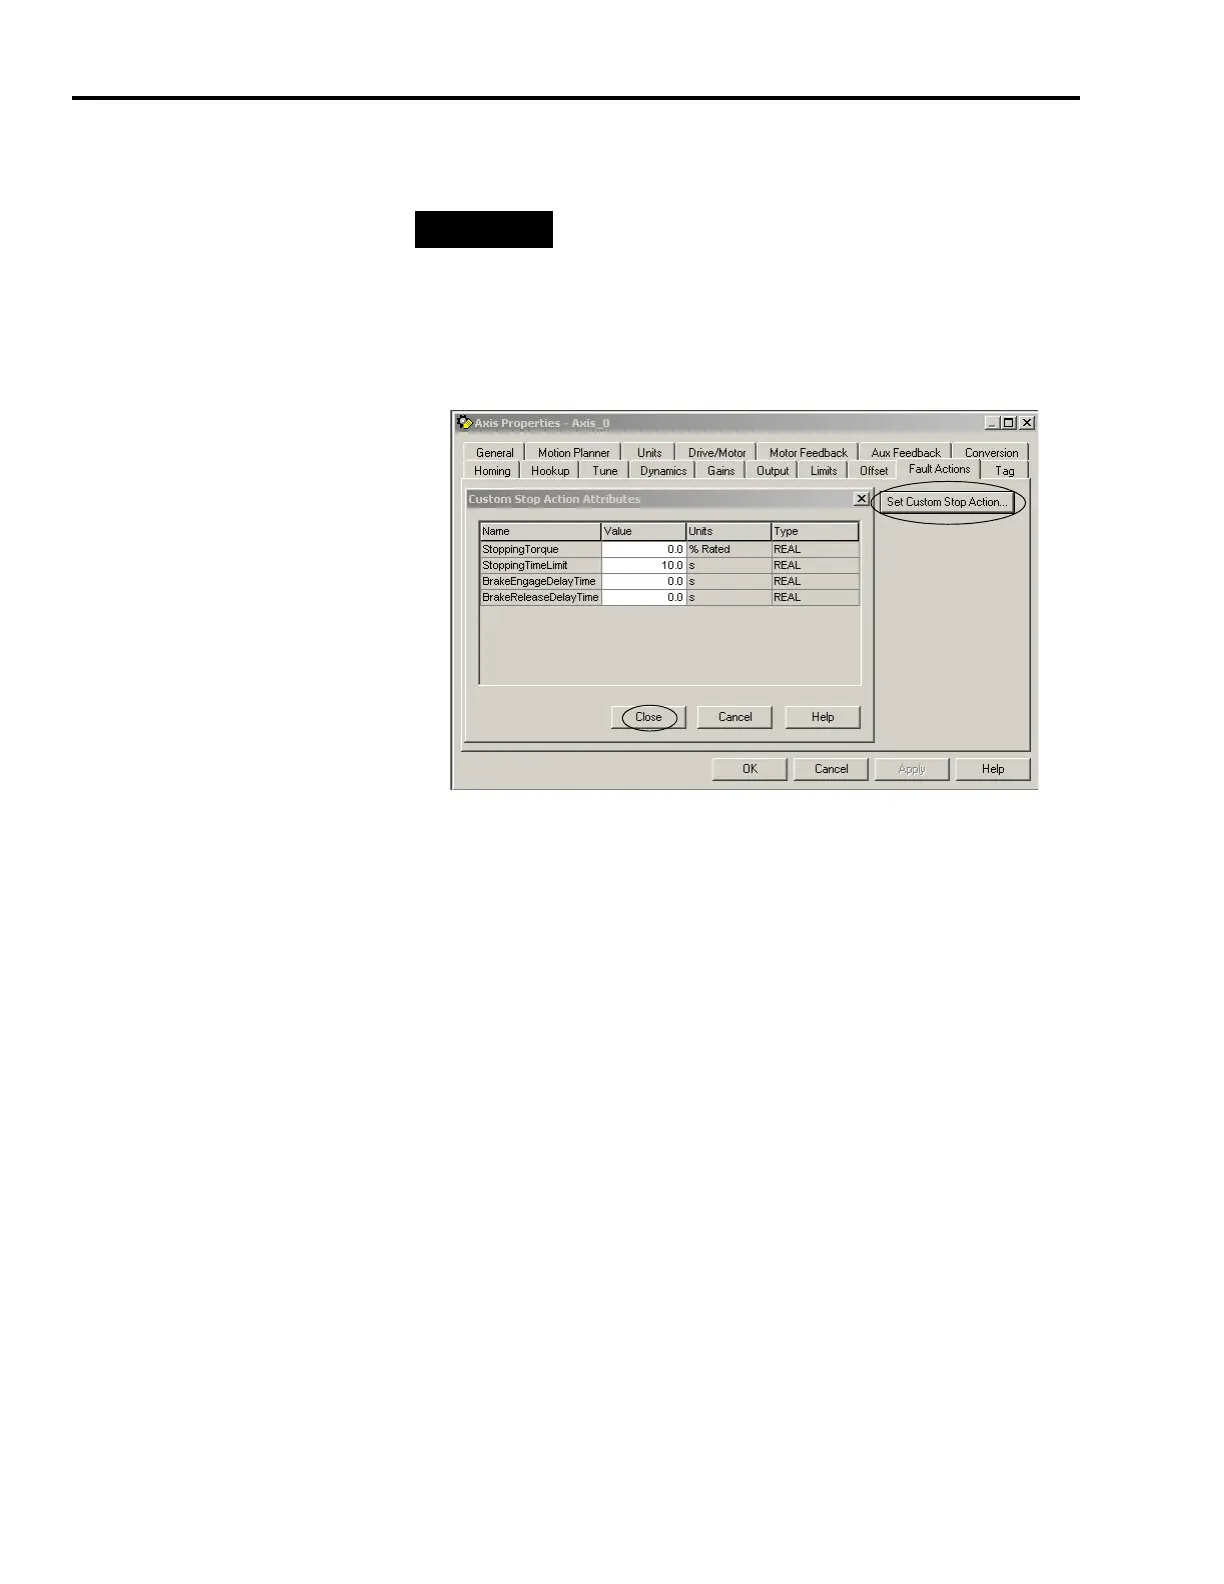
6. Click the Fault Actions tab.
7. Click the Set Custom Stop Action.
The Custom Stop Action Attributes dialog opens.
8. Set the appropriate values.
a. Set the Brake Engage Delay Time.
Use this setting to hold motor torque on load until the delay
time has expired (brake is engaged).
b. Set the Brake Release Delay Time.
Use this setting to make sure no motor movement occurs until
the delay time has expired (brake is released).
c. Click Close.
9. Click OK.
10. Verify your Logix program and save the file.
Download Your Program
After completing the Logix configuration you must download your
program to the Logix processor.
For more information on setting fault limits, refer to
Appendix C, Minimizing the Effects of Feedback Signal Loss on
page 141.
 Loading...