14
User Program Edit Parameters
7. Enhancer
35. EH
0
Delay
63. Band Step Flg
8. Auto Wah
36. Chorus
0
DLY
64. VS Overdrive
9. Rotary
37. Flanger
0
DLY
65. VS Distortion
10. Compressor
38. CHO
0
Flanger
66. GT Amp Simul
11. Limiter 39. CHO/DLY 67. Gate
12. Hexa-Chorus 40. Flanger/DLY 68. Long Delay
13. Trem Chorus 41. CHO/Flanger 69. Serial Delay
14. Space-D 42. Isolator 70. MLT Tap DLY
15. St. Chorus 43. Low Boost 71. Reverse DLY
16. St. Flanger 44. Super Filter 72. Shue DLY
17. Step Flanger 45. Step Filter 73. 3D Delay
18. St. Delay 46. Humanizer 74. Long Time DLY
19. Mod. Delay 47. Speaker Sim 75. Tape Echo
20. 3 Tap Delay 48. Step Phaser 76. LoFi Noise
21. 4 Tap Delay 49. MLT Phaser 77. LoFi Comp
22. Time Delay 50. Inf Phaser 78. LoFi Radio
23. 2 Pitch Shifter 51. Ring Modul 79. Telephone
24. FBK Pitch 52. Step Ring 80. Phonograph
25. Reverb 53. Tremolo 81. Step Pitch
26. Gate Reverb 54. Auto Pan 82. Sympa Reso
27. OD
0
Chorus
55. Step Pan 83. Vib-Od-Rotary
28. OD
0
Flanger
56. Slicer 84. Center Canc
Mfx Edit
The rst two parameters for each Mfx type are “Chorus Send”
(0–127) and “Reverb Send” (0–127). They allow you to specify
whether—and to what extent—the Mfx signal should be processed
by the Chorus and/or Reverb eect.
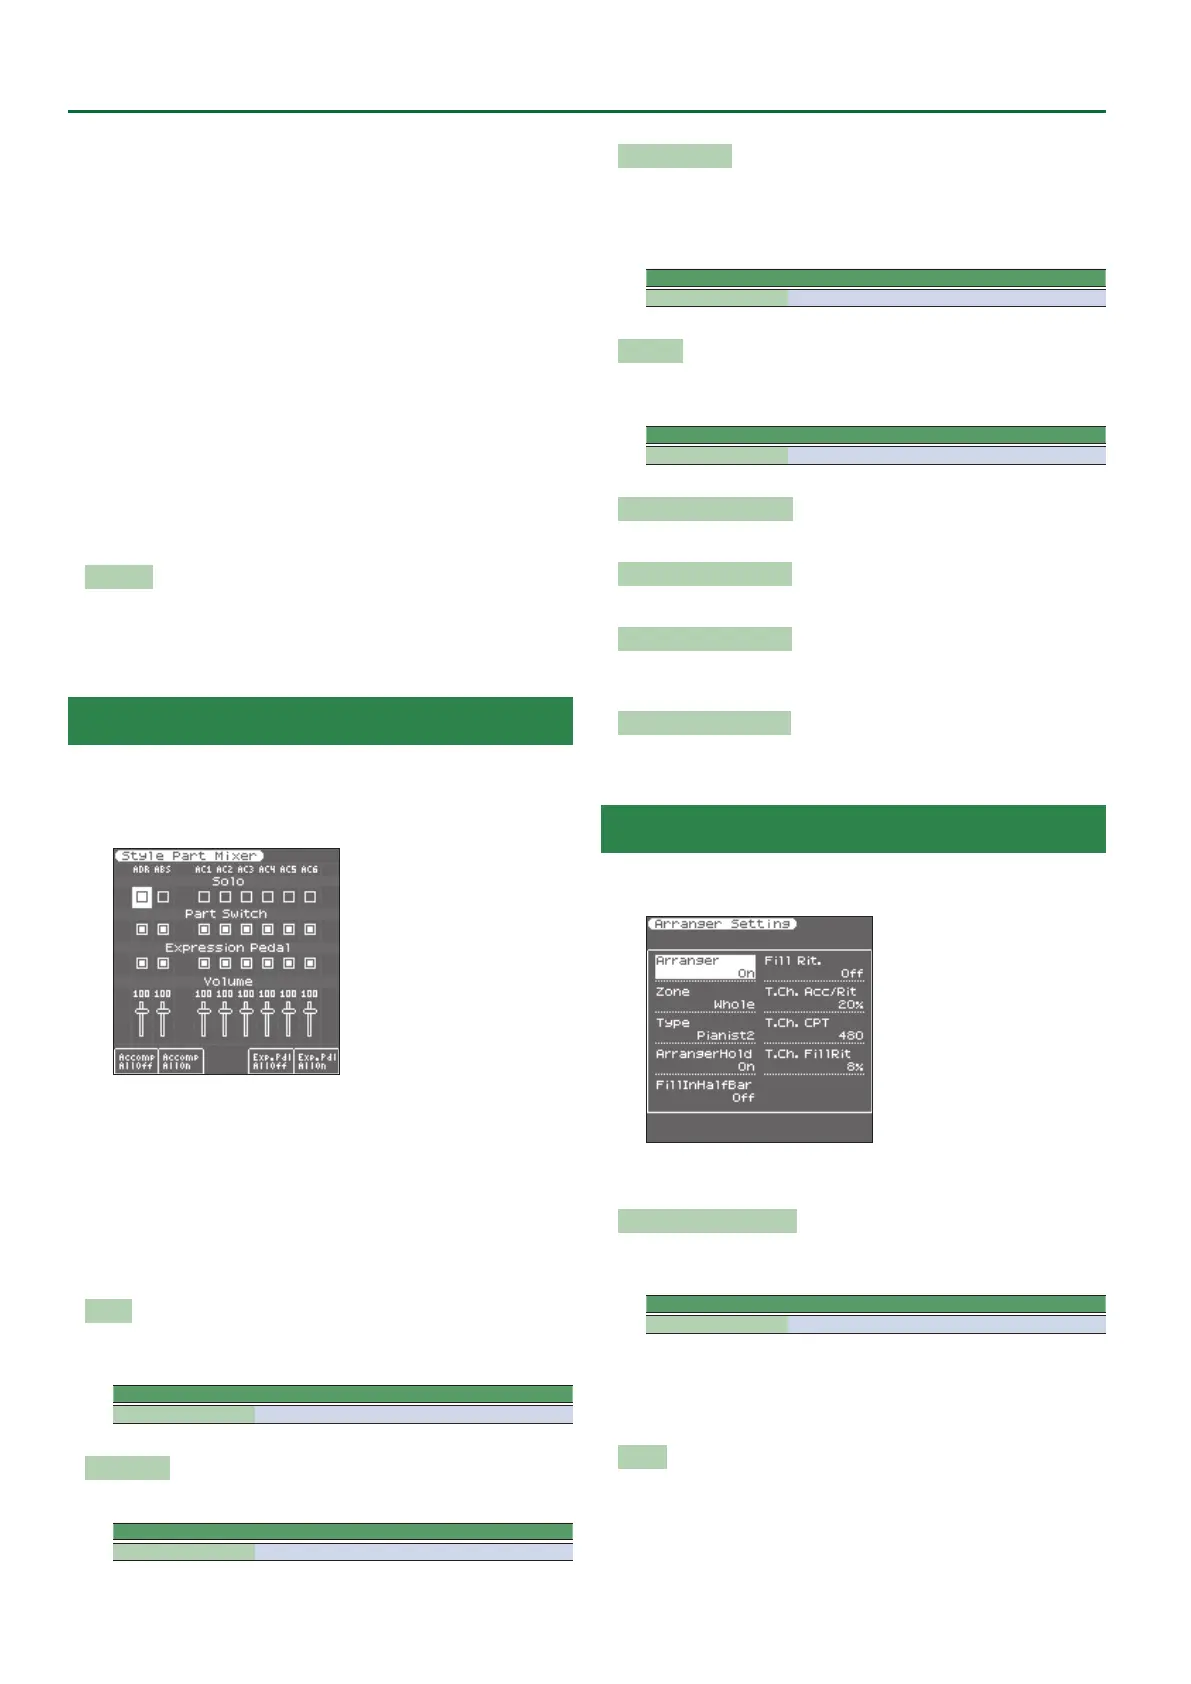
Style Part Mixer Parameters
This function group can be selected using [MENU]
0
“User
Program Edit”
0
“Style Part Mixer.”
You can also access the Style Part Mixer screen by pressing the [F2]
button (Style Mixer) of the left main screen.
The parameters of this function group apply to the eight Arranger
parts (i.e. the parts used to play back the selected style).
The vertical columns correspond to each style part (ADR is the drum
part, and ABS is the bass part). The horizontal rows show parameters
that you can edit.
Use the direct buttons and Cursor buttons to select the desired
parameter, and use the Value [-] [+] buttons or the Balance/Value
knob (when the LED is unlit) to edit the value.
The following parameters are available:
Solo
Allows you to solo the selected part, which means that all other style
parts are switched o.
Parameter Value
Solo O, On
Part Switch
Turns each part on/o.
Parameter Value
Part Switch O, On
Expression Pedal
Select “O” if you don’t need pedal expression for the selected part.
This means that the style part in question no longer responds to
an expression pedal you may have connected to the EXPRESSION
socket.
Parameter Value
Expression Pedal O, On
Volume
Adjusts the volume of the selected style part.
Selecting “0” means that the part in question is no longer audible.
Parameter Value
Volume 0–127
Accomp AllO ([F1] button)
Turns o all parts ACC1–6.
Accomp AllOn ([F2] button)
Turns on all parts ACC1–6.
Exp. Pdl AllO ([F4] button)
Turns o the expression pedal connection of all parts Drum, Bass,
and ACC1–6.
Exp. Pdl AllOn ([F5] button)
Turns on the expression pedal connection of all parts Drum, Bass,
and ACC1–6.
Arranger Setting Parameters
This function group can be selected using [MENU]
0
“User
Program Edit”
0
“Arranger Setting.”
The parameters of this function group apply to the Arranger as a
whole and allow you to ne-tune its behavior.
Arr Switch (Arranger Switch)
Select “O” if you only need the drum part of the selected style and
no melodic accompaniment parts (ABass, ACC1–6).
Parameter Value
Arr Switch O, On
You can also turn the arranger switch on/o by pressing the [F5] (Arr
Switch) button of the left main screen.
If you turn the arranger switch O and then On again, chord
detection will resume when you play a chord.
Zone
When you press the [SPLIT] button, the selected style pattern is
controlled by the chords you play in the left half of the keyboard.
You can also tell the Arranger to scan another part of the keyboard
for usable chords. Though “Left” is probably the most popular
setting, you could select “Right” to have the Arranger scan the right
half of the keyboard.
 Loading...