57
Mastering Tools
The E-A7 contains an eects processor that applies to all keyboard
parts, style and SMF song parts.
This processor is called “Mastering Tools,” because it allows you to
perfect the signal mix to adapt it to the sound system you are using.
The parameters discussed here can be selected using [MENU]
0
“Mastering Tools.”
MEMO
If Output Mode is on (the Output Mode button is lit), the
Mastering Tools parameters are xed to match the response of
the built-in speakers.
If you want to edit the Mastering Tools parameters, turn Output
Mode o.
Mastering Comp
This multi-band compressor/limiter allows you to process three
frequency ranges separately. A compressor reduces high levels
(peaks) and boosts low levels, smoothing out uctuations in volume.
To edit the Compressor parameters, use [MENU]
0
“Mastering
Tools”
0
“Mastering Comp.”
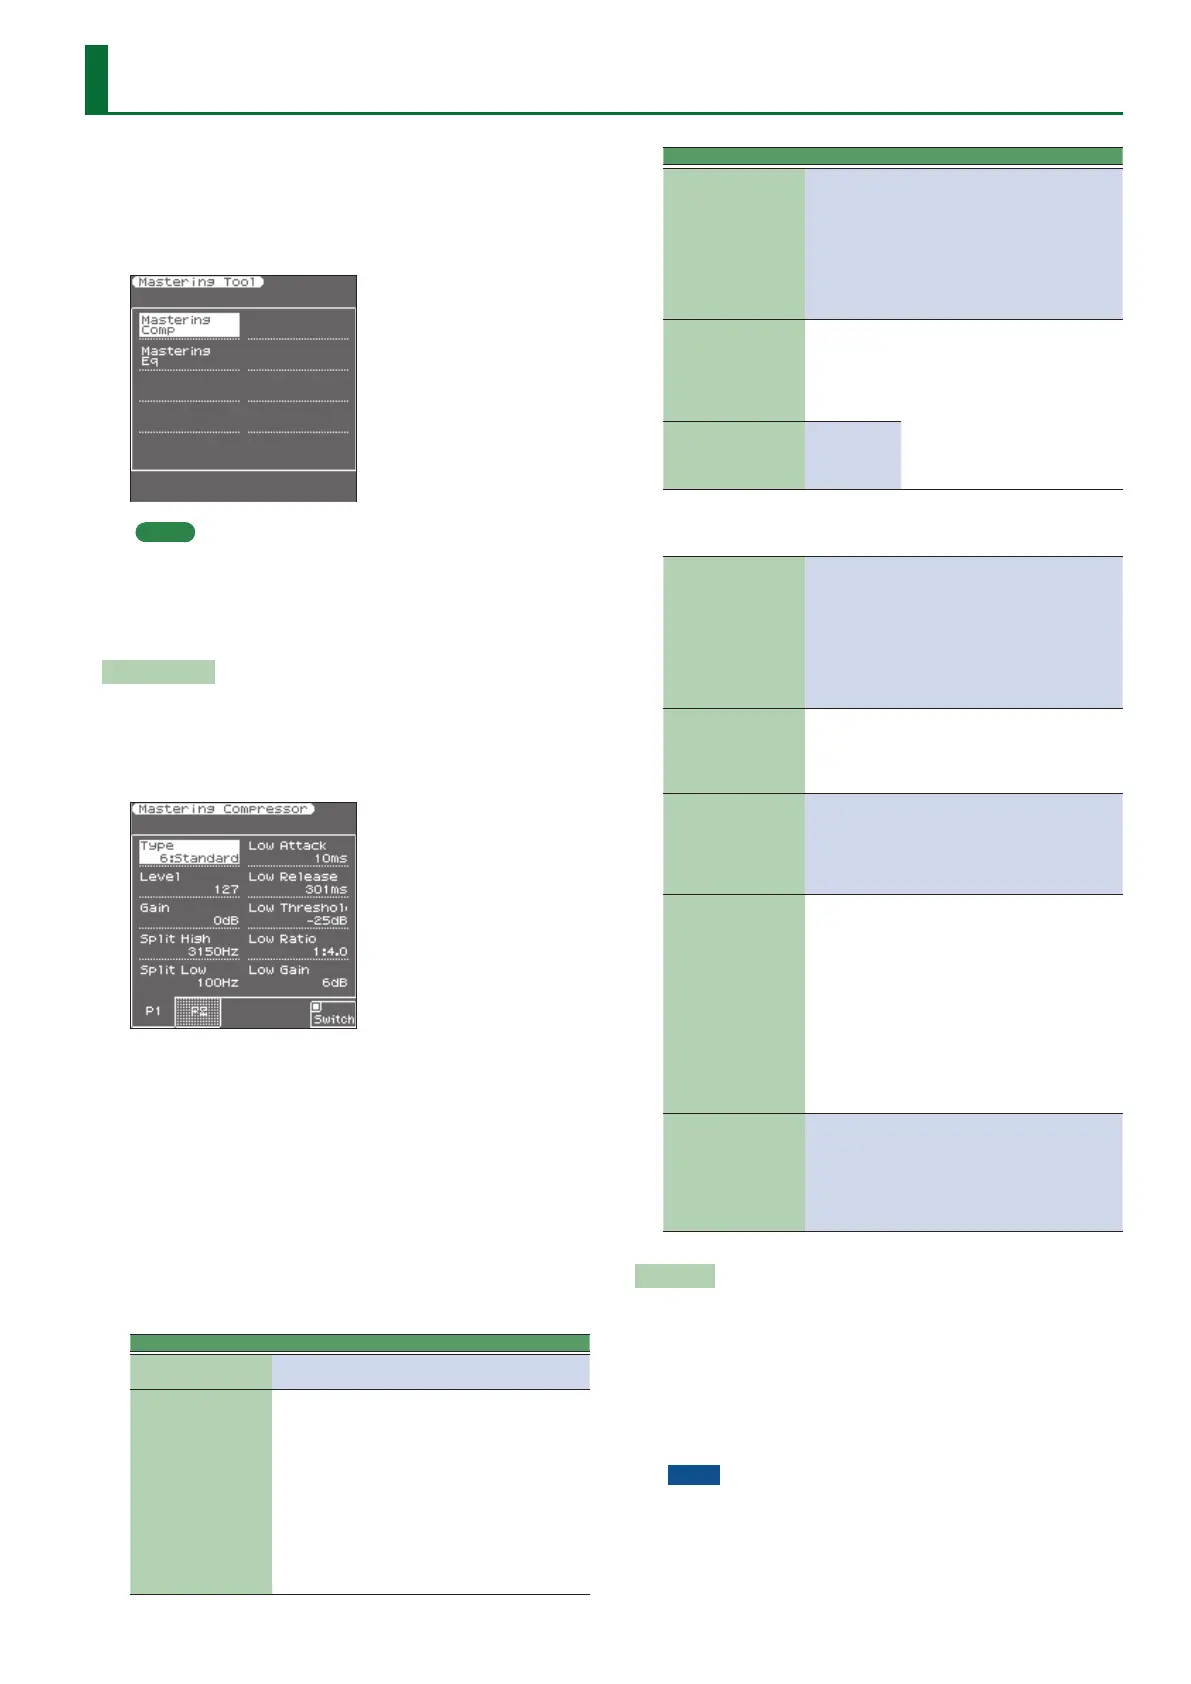
1. Open the Mastering Comp screen.
2. Use the [F5] (Switch) button to set it “On” to activate
the compressor.
The compressor is now active. (Select “O” to switch the compressor
back o.)
3. Use the direct buttons to select the “Type” parameter.
4. Use the Value [-] [+] buttons to select one of the
available presets.
5. If none of the preset memories contains the settings
you need, use the direct buttons and Value buttons to
select and set the following parameters.
Parameter Value Explanation
Type
Type 1–5,
Standard, User
Level 0–127
Use this parameter to set the com-
pressor’s input level.
The higher the value, the stronger
the three frequency bands are
compressed.
The value you set here is added to
the “Level” settings of the three
bands. Do not set this parameter to
“0” if the compressor is switched
on, because doing so means that
the keyboard parts, the SMF song or
Style parts are no longer audible.
Parameter Value Explanation
Gain -12–0–+12 dB
Use this parameter to correct the
level at the compressor’s outputs.
If the settings of the remaining
parameters lead to a signicantly
lower level, select a positive value. If
your settings lead to a signicantly
higher level, select a negative value.
“0” means that the level is neither
boosted nor attenuated.
Split High
2000, 2500,
3150, 4000,
5000, 6300,
8000, 9000,
10000, 11000,
12000 Hz
These two parameters specify the
frequency where two bands are
separated. The compressor has
three bands, and so there are two
crossover frequencies you can set:
“High” between the “Mid” and
“High” ranges; and “Low” between
the “Mid” and “Low” ranges.
Split Low
80, 100, 150,
200, 250, 315,
400, 500, 630,
800 Hz
High/Mid/Low: Because “Attack,” “Release,” “Threshold,” “Ratio” and
“Level” are the same for each band, we will only discuss them once. As you
see, each of the three frequency ranges has its own set of parameters that
allow you to specify their behavior.
Attack 0–100 ms
Use this parameter to specify how
fast the compressor of the band in
question should start processing the
signal once the level of that band ex-
ceeds the “Threshold” level. Choose
a smaller value if you prefer a com-
pression similar to that of FM radio
stations. Higher values may yield a
“snappier” or “funkier” sound.
Release 50–5000 ms
This parameter allows you to specify
how fast the compressor of the
corresponding band should stop
working when the signal level drops
below the “Threshold” value.
Threshold -36–0 dB
This parameter allows you to set the
level the frequency band (“High,”
“Mid” or “Low”) must reach to
trigger its compressor. The lower
the value, the more noticeable the
compression will be.
Ratio 1:1.0–1:INF
Use this parameter to specify how
strongly the level should be reduced
when the band’s level exceeds the
“Threshold” level. “1:2.0,” for exam-
ple, means that level values above
the “Threshold” level are halved.
“1:INF” is useful if you set “Thresh-
old” to “0 dB” or thereabout. This
produces a limiter eect, which
means that no signal level will ever
exceed the “Threshold” value. This
may help you protect the speakers of
the PA system etc.
Gain -24–+24 dB
This parameter allows you to
establish the desired mix among the
three compressor bands. Choose
a negative value to decrease the
level, or a positive one to increase it.
Choose “0” for a band whose level
is OK as is.
Write User
This function allows you to save the settings you made on the
“Compressor” page.
1. Press the [WRITE] button.
The display shows a conrmation message.
2. Press the [F5] (YES) button to save the current settings.
If you decide to cancel, press the [F1](NO) button.
The E-A7 then returns to the “Compressor” page.
NOTE
5 There is only one “User” memory for your own settings. By saving
new settings, you therefore overwrite the previous ones.
Once you save the settings as User, the Type will subsequently
always be “User.” For example, if you want to return to the
“Standard” setting, select “Standard” as the Type and then
perform the Write operation. After writing, the indication shows
 Loading...