47
Style Composer
however, “Change Gate Time” will help you cut the notes down
to size and thus avoid undesirable overlaps.
Parameter Value Explanation
Track
Adrm–Acc6,
ALL
Allows you to select the track you
wish to edit. You can also select
“ALL” here, in which case the opera-
tion applies to all tracks.
Mode
Major, Minor,
7th
Allows you to select the Mode to be
edited.
Division
Intro 1–4, Main
1–4, Fill 1–4,
End 1–4
Use this parameter to select the
Division you want to edit.
From Bar–
To CPT
See page 43.
Data Type See page 43.
Value (CPT) –4800–4800
This parameter sets the amount by
which the notes are shifted. The
value refers to CPT units (one CPT=
1/120 q). Notes on the rst beat of
the rst bar cannot be shifted further
to the left, because that would mean
shifting them to the “0” measure,
which doesn’t exist.
From Note,
To Note
0 C- –127 G9
“From Note” allows you to set the
note (or lower limit of the note
range) to be modied within the
specied “From”/“To” time range.
“To Note” allows you to set the
upper limit of the note range to be
modied.
Specify the parameters, and press the [Exec] (F5) button to execute
the operation.
NOTE
5 If you want to save the modied data, save the style (p. 42).
5 If you want to return to the state prior to editing, execute the
UNDO operation (p. 42).
Track Length
This function allows you to modify the length (number of bars,
beats and clocks) of a pattern after recording. Data that lie outside
the range you decided to keep are discarded. Obviously, you only
need to change the settings of the Mode whose length you want to
modify.
NOTE
There is no way to recall the previous version, so be sure to save
your style before continuing (see p. 42).
Parameter Value Explanation
Track
Adrm–Acc6,
ALL
Allows you to select the track you
wish to edit. You can also select
“ALL” here, in which case the opera-
tion applies to all tracks.
Division
Intro 1–4, Main
1–4, Fill 1–4,
End 1–4
Use this parameter to select the
Division you want to edit.
Length Bar Species the length of a bar.
Length Beat
1–[number of
beats per bar]
Species the beat position. The
number of selectable beats depends
on the selected time signature.
Length CPT
This parameter allows you to “ne-
tune” the length. In most cases, you
will probably work with multiples
of q notes (i.e. 120CPT) because
120CPT represent one beat of an X/4
bar (1/4, 2/4, 3/4, 4/4, etc.).
Mode
Major, Minor,
7th,
M=m, M=7,
M=m=7, m=7
Choose the Modes to which the new
length setting should apply. You
can also switch on two or all three
button icons. If you set “Track” to
“ALL,” all three Modes are selected
automatically (and that cannot be
changed).
Specify the parameters, and press the [Exec] (F5) button to execute
the operation.
NOTE
5 If you want to save the modied data, save the style (p. 42).
5 If you want to return to the state prior to editing, execute the
UNDO operation (p. 42).
Editing Individual Style Events (Micro Edit)
Select this mode if you need to change just one aspect of an
otherwise perfect style.
In this section, we will use the word “event” for any kind of message.
An event is thus a command (or instruction) for the Arranger.
You can only view and edit one track at a time. Therefore, be sure to
check the “Track” setting before editing the events displayed on this
page.
1. Access the style composer main screen.
2. Use the “Track,” “Mode” and “Division” parameters to
select the pattern you want to edit.
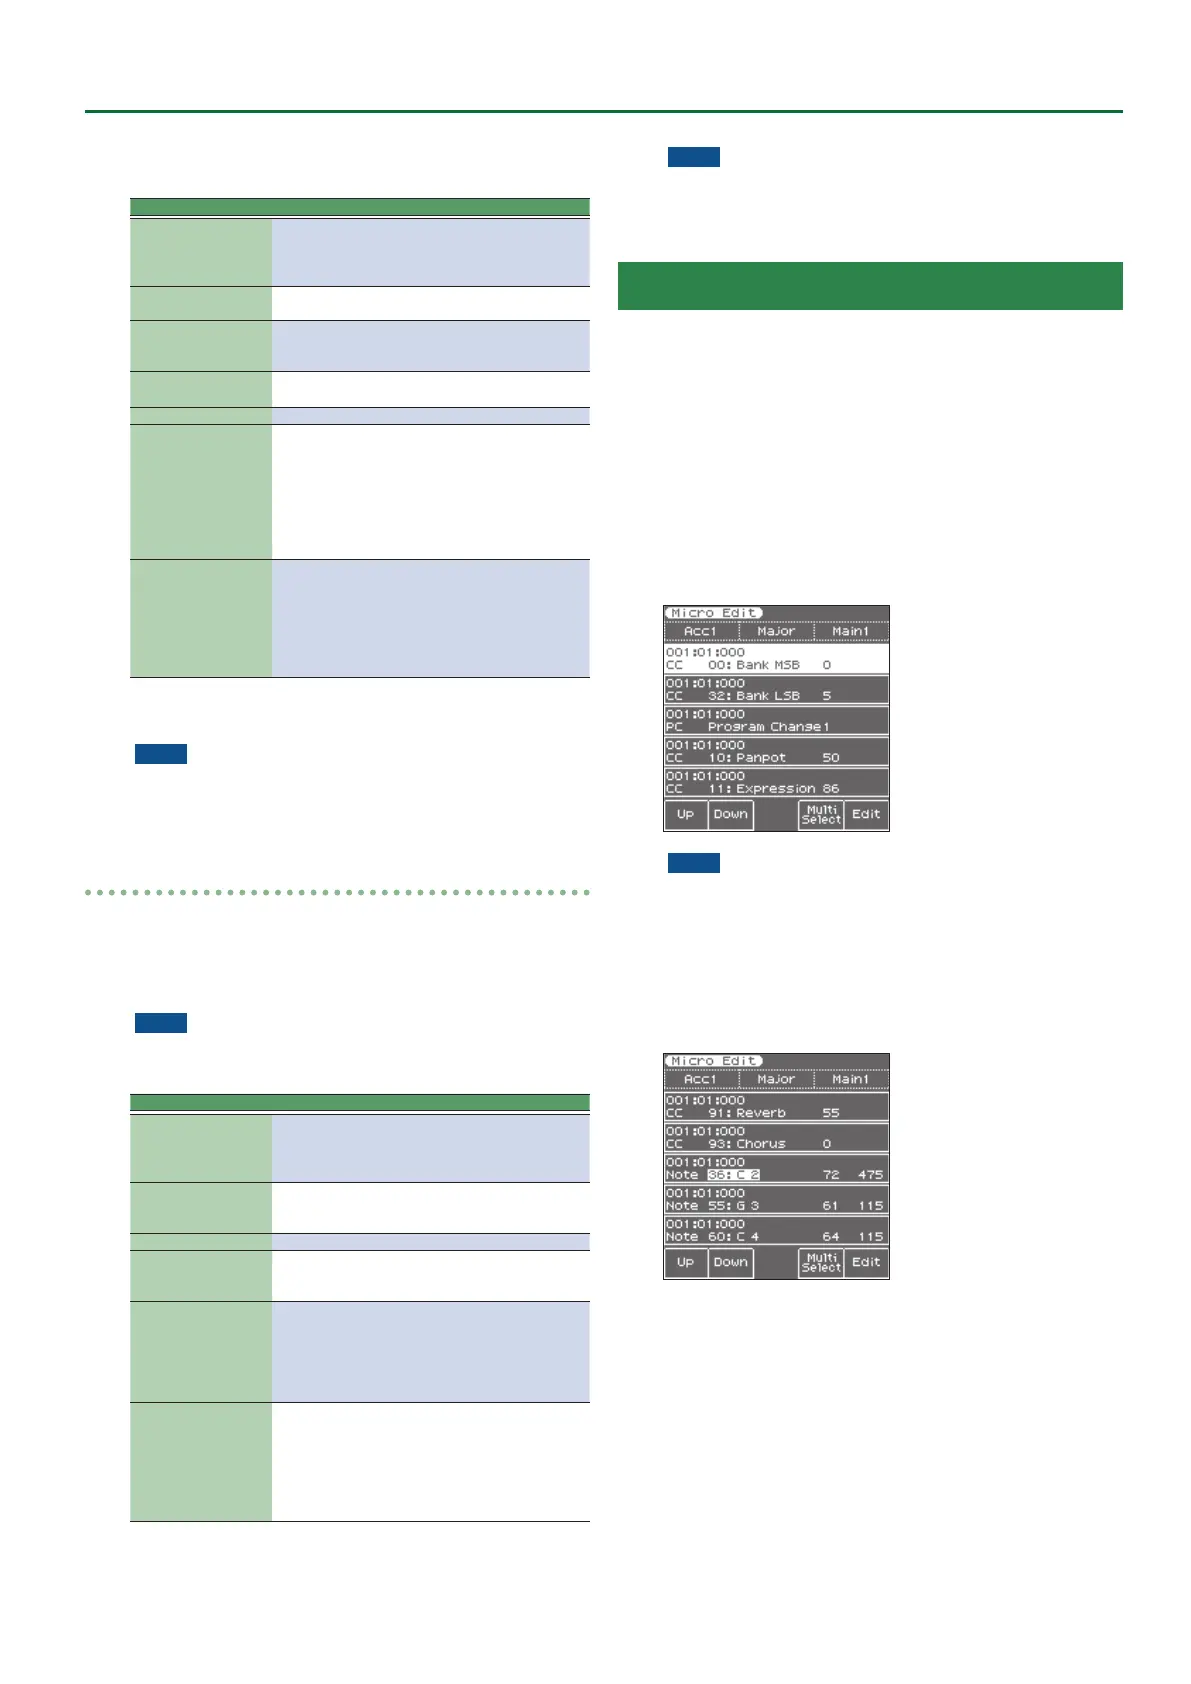
3. Use the direct buttons to select “Micro Edit.”
The display changes to:
NOTE
This page doesn’t allow you to select a dierent style pattern.
Be sure to select the correct button before calling up the “Micro
Edit” page.
1. Use the [F1] (Up) button, [F2] (Down) button, and direct
buttons to select the event that you want to edit.
2. Use the direct buttons and the cursor buttons to move
the cursor to the parameter that you want to edit.
3. Use the Value [-] [+] buttons and [Balance] knob (when
the LED is unlit) to change the value.
General notes about “Micro Edit”
Position indications: Sequencers only register “events” whose
positions and distances specify when the notes are to be sounded or
when they should change (i.e. their “sequence”).
Each event is executed at a given point in time, which is why they all
have a position indication (“1-01-119,” for example). The rst gure
refers to the bar, the second to the beat within that bar and the third
to the clock (CPT) between the current beat and the next. Each beat
of a 4/4 bar comprises 120 clocks.
Monitoring note events: The Style Composer can play back the
note events you select. This may help you identify the occurrence
you want to edit. When you move the cursor to a note event, it is
played back.
 Loading...