42
Style Composer
Returning a Recorded Track to the State
Prior to Recording (UNDO)
If you want to return the recorded track to the state prior to
recording, execute the UNDO operation.
1. In the Style Composer Menu screen, select “UNDO.”
A conrmation message appears.
2. To execute, select “ Ye s .”
If you decide not to execute UNDO, select “ N o.”
NOTE
The UNDO operation returns the data to the state immediately
prior to the previous recording. If you have recorded multiple
times in succession, the data will not return to its original state
even if you execute UNDO.
Saving Your Style
Make it a habit to save your style as frequently as possible. After all,
if someone decided to switch o your E-A7 now, you would lose
everything you have programmed so far.
1. In the Style Composer Menu screen, select “ S a v e .”
2. Use the direct buttons or function buttons to select the
save-destination.
Button Explanation
[R1] (Int/Ext)
Switches between Internal Storage and External
Storage (USB ash drive).
[F4] [F5] (Page) Switch pages.
[L1] Up folder Exits the folder.
3. Press the [Enter] button.
Assign a name.
&
For details on how to assign a name, refer to “Assigning a
Name” (Owner’s Manual: p. 16).
If you decide to cancel, press the [Exit] button.
4. Press the [F5] (Exec) button.
The style is saved.
MEMO
If there is a le with the same name as the name you entered, a
screen asks you to conrm that you want to overwrite it.
If you want to save, select “YES” to replace it with the le you
renamed.
If you decide to rename the le, select “NO” and return to the
page where you can rename the le.
Muting Tracks While Recording Others
After recording a few tracks, you may nd that certain parts tend to
confuse you. That is why the E-A7 allows you to mute tracks that you
do not want to hear during recording.
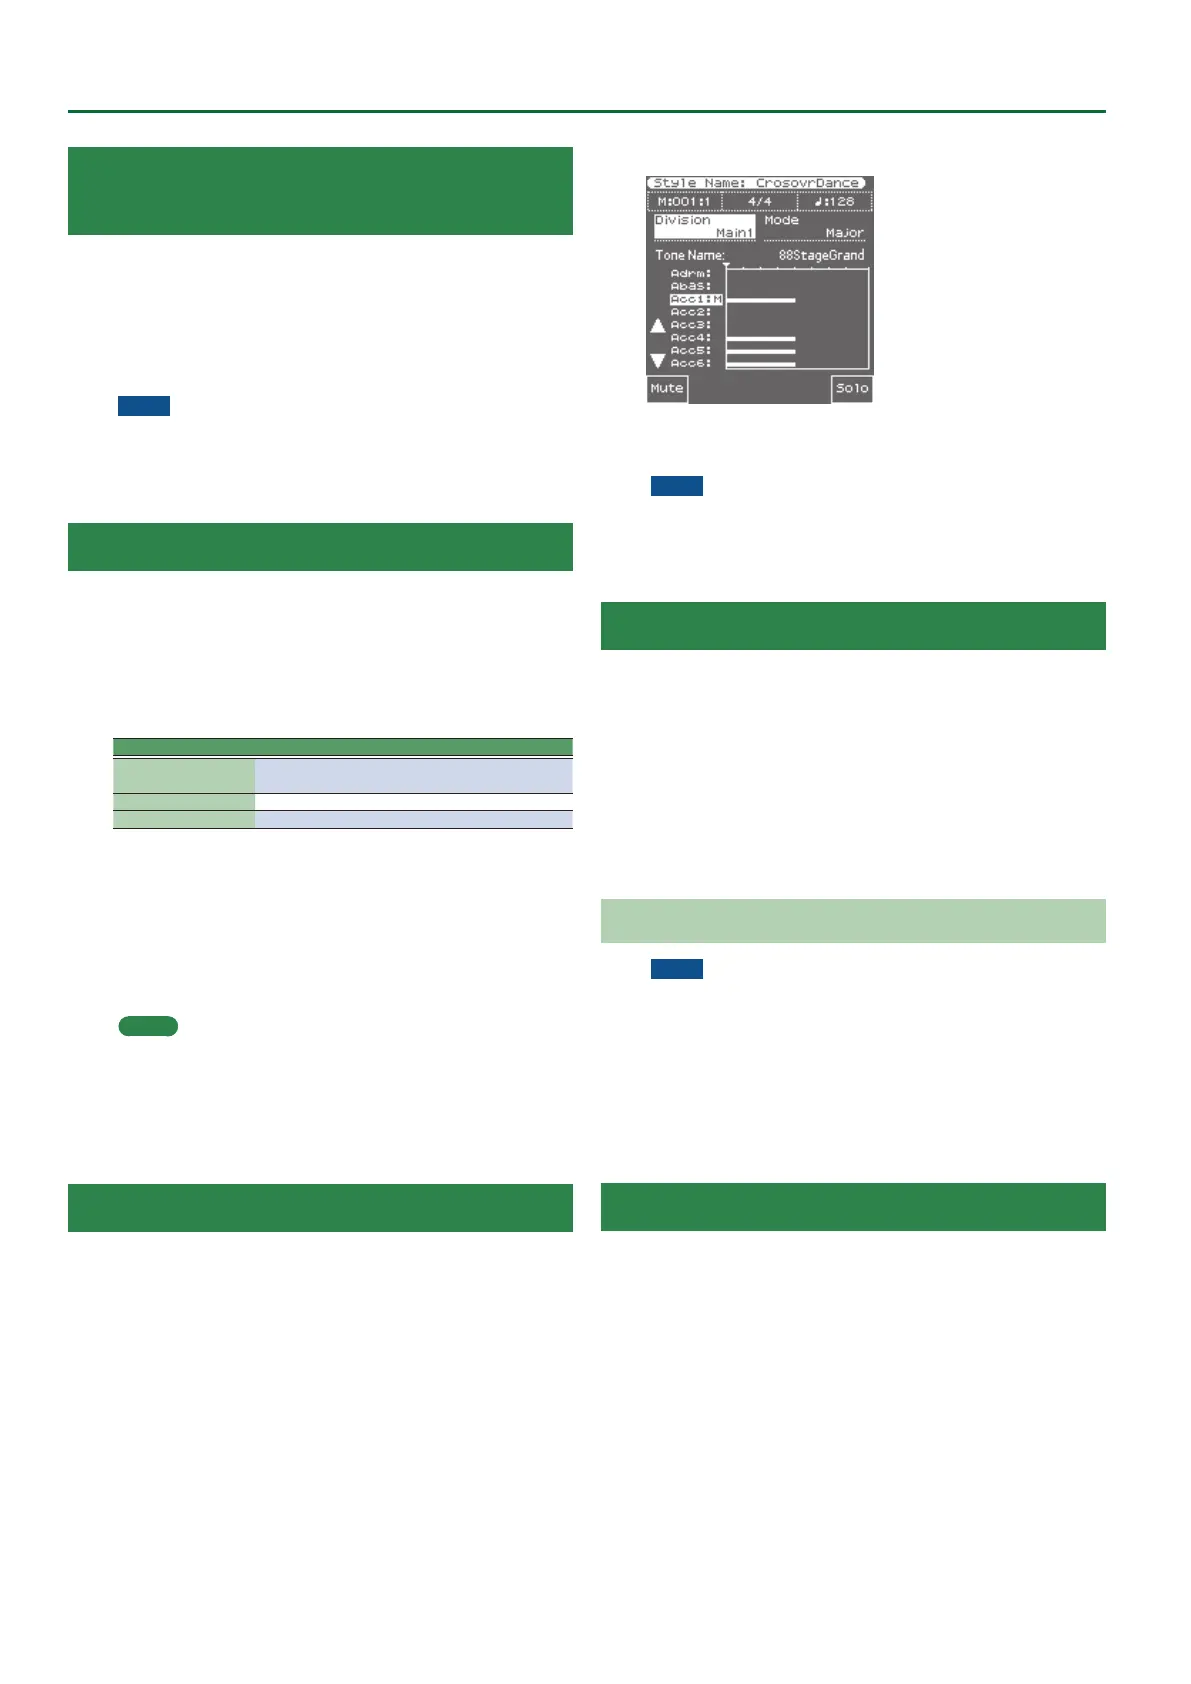
1. In the Style Composer page, use the [L4] [L5] buttons to
select a track.
The eld below the “TRACK” parameter shows the name of the Tone
or Drum Kit assigned to the selected track.
2. Press the [F1] (Mute) button.
An “M” appears next to the track you have just muted.
3. Press the [F1] (Mute) button again to switch o the
mute function (the “M” disappears).
NOTE
This mute setting only applies to the Style Composer page.
During normal Arranger playback, all tracks that contain data
are played back. Use the “Erase” function to remove parts that
should not appear in your accompaniments (p. 43).
Solo
This function causes only the selected single track to play.
1. In the Style Composer page, use the [L4] [L5] buttons to
select a track.
The eld below the “TRACK” parameter shows the name of the Tone
or Drum Kit assigned to the selected track.
2. Press the [F5] (Solo) button.
An “S” appears next to the track you have just muted.
3. To turn o the Solo function, press the [F5] (Solo)
button once again.
Playback in Arranger Mode
NOTE
Save your style before trying it out with the Arranger.
If the style stops unexpectedly during playback in Arranger mode,
try dierent chords. Chances are that you only programmed the
major pattern, so that the Arranger selects an empty pattern
when you play a minor or seventh chord. Remember to set the
Mode parameter to “M=m=7” until you have come to grips
with the possibilities of the E-A7’s Arranger. That way, those
three patterns will sound alike, but at least you are sure that the
Arranger does not stop when you play a minor or seventh chord.
Style Track Edit Functions
The “Track Edit” level of the Style Composer provides 12 functions:
Quantize, Erase, Delete, Copy, Insert, Key, Change Velo, Change Gate
Time, Global Change, Shift Clock, Track Length and Time Signal. There
is also a “Micro Edit” environment that allows you to add, delete or
change individual events. See page 47 for details.
1. In the Style Composer Menu screen, select “Track Edit.”
The Track Edit page appears.
2. Use the direct buttons to select the operation that you
want to execute.
 Loading...