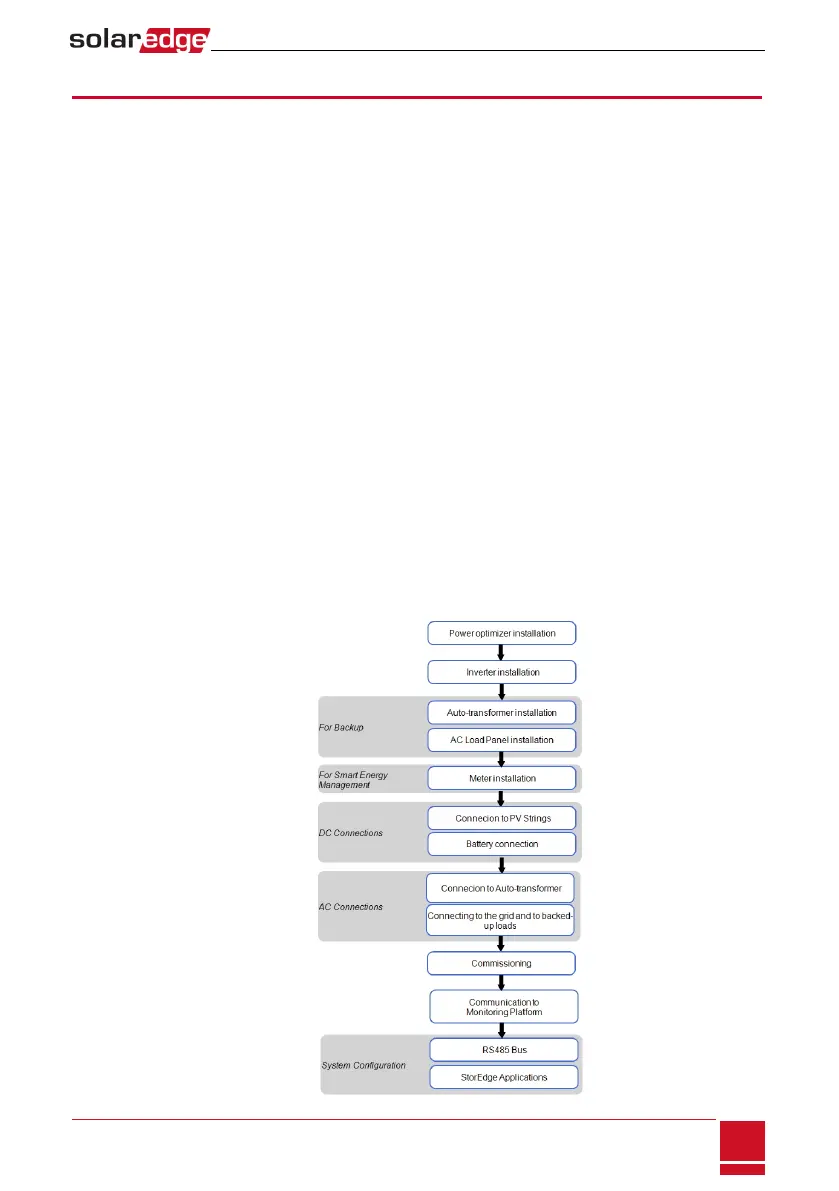
Installation Workflow
WheninstallingtheStorEdgesystem,followthisworkflowtoensureallthecomponentsareconnected
andfunctioningcorrectly.
Step 1-PV system installation-modules,poweroptimizersandinverter:
l Poweroptimizers-asdescribedinInstallingthePowerOptimizersonpage13.
l Inverter-asdescribedinInstallingtheInverteronpage21.
Step 2-SolarEdge Auto-transformer and AC load panel installation (required for Backup Power only):
RefertoAuto-transformerandBacked-upLoadsPanelInstallation(forBackup)onpage28.
Step 3- Electricity Meter installation (required for Smart Energy Management only).RefertoMeter
Installationonpage30.
Step 4 - Connecting PV strings (DC) to the inverter - RefertoConnectingtheStringstotheInverteron
page33.
Step 5-Connecting the battery to the inverter and mounting the battery.Refertotheinstallation
informationinthemanufacturerdocumentation,andtoStorEdgeInverterConnectionsonpage31.
Step 6 - Connecting all components to the inverter-connecttheautotransformerandloads(AC),PV
strings(DC),andmeter.RefertoStorEdgeInverterConnectionsonpage31.
Step 7 - Commissioning the inverter-Activatethesystemandpairthepoweroptimizers.Referto
CommissioningtheInstallationonpage44.
Step 8-Connecting to the monitoring platform.RefertoSettingUpCommunicationtotheMonitoring
Platformonpage69.
Step 9-System Configuration-ConfiguringtheRS485busandStorEdgeapplications.RefertoSystem
Configurationonpage78.
ThefollowingflowchartappearsthroughoutthisInstallationGuidetoassistwiththeinstallationsteps:
Chapter 1: Overview
SolarEdge-StorEdge Installation Guide MAN-01-00262-1.2
11
 Loading...