Recording
Recordingmovies
Before recording, follow steps 1 to 7 in
"Getting started" _. 11 - p. 20).
When you are recording, movies will be
recorded along with stereo soun&
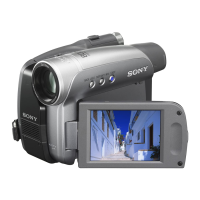
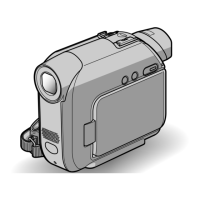
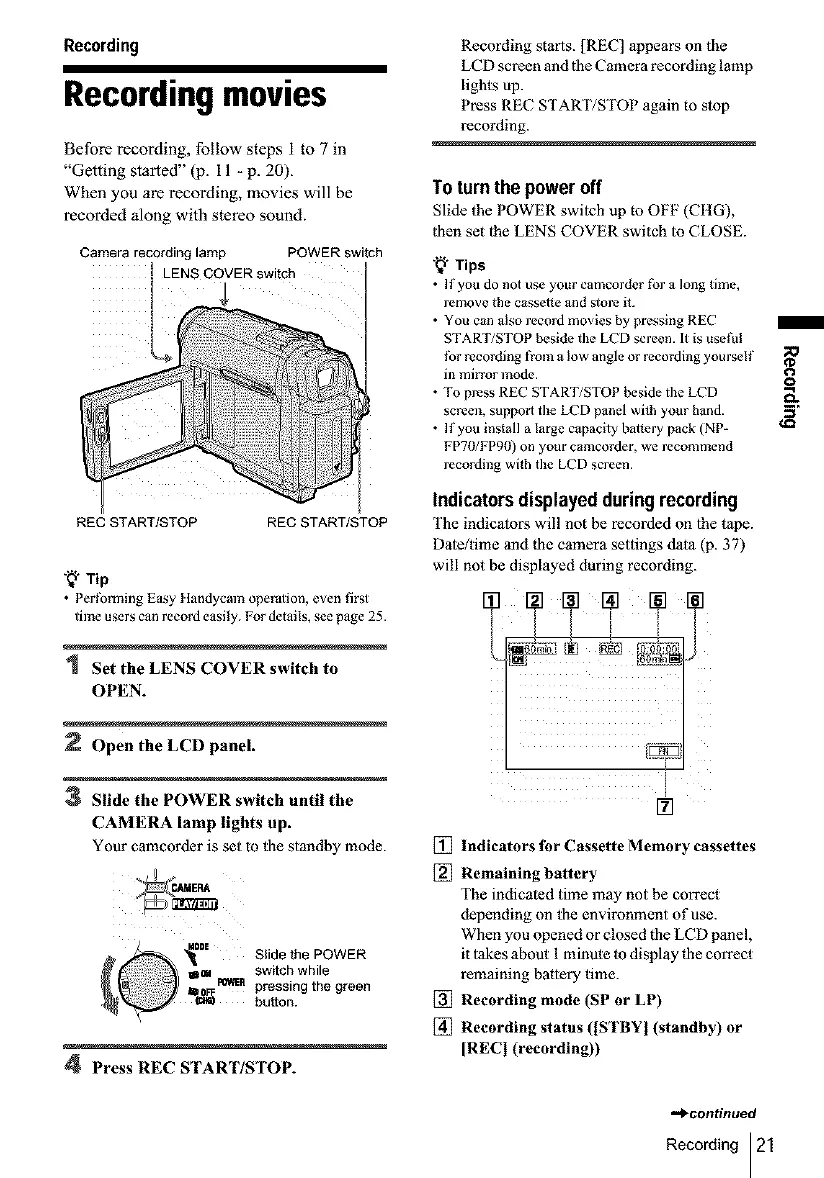
Camera recording lamp POWER switch
t LENS COVER switch
I
REC STARTISTOP REC START/STOP
"_" Tip
• Pertbrming Easy tlandycam operation, even first
time users can record easily. For details, see page 25.
1 Set the LENS COVER switch to
OPEN.
Open the LCD panel.
Slide the POWER switch until the
CAMERA lamp lights up.
Your camcorder is set to the standby mode.
,_0aE Slide the POWER
Switch while
:powEnpressing the green
button.
4 Press REC STARTISTOP.
Recording starts. [REC] appears on the
LCD screen and the Camera recording lamp
lights up.
Press REC START/STOP again to stop
recording.
Toturnthe poweroff
Slide the POWER switch up to OFF (CIIG),
|hen set |he LENS COVER switch to CLOSE.
"_"Tips
• If'you do not use your camcorder tbr a long time,
remove the cassel_e and store it.
• You can also record movies by pressing REC
START/STOP beside the LCD screen. It is useful
tbrrecording from a low angle or recording yourself
in mirror mode.
• To press REC START/STOP beside the LCD
screen, support the LCD panel wi_hyour hand.
• If you install a large capacitybattery pack (NP=
FPTg/FP9g) on your camcorder, we recommend
recording with the LCD screen.
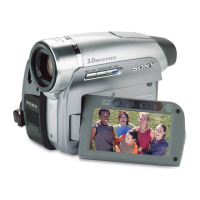
Indicators displayedduringrecording
The indicators will not be recorded on lhe tape.
Date/time and |be camera settings data (p. 37)
will not be displayed during recording.
[]
[] Indicators for Cassette Memory cassettes
[] Remaining battery
The indicated time may not be correct
depending on the environment of use.
When you opened or closed the LCD panel,
it takes about 1 minute to display |be correct
remaining battery time.
[] Recording mode (SP or LP)
[] Recording status ([STBY l (standby) or
[REC] (recording))
€,Q
"">continued
Recording 21
 Loading...