5-13 (E)
HXCU-100
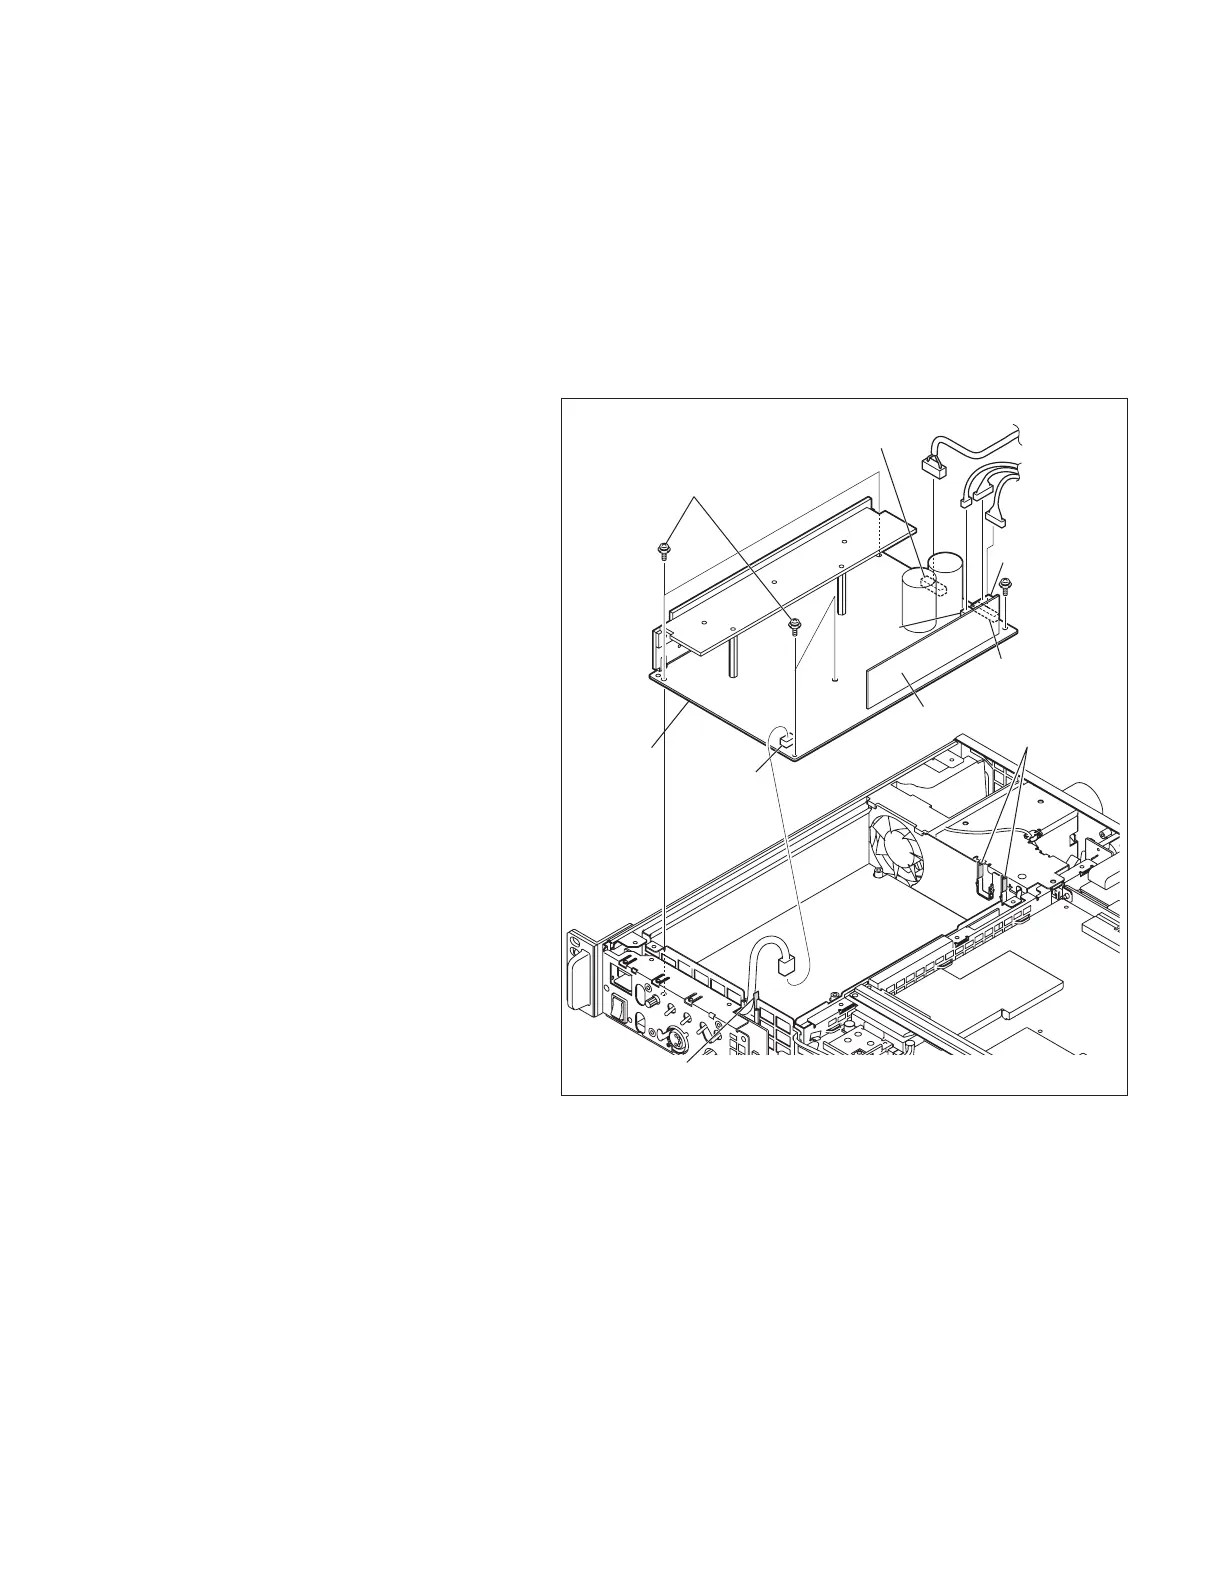
5-5-11. PS-739 Board
1. Remove the front assembly.
(Refer to Section 5-1.)
2. Remove the top cover.
(Refer to Section 5-2.)
3. Remove the two screws to detach the PS
cover. (Refer to Section 5-5-9.)
4. Disconnect the harnesses from the connec-
tors CN5006 and CN5007 on the CT-257
board.
5. Disconnect the harnesses from the connec-
tors CN1, CN1004, and CN2002 on the
PS-739 board.
6. Unlock the three wire holders.
7. Remove the fi ve screws to remove the
PS-739 board.
8. Install a new PS-739 board by reversing the
steps above.
PSW3 x 6
PSW3 x 6
PS-739
board
Wire holders
Wire holder
CT-257 board
CN5007
CN1
CN2002
CN1004
CN5006
 Loading...