PARTS REPLACEMENT
– 37 –
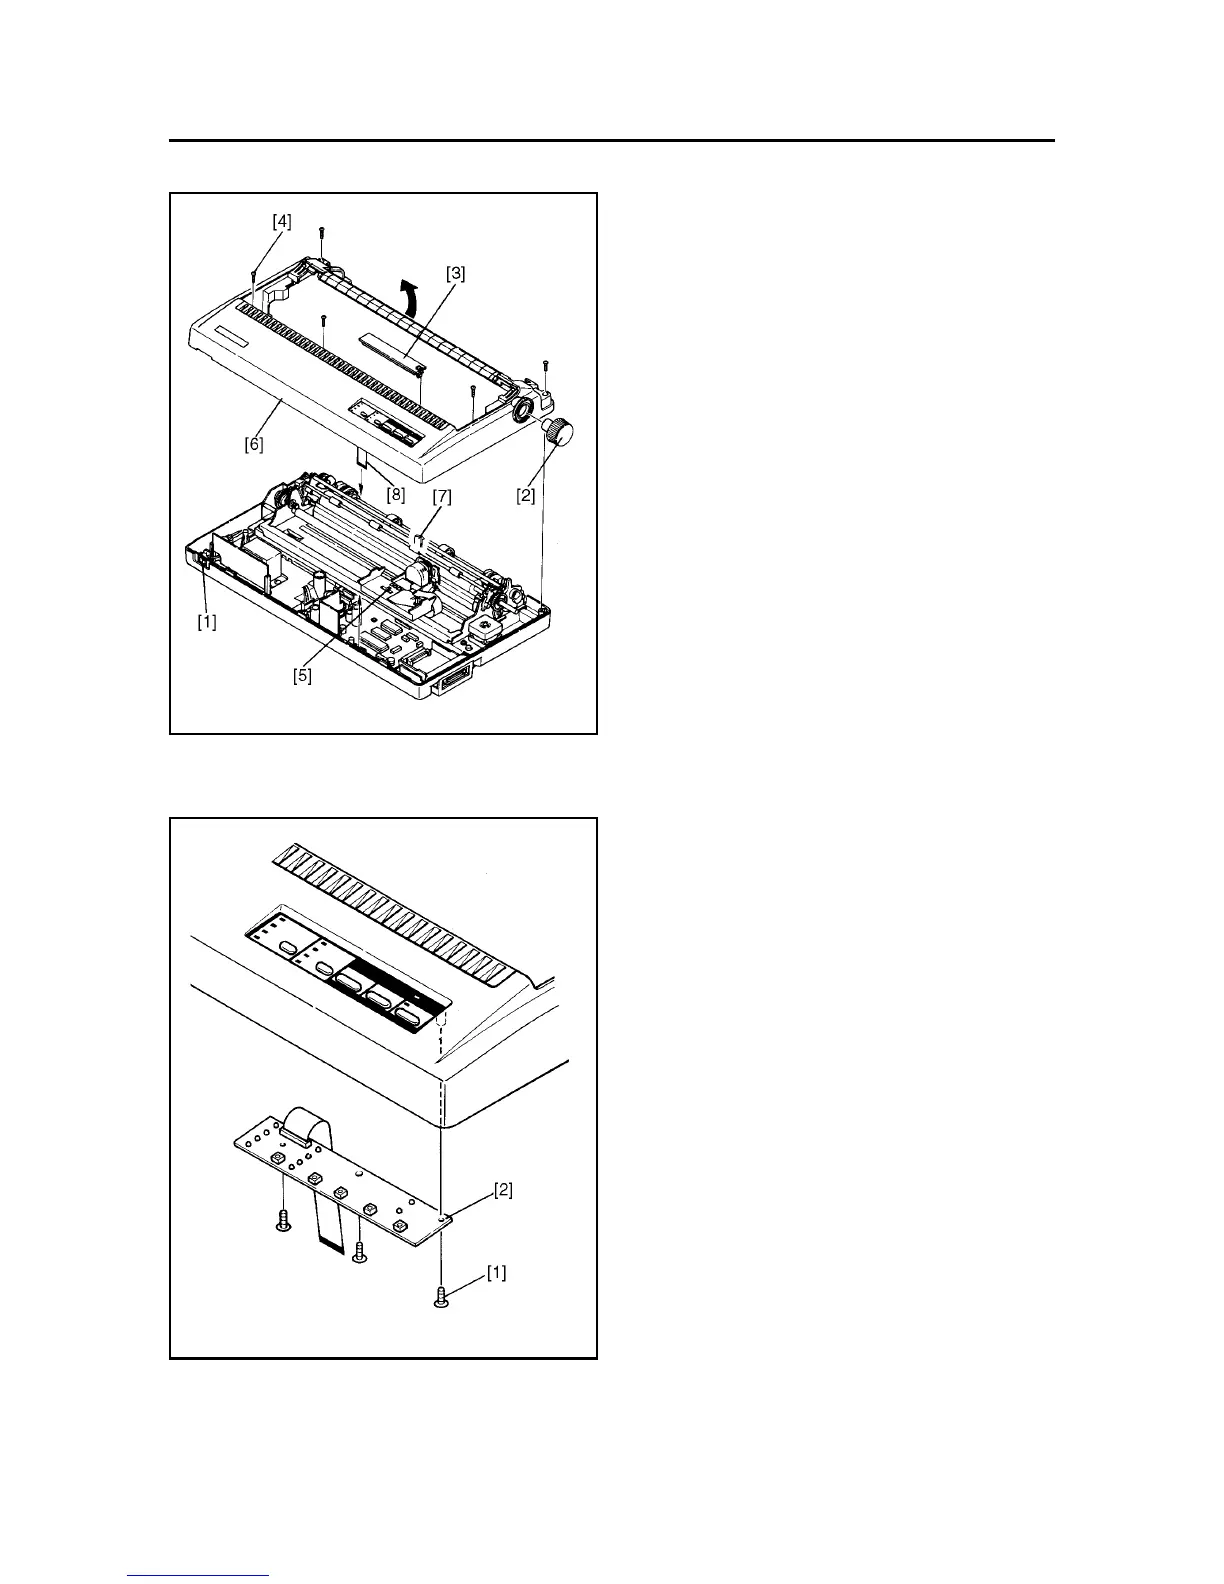
1. Upper Case Unit
(1) Turn off the power switch [1]
(2) Remove
• Printer cover
• Rear cover
• Platen knob [2]
• ROM cover [3]
• Five tapping screws [4]
(3) Move the carriage unit [5] over the right so that it
aligns with the cut-out of the upper case unit [6] .
(4) Remove
• Upper case unit [6]
Push the hook [7] of the lower case to separate the
upper case unit [6] and lower case, next lean the
upper case unit [6] forward for removal.
• Cable [8] of control panel board
2. Control Panel Board
(1) Remove
• Upper case unit according to the procedure de-
scribed in item 1.
• Three tapping screws [1]
• Control panel board [2]
 Loading...