FUEL AND LUBRICATION SYSTEM 4-9
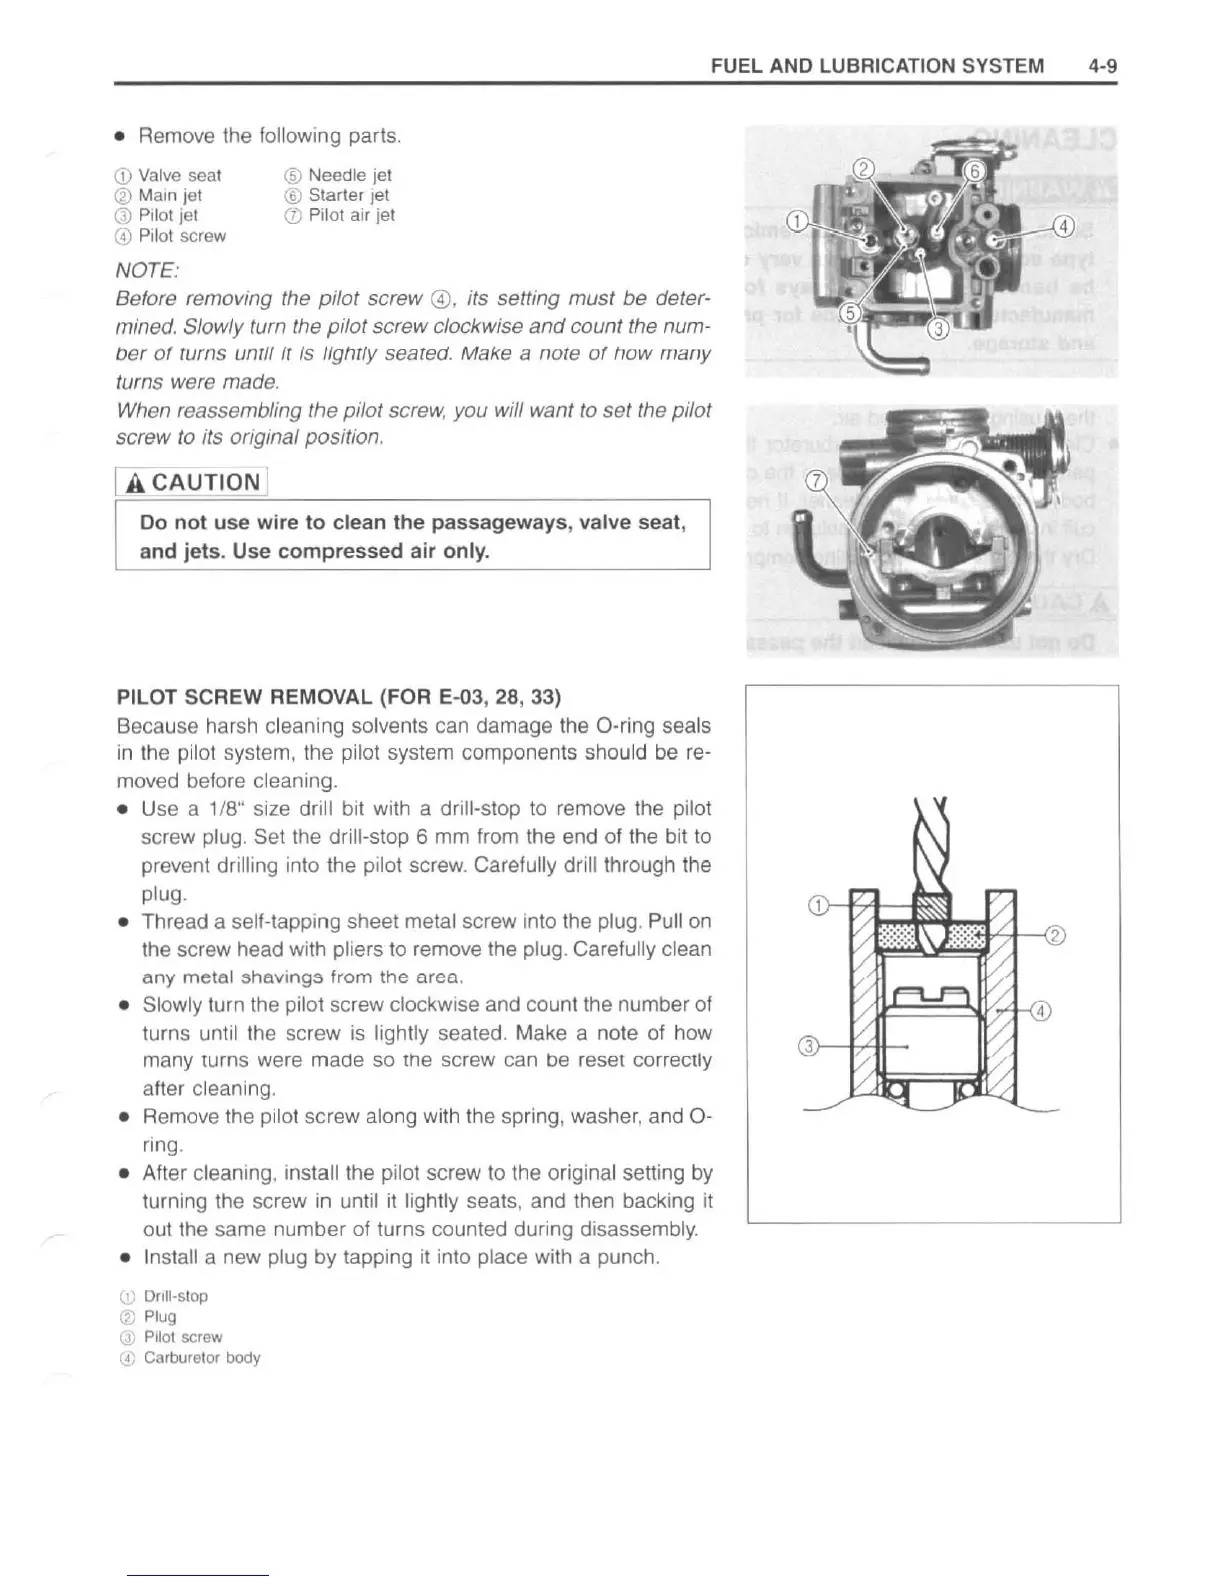
• Remove the following parts.
CD
Valve seal
tV
Mainjel
@
Piloljet
o Pilol screw
NOTE:
lID
Needle jet
lID
Starter jet
!J) Pilot air jet
Before removing the
pilot
screw
@.
its setting must
be
deter-
mined
. Slowly turn the
pilot
screw
clockwise
and
count the num-
oer
o( rums
Un111
11
Is
IIgnrty seared. Make a nore o( now many
turns were made.
When reassembling the pilot screw. you will want to
set
the pilot
screw to its original position.
I
ACAUTION
Do
no
t use wire
to
clean
the
passageways, valve seat,
and j
ets
. Use
compressed
a
ir
only
.
PILOT
SCREW REMOVAL (FOR E-0
3,
28, 33)
Because harsh
cleaning solvents can damage the O-ring seals
in
the pilot system, the pilot system components should be
re-
moved before cleaning.
• Use a 1/
8"
size drill bit with a drill-stop
to
remove the pilot
screw plug. Set the drill-stop 6 mm from the end of the bit to
prevent
drilling into the pilot screw. Carefully drill through the
plug.
•
Thread a self-tapping sheet metal screw into the plug. Pull
on
the screw head with pliers to remove the plug. Carefully clean
any
metal
shavings
from
the
area
.
• Slowly turn the pilot screw clockwise and count the number of
turns until the screw
is
lightly seated. Make a note of how
many turns were made
so
me screw can
be
reset correctly
after
cleaning.
•
Remove the pilot screw along with the spring. washer. and
0-
ring.
• After cleaning. install the pilot screw to the original setting
by
turning the screw in until
it
lightly seats. and then backing
it
out the same number
of
turns counted during disassembly.
• Install a new plug by tapping
it
into place with a punch.
C!)
Drill-stop
tV
Plug
@ Pilot screw
00
Carburetor body
http://www.motorcycle.in.th
 Loading...