"! !
!
1Ć2
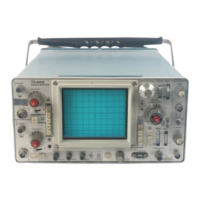
The features of the TAS 465 Analog Oscilloscope are briefly described here
to help get you acquainted with the operating systems.
This oscilloscope uses a combination of frontĆpanel buttons, knobs, and
onĆscreen menus to control its many functions. The frontĆpanel controls are
grouped according to function: vertical, horizontal, trigger, and special.
Within each group, any function adjusted often, such as vertical positioning
or the time base setting, is set directly by its own frontĆpanel control.
The button provides you with a usable, triggered display of a
signal applied to an input channel. Many instrument controls and menus are
set to a preĆdefined state, providing you with a known starting point for your
measurements.
"
Those functions for which control settings changed less often, such as
vertical coupling and trigger mode, are set indirectly. That is, pressing a
frontĆpanel button, such as , displays a menu of functions
at the bottom of the screen related to that button. (For the button
, the menu displayed contains functions such as coupling and bandĆ
width.) The buttons below this main menu select a function, such as couĆ
pling and displays a sub menu of settings for that function, such as DC, AC,
or GND, at the right side of the screen. The buttons to the right of the menu
select a setting, such as DC.
"
Some menus assign the General Purpose Knob to a selected adjustment.
The method employed is the same as for selecting a function, except the
final selection in the side menu causes the General Purpose Knob to adjust
some function, such as the position of measurement cursors on screen.
Pressing the button clears the assignment of the General
Purpose Knob except when assigned to adjust cursors or delay time.
The button works in conjunction with the General Purpose Knob
when positioning cursors. Each press of the button switches
which cursor is active, and therefore controlled by the General Purpose
Knob.
# !"
You can store up to four complete front panel setups in memory. Once you
complete a complex setup and then save it in one of the four memory locaĆ
tions, you can retrieve it at any time. Saved front panel settings do not
include the assignment of the General Purpose Knob.
!

 Loading...


