EasyManuals Logo
Home>Toshiba>All in One Printer>e-STUDIO 257

Toshiba e-STUDIO 257 User Manual

Toshiba e-STUDIO 257
172 pages
To Next Page IconTo Next Page
To Previous Page IconTo Previous Page
Page #117 background imageLoading...
Page #117 background image
4 EDITING FUNCTIONS
Time Stamp 115
Time Stamp
You can add the date and time on the copied paper.
1
Place paper in the drawer(s).
2
Place the original(s).
3
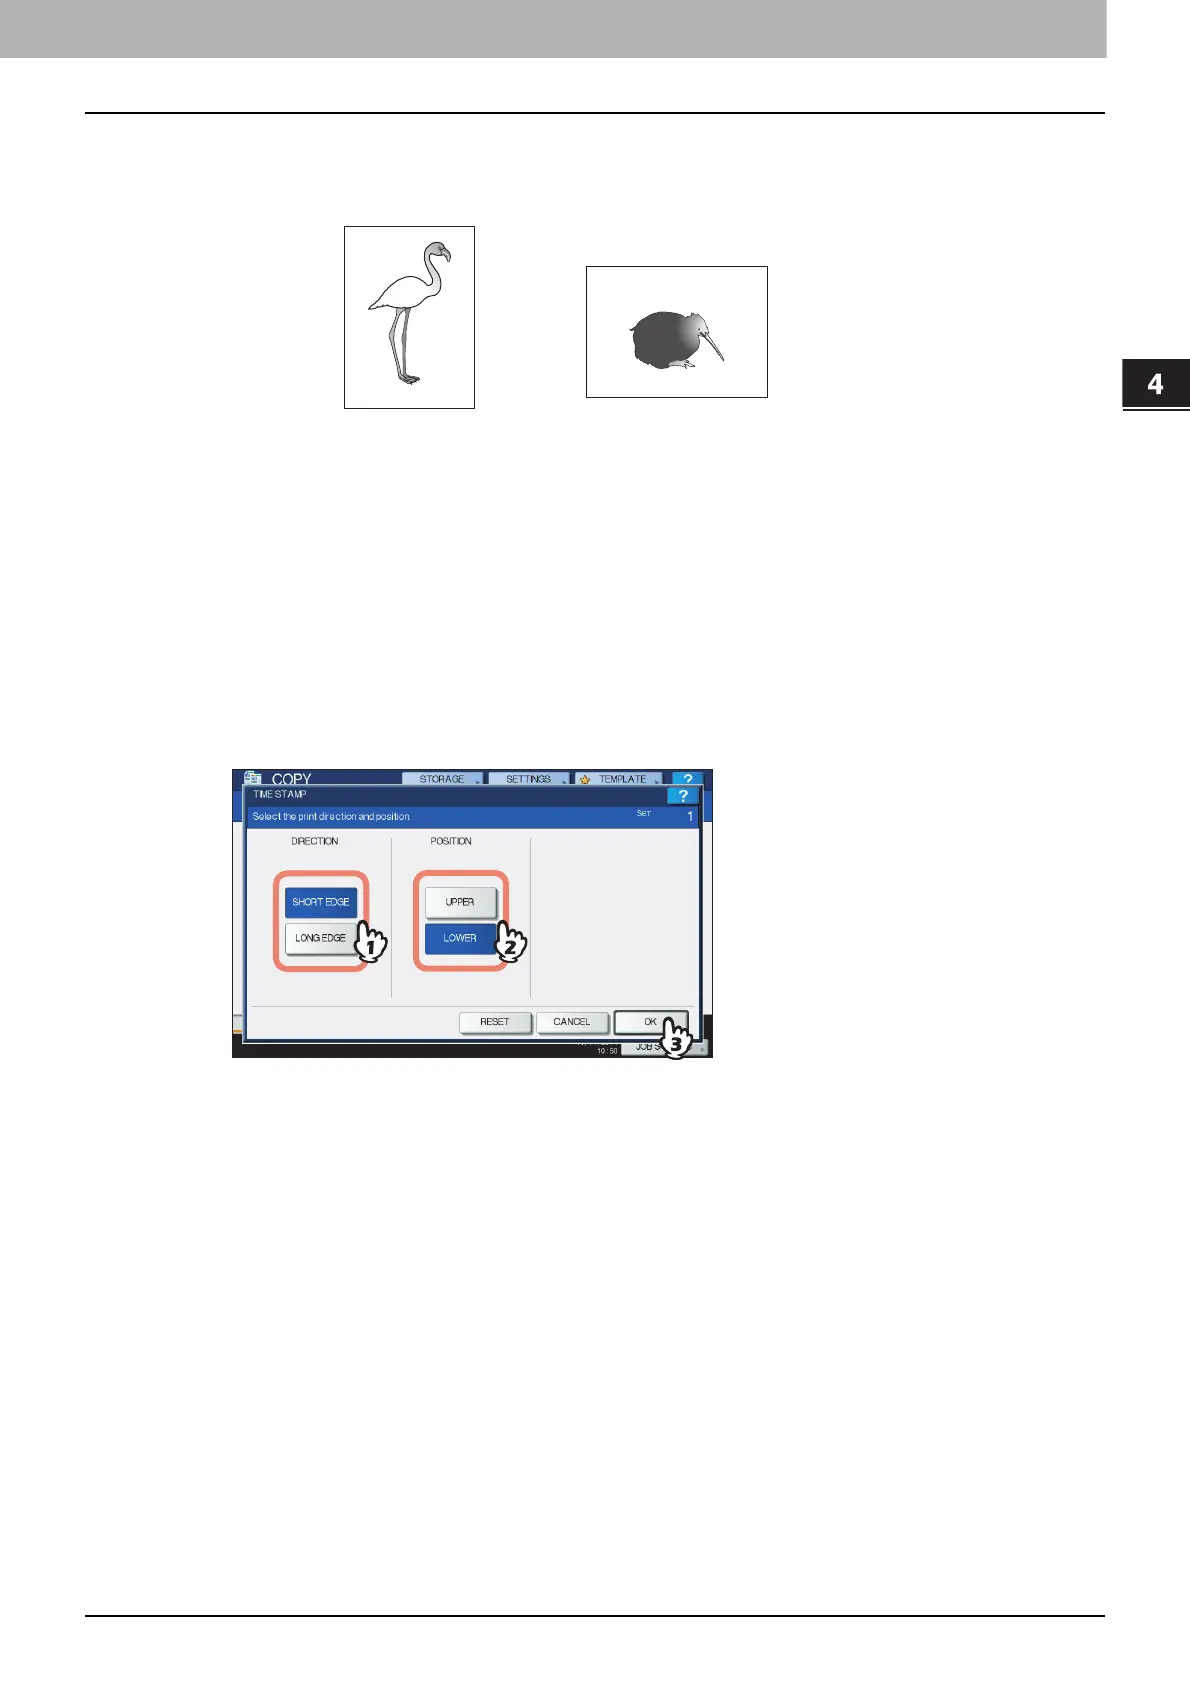
Press [TIME STAMP] on the EDIT menu.
4
Select the direction and position of the time stamp.
1) Select the direction ([SHORT EDGE] or [LONG EDGE]).
2) Select the position ([UPPER] or [LOWER]).
3) Press [OK].
5
Select other copy modes as required, and then press the [START] button on the control
panel.
MM.DD.YYYY 14:54
MM.DD.YYYY 14:54
Printed at the bottom
of a portrait copy
Printed at the top
of a landscape copy

Table of Contents

Other manuals for Toshiba e-STUDIO 257

Questions and Answers:

Question and Answer IconNeed help?

Do you have a question about the Toshiba e-STUDIO 257 and is the answer not in the manual?

Toshiba e-STUDIO 257 Specifications

General IconGeneral
BrandToshiba
Modele-STUDIO 257
CategoryAll in One Printer
LanguageEnglish

Related product manuals