3 BASIC COPY MODES
84 Duplex Copying
Making a 2-sided copy
If 1-sided portrait originals have been placed in a landscape direction and you copy them on both sides of
the paper, copied sheets are usually in the open to top/bottom direction. You can make copies in the open
to left/right direction with the image direction function.
P.120 “Image Direction”
1
Place paper in the drawer(s).
When using bypass copying, be sure to set the paper size.
2
Place the original(s).
3
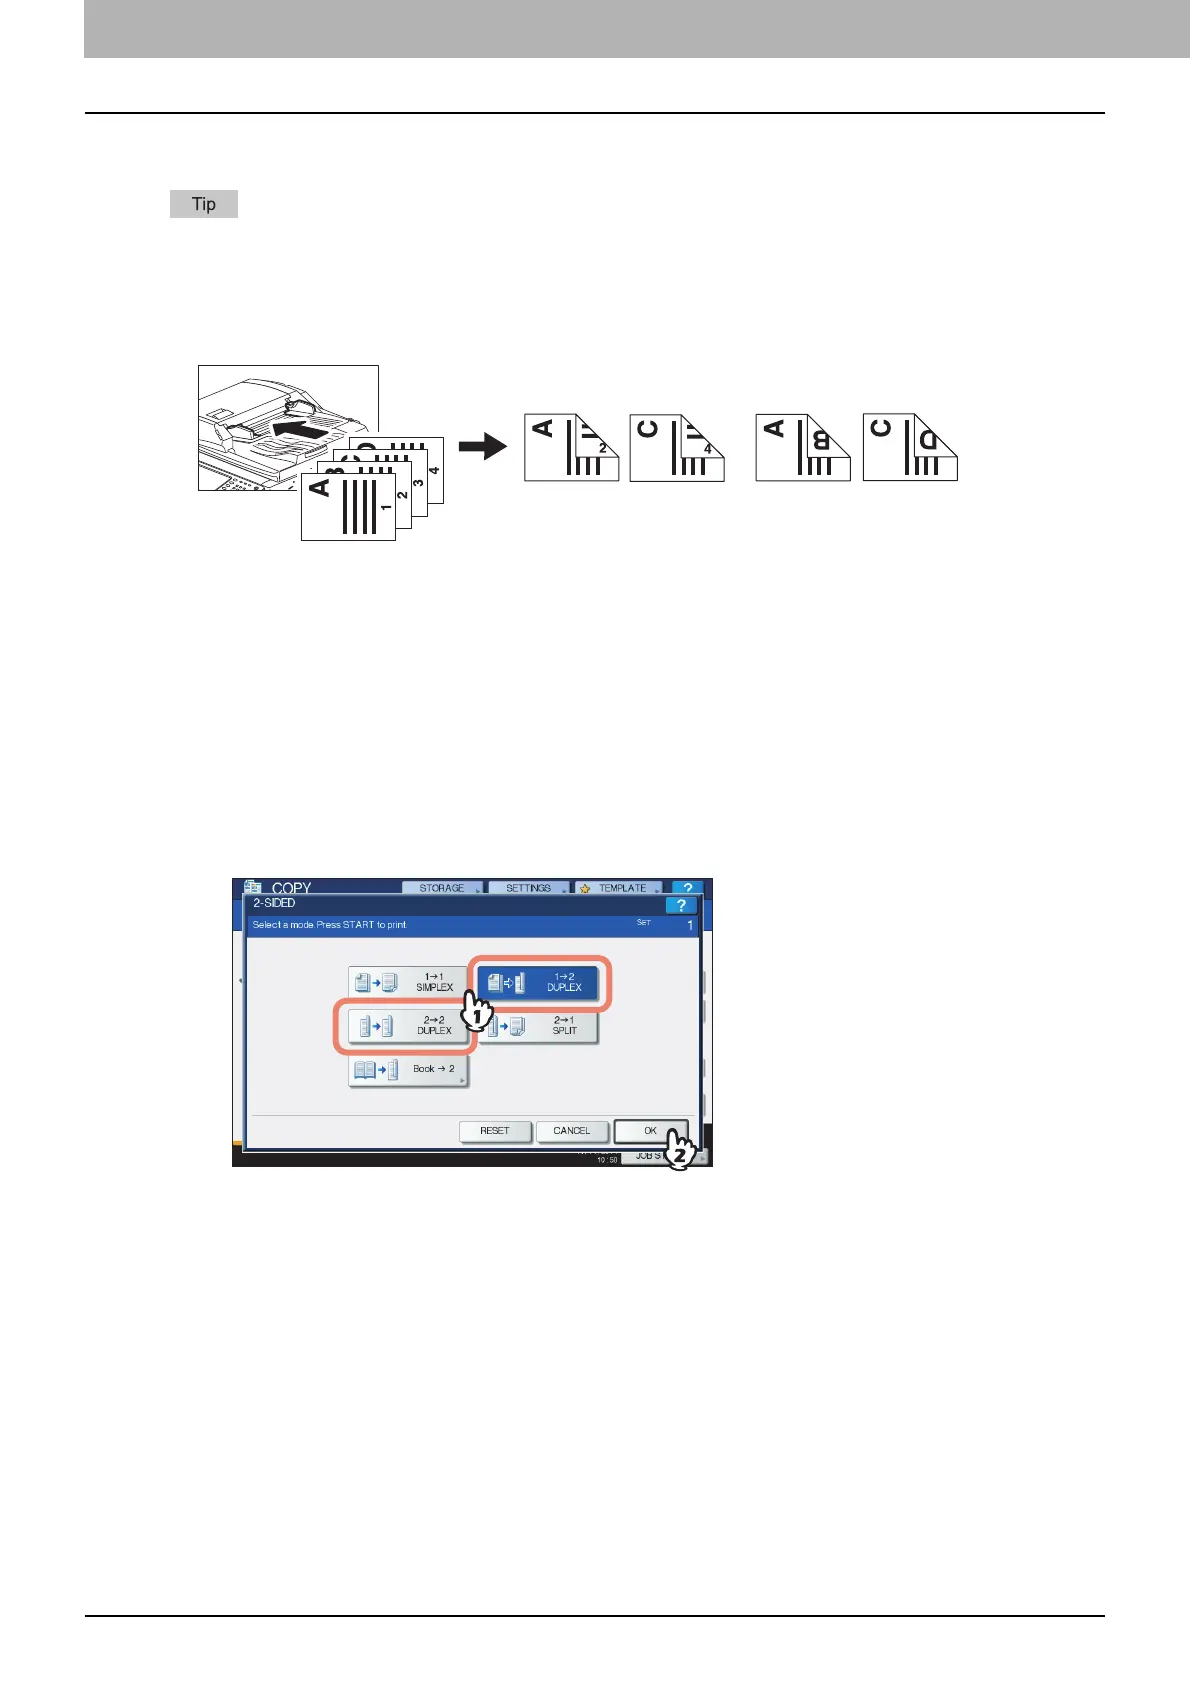
Press [2-SIDED] on the touch panel.
4
Select the desired mode, and then press [OK].
[1 -> 2 DUPLEX]: 1-sided original to 2-sided copy
[2 -> 2 DUPLEX]: 2-sided original to 2- sided copy
5
Select other copy modes as required, and then press the [START] button on the control
panel.
When placing the original on the original glass, follow steps 6 and 7 on P.28 “Basic copying
procedure”.
No setting“IMAGE DIRECTION” set

 Loading...