5-14
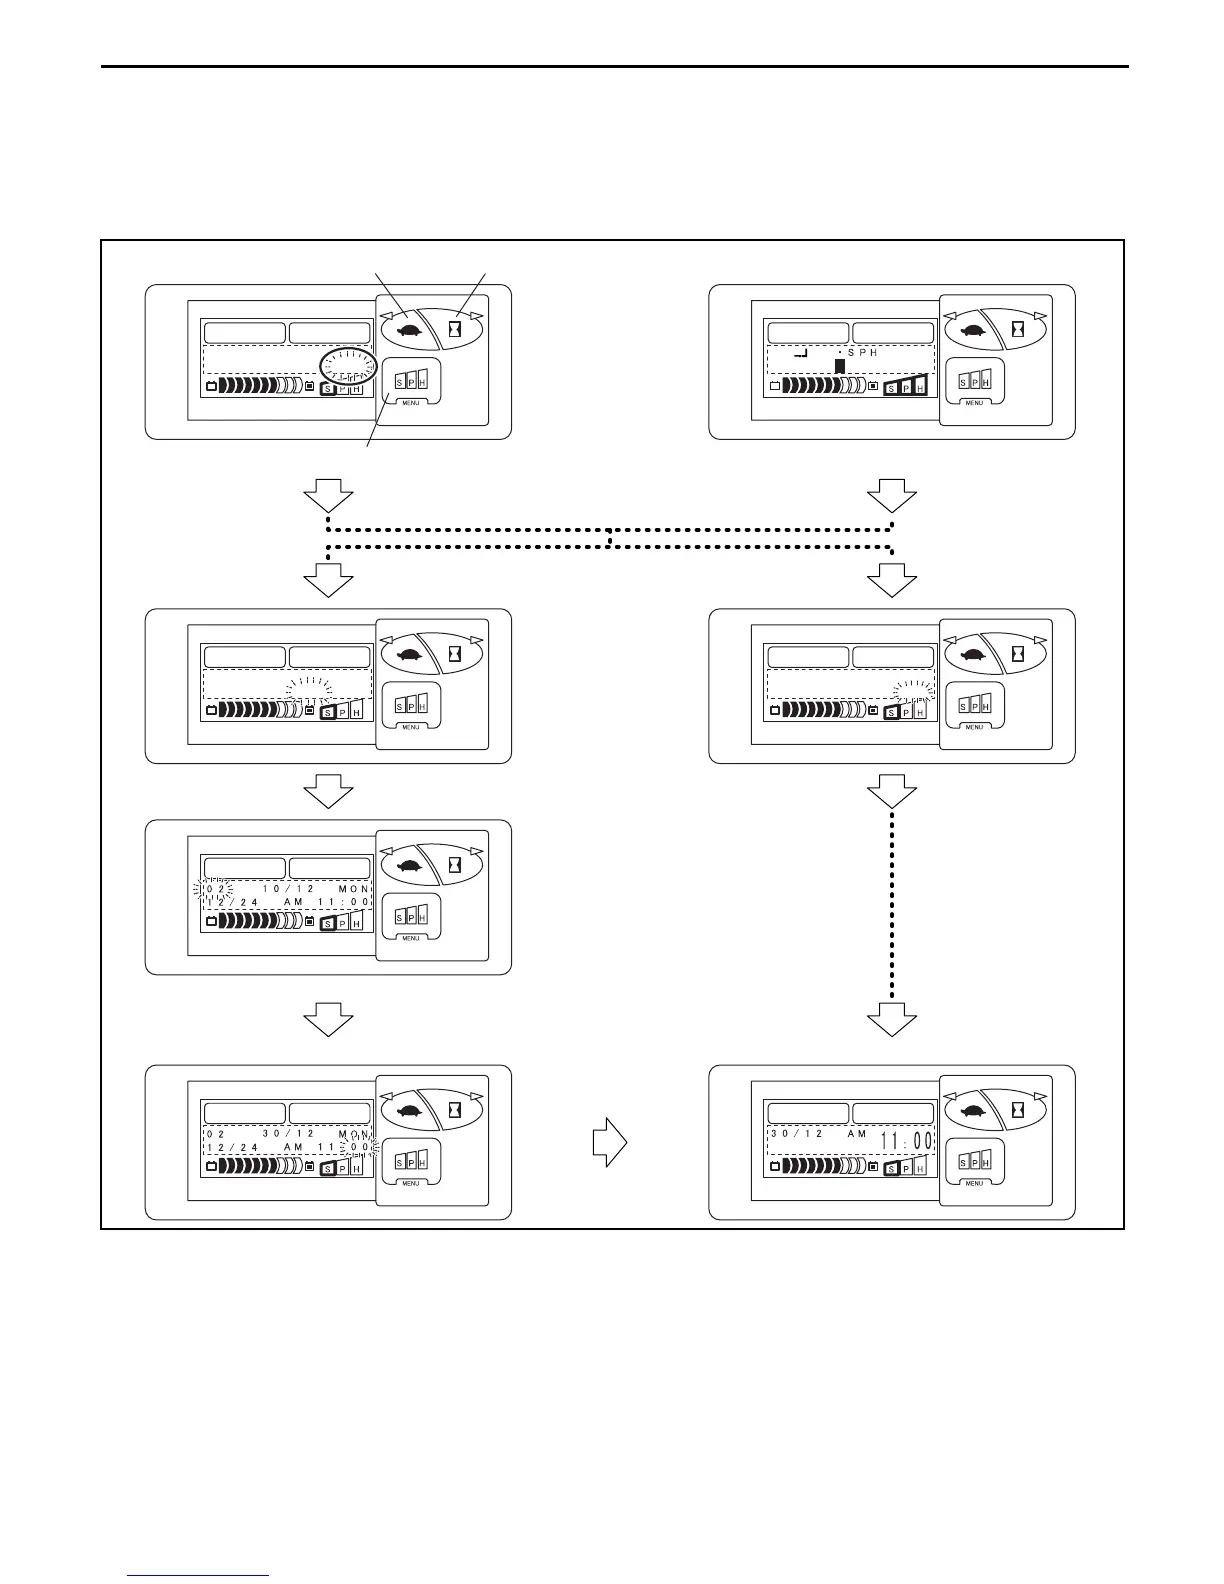
CLOCK SET FUNCTION SELECTION screen
The year, month, day, day of week, time and 12/24-hour display can be set independently.
Press button (2) on the POWER CONTROL FUNCTION SELECTION screen, select “NO”, and press
button (3), or press button (3) on the MATERIAL HANDLING POWER CONTROL LEVEL SETTING
screen to display the CLOCK SET FUNCTION SELECTION screen.
1. Press button (1) on the CLOCK DISPLAY FUNCTION SELECTION screen, select “YES” and press
button (3) to display the CLOCK SET screen.
CLOCK SET screen
1) Press button (1) to decrease the selected (blinking) value.
2) Press button (2) to increase the selected (blinking) value.
3) Press button (3) to enter the selected (blinking) value and proceed to the next item.
4) Press button (3) when “MINUTES” is selected on the CLOCK SET FUNCTION SELECTION
screen to display the next screen (GENERAL screen).
2. Press button (3) when “NO” is selected on the CLOCK SET FUNCTION SELECTION screen to display
the next screen (GENERAL screen).
End of clock setting
Each press of button (3) will shift
the selection item in this order:
month, day, ... and minute.
Press button (3)
Press button (3)
Select "NO" and press button (3)
POWER SEL ECT
YES / NO
Press button (3)
Press button (3)
Button (3)
Button (1)
Button (2)
CLOCK SET
YES / NO
CLOCK SET
YES / NO
 Loading...