smartPRINTER Operating Instructions
smartPRINTER Operating Instructions 003/10.2017 16
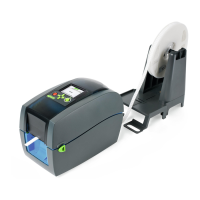
6.4.3 Inserting the Ink Ribbon
Insert the ink ribbon spool on the bottom of the print unit (Fig. EF1).
Place the ink ribbon spool on the spring-loaded holder.
Press the holder downwards with the ink ribbon spool, compressing the spring (Fig. EF2).
Keep compressing the spring, and place the opposite side of the ink ribbon spool on the
holder.
The bars on the holder should grip the notches in the cardboard core of the ink ribbon spool.
The ink ribbon spool is now correctly inserted.
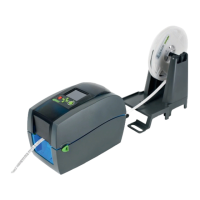
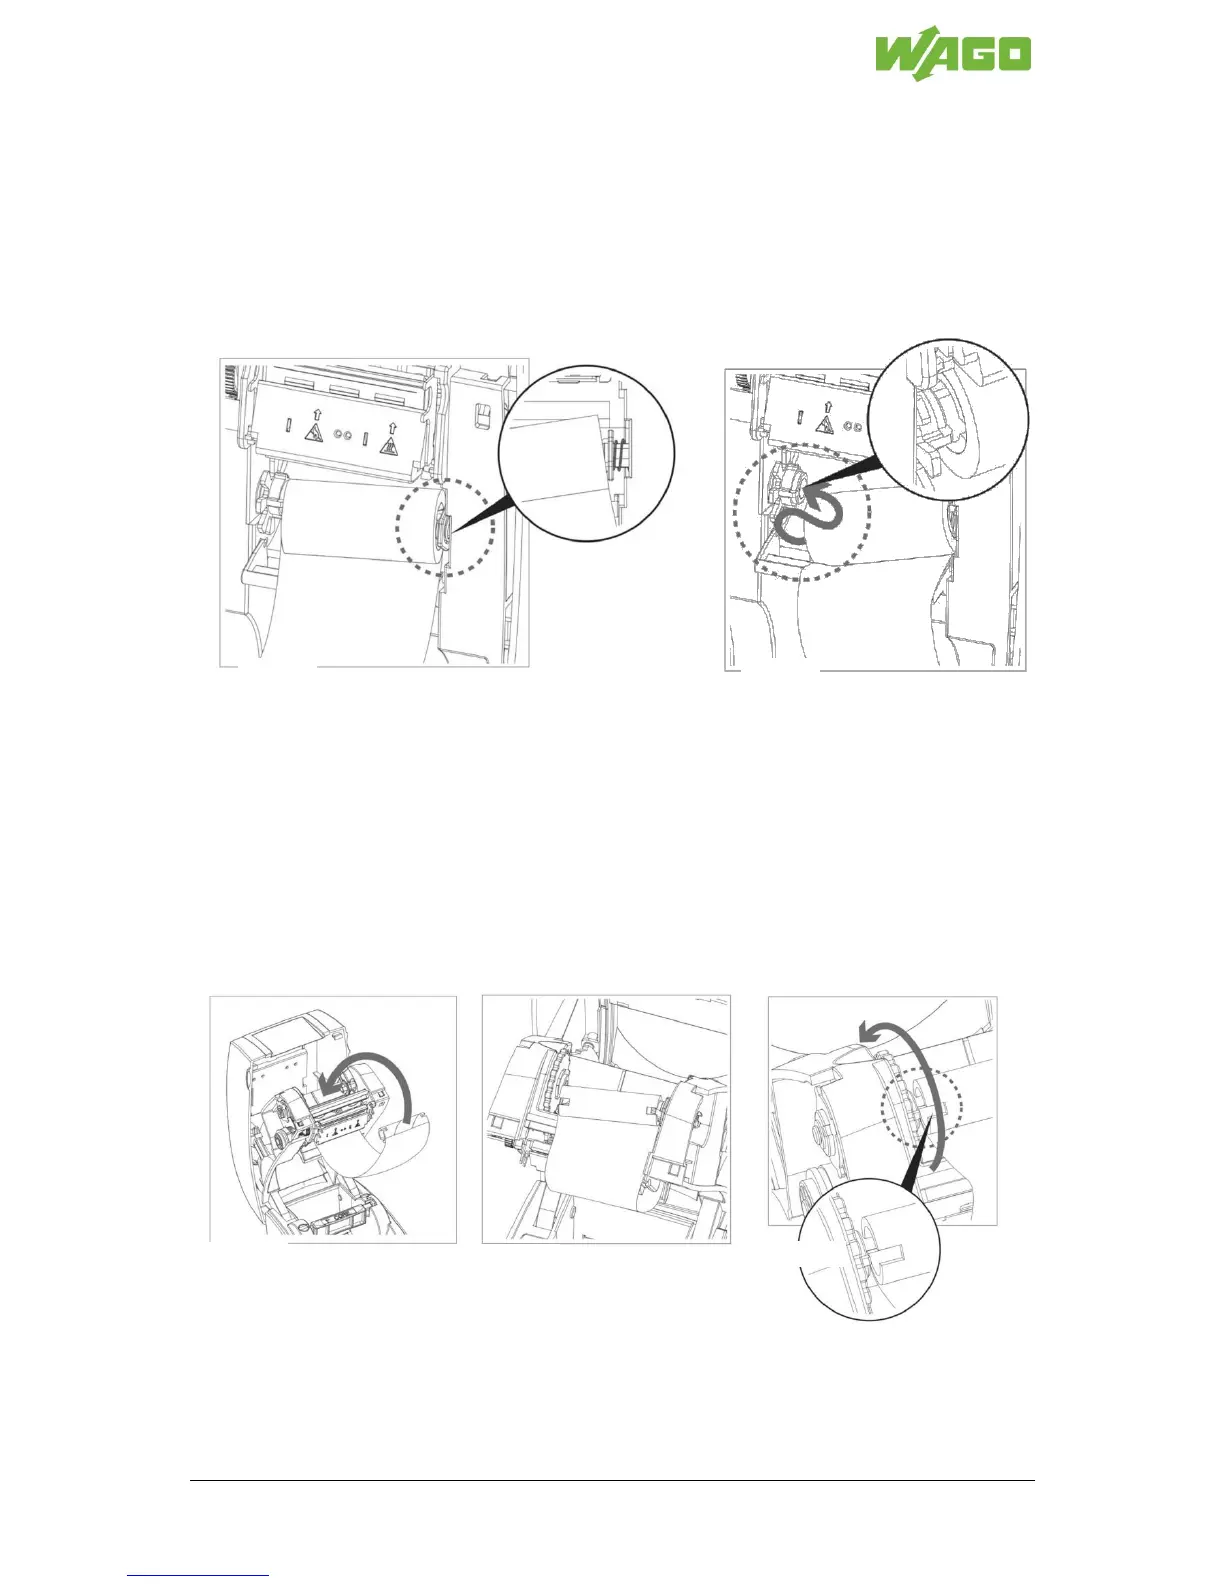
Insert the cardboard core for rewinding the ink ribbon on the top of the print unit (Fig. EF3).
Guide the cardboard core that has been turned in around the “head” of the print unit (Fig.
EF4).
Place the cardboard core on the spring-loaded holder.
Press the holder downwards with the cardboard core, compressing the spring
Keep the spring compressed. Place the opposite end of the cardboard core on the holder
(Fig. EF5).
The bars on the holder should grip the notches in the cardboard core.
The paper core for rewinding the ink ribbon is now correctly inserted.
Turn the green rotating wheel in the direction of the arrow until the black ink ribbon is wound
one full turn onto the cardboard core.
 Loading...