XO FLEX – Installation instructions Checking the unit
47
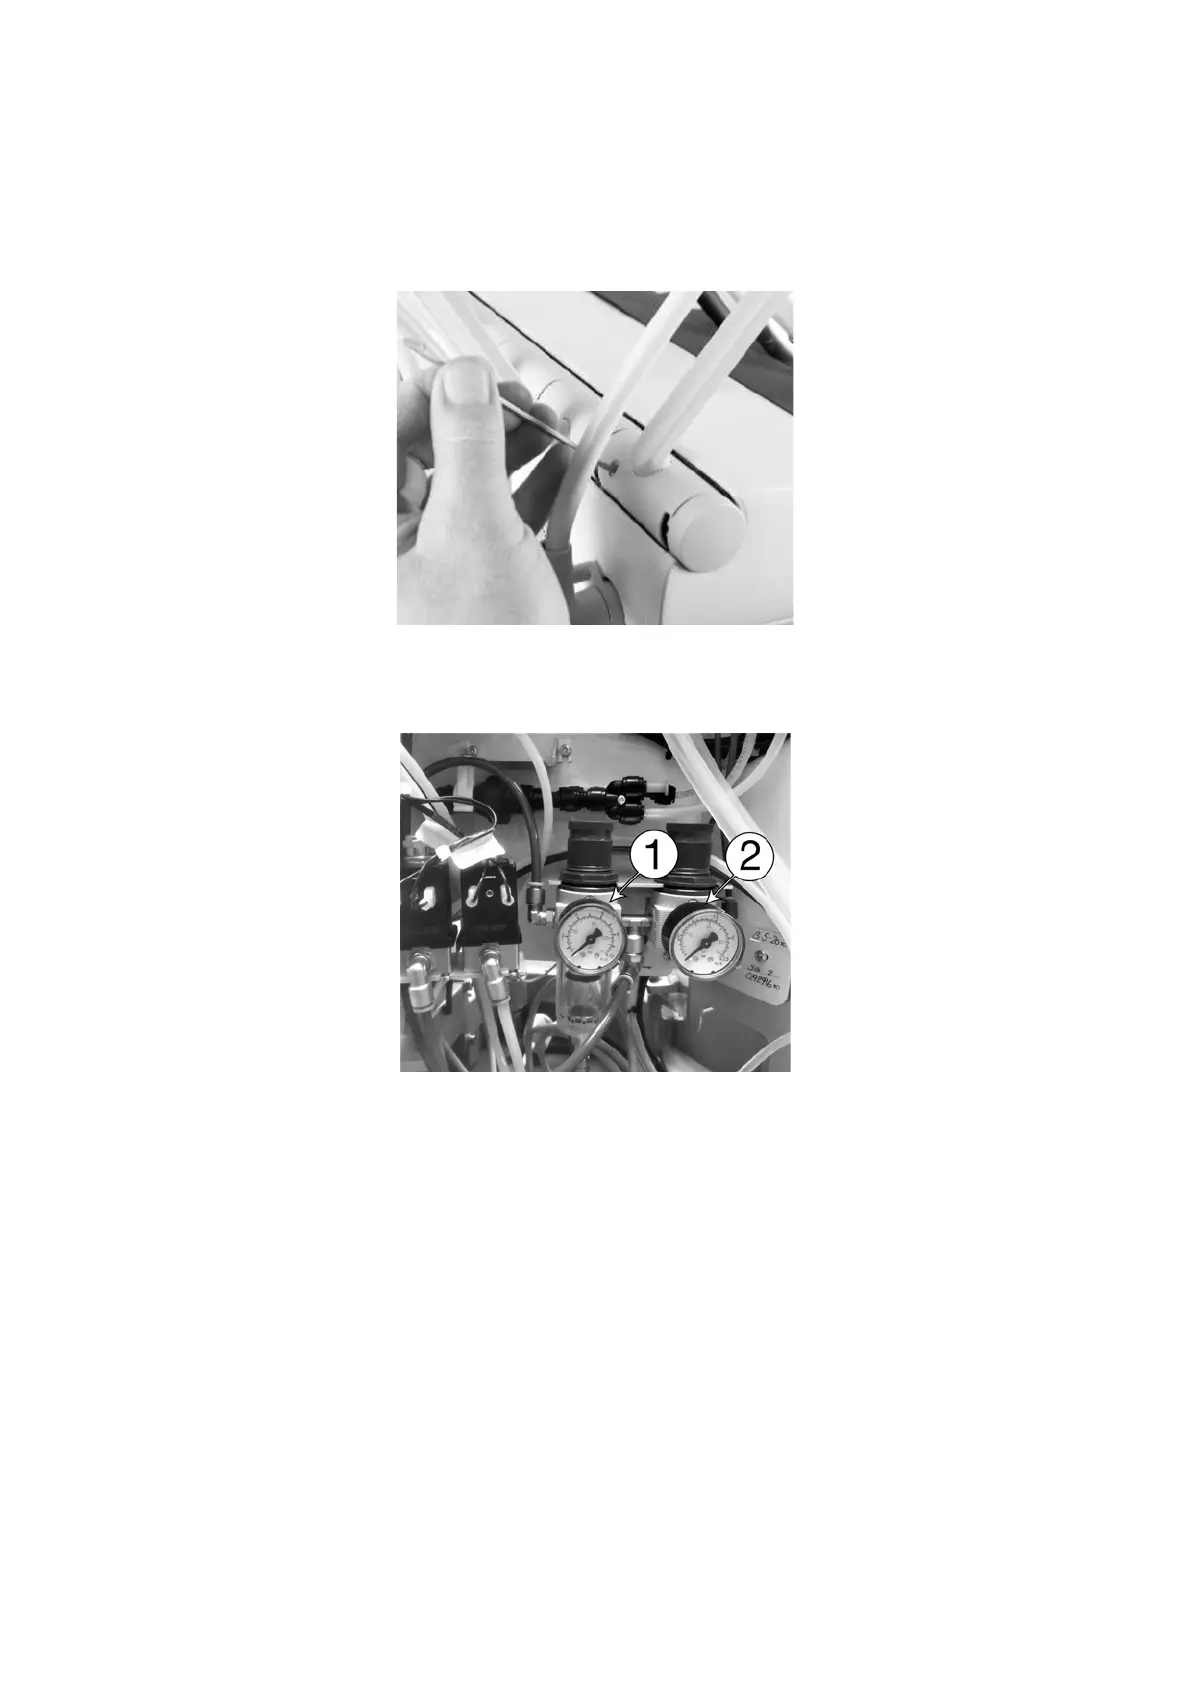
If necessary, adjust the instrument balance suspensions as follows:
1. Lift the suspension a bit forward, whereby an adjustment screw appears behind the roll.
2. Adjust the screw with a 2.5 mm Allen key.
Figure 64 – Adjustment of balance
6.2 START AND CHECK THE UNIT
Figure 65 – (1) Air manometer for bridge, (2) Air manometer for backflow prevention
1. Switch the unit on
2. Hear the “welcome” sound
3. Check that the display shows XO FLEX, software version and the serial number of the unit
just after power-on.
4. Open the water valve carefully.
5. Open the air valve.
6. Check that the air manometer shows 5.5 bar for the instrument bridge – (1) in Figure 65.
7. Check that the air manometer shows 2.5 bar – (2) in Figure 65.
8. If the unit is fitted with backflow prevention, wait about 5 minutes while the internal water
container is filled.
9. Activate the water button on the syringe until the water supply is air-free.
10. Vent the valve blocks by activating the last water-bearing suspension until the water is air-
free.
 Loading...

