XO FLEX – Installation instructions Checking the unit
50
Fit the test flowmeter (FA-400) to
the micromotor.
Lift the micromotor forward.
Check the cooling air pressure.
Activate the configuration button
under the bridge twice within one
second (see
Figure 66).
Adjustment of cooling air to 10
l/min.
Activate
to increase pressure.
Activate
to decrease pressure.
Activate ◄ to save value.
Place the micro motor on the
instrument bridge again.
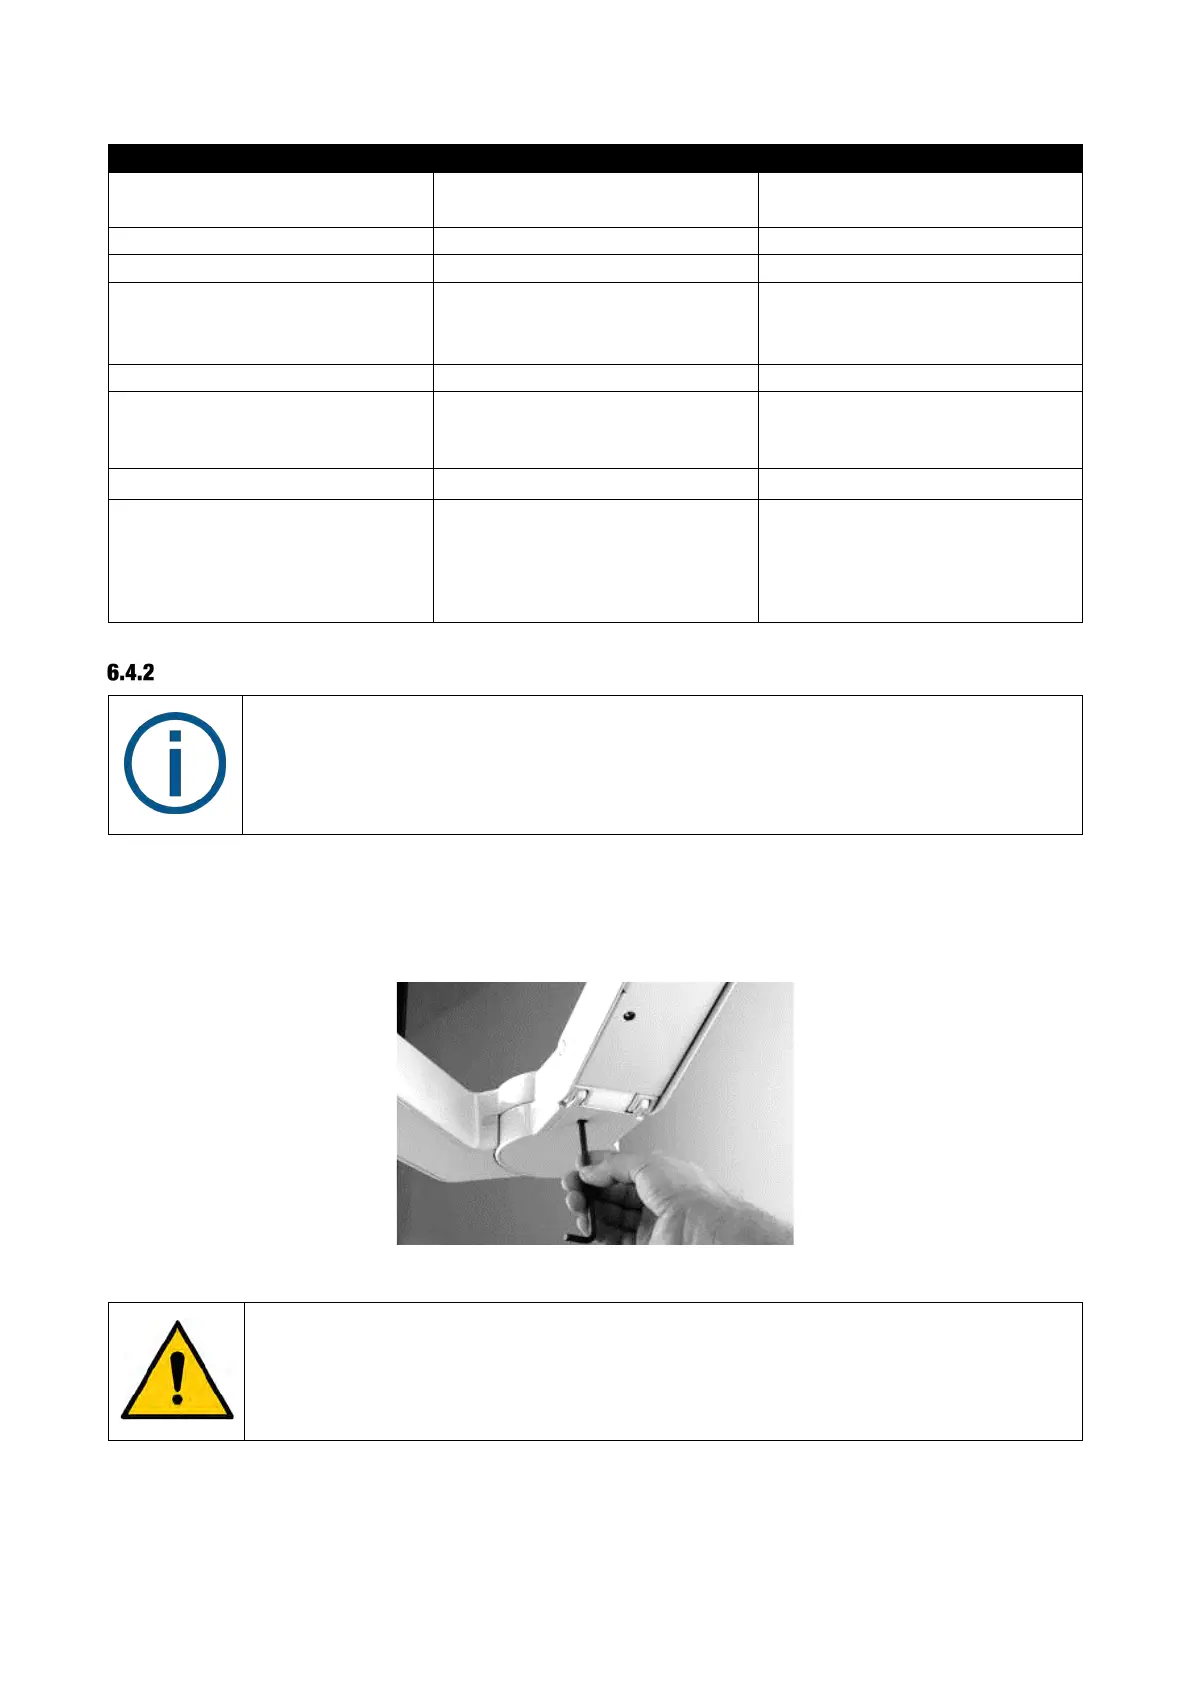
ADJUSTING THE BALANCE SPRING AND FRICTION BRAKE IN THE BRIDGE FOREARM
When all instruments – incl. handpieces – are fitted to the bridge and the hand
instrument table carries the “normal” load (maximum load on instrument table is 1.5
kg):
• The instrument bridge should be in balance in all positions and
• It should be easy to maneuver with “two fingers”
1. Move the instrument bridge to the highest, middle and lowest positions.
2. Adjust the balance spring with a 6 mm Allen key as shown in Figure 68.
3. If necessary, adjust friction at the specified load and adjust with 4 mm Allen key as shown in
Figure 69.
Figure 68 – Adjusting the balance spring in the bridge forearm
Do not tighten the friction brakes too much!
If the brake is too tight it may result in a mechanical hazard!
If it is not possible to keep the arms in balance without overtightening the brakes, the
unit is not in level and the steps described in section 5.2.5 should be followed to level
the unit.
 Loading...

