XO FLEX – Installation instructions Checking the unit
51
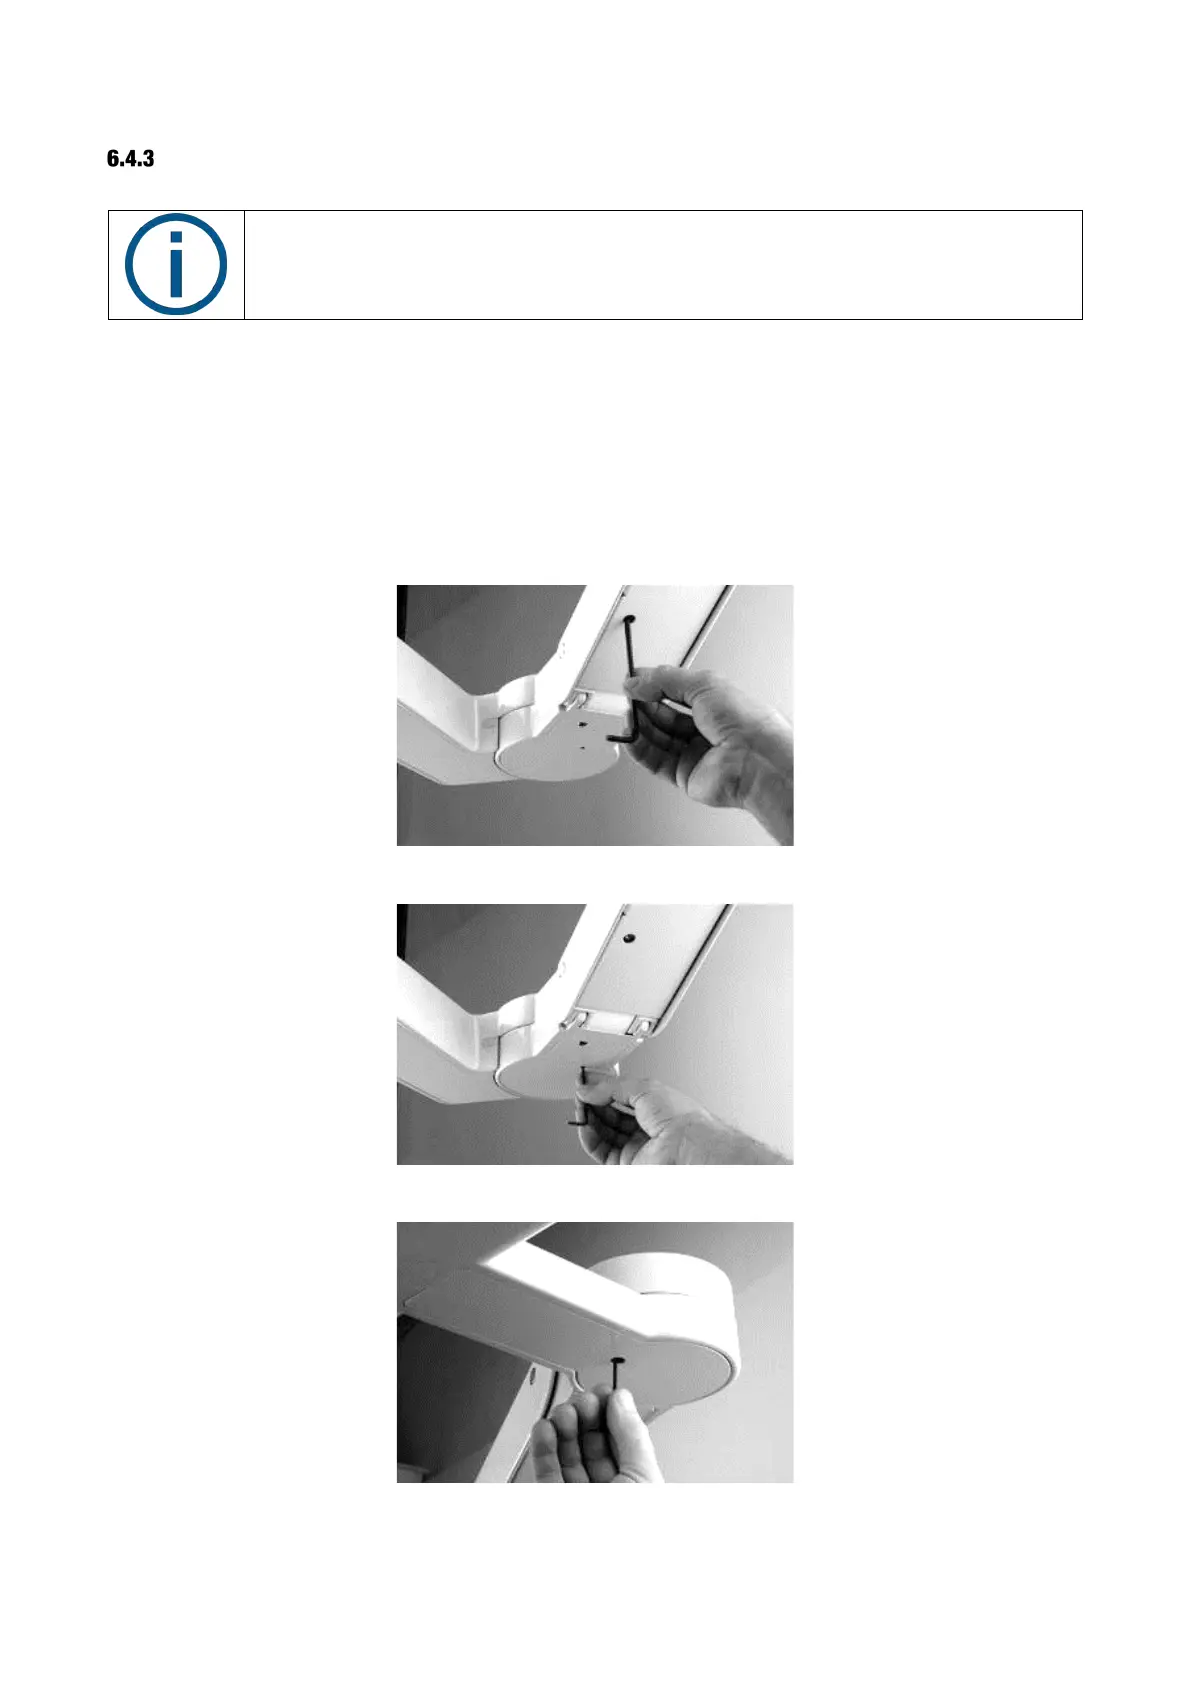
ADJUSTING THE PIVOTING JONTS OF THE BRIDGE ARM
The instrument bridge should be easy to move in the horizontal plane, and it should
not move by itself.
The instrument bridge arm has three pivoting joints.
Each pivoting joint has its own friction brake adjustable with a 3 mm or a 6 mm Allen key. See
Figure 70, Figure 71 and Figure 72.
The friction brake in the rear bridge arm is hidden behind the Ø 150 mm cylindrical panel covering
the unit stand post. Remove the cover plug in the back of the cylinder to access the friction brake.
See Figure 72.
Figure 69 – Adjusting the friction brake in the bridge forearm
Figure 70 –Adjusting the friction brake in the swivel joint
Figure 71 – Adjusting the friction brake in the swivel joint
 Loading...

