Page 83FT-2000D OPERATING MANUAL
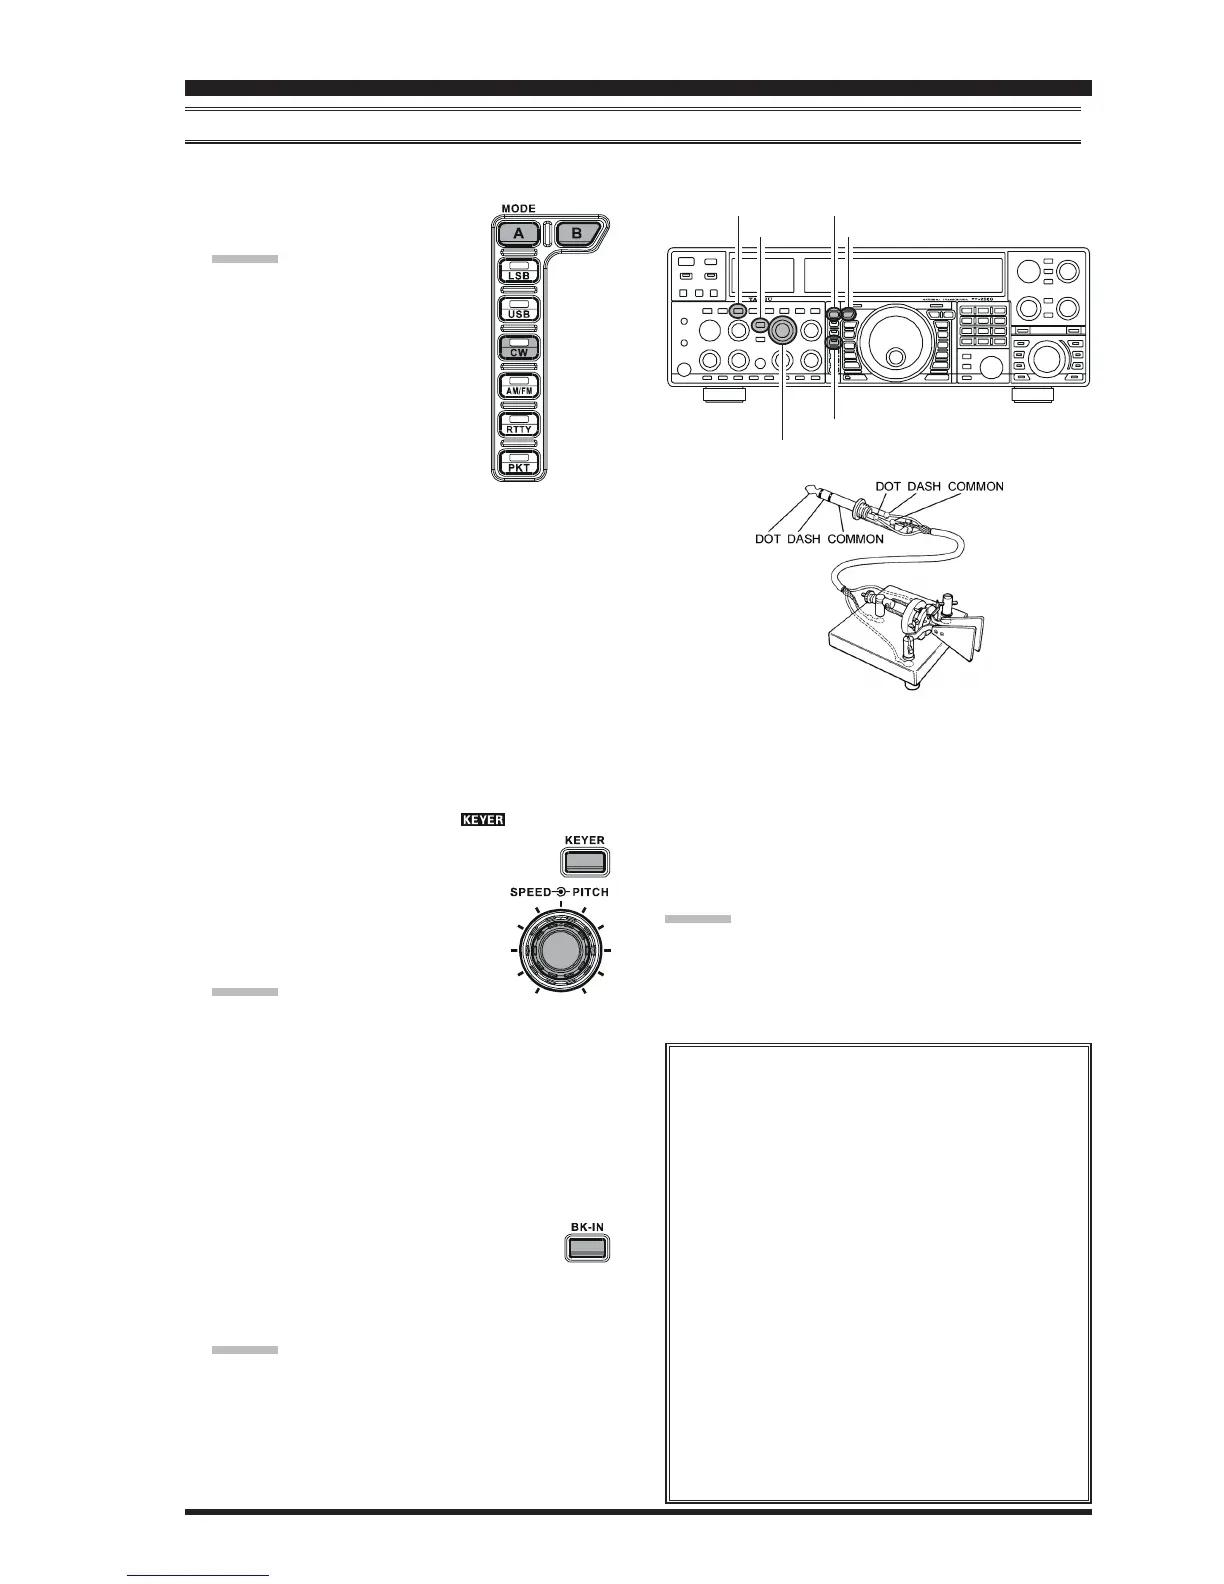
CW MODE OPERATION
USING THE BUILT-IN ELECTRONIC KEYER
Connect the cable from your keyer paddle to the front or rear panel KEY jack.
1. Press the
[
CW
]
mode button to en-
gage CW operation.
ADVICE:
The operating mode is selected
using the
[
MODE
]
buttons to the
left of the Main Tuning Dial knob,
and the VFO (A or B) to which
the selection is applied is selected
by the
[
A
]
or
[
B
]
button above
the
[
MODE
]
buttons. Usually, the
[
A
]
button glow Red, signifying
Main band (VFO-A) is being ad-
justed. Similarly, pressing the
[
B
]
button will cause
its indicator to blinks Orange for five second, signi-
fying Sub band (VFO-B) adjustment. Therefore,
press the
[
A
]
or
[
B
]
button to select the desired VFO,
then press the
[
CW
]
button to select the CW mode.
If you press the
[
CW
]
button once more, after ini-
tially selecting CW, you will engage the “CW Re-
verse” mode (see page 86), whereby the “oppo-
site” sideband injection is used, compared to the
“normal” sideband. The LSB LED will blink for
three seconds if you select CW Reverse.
2. Rotate the Main Tuning Dial knob to select the desired
operating frequency.
3. Press the
[
KEYER
]
button. The “ ” icon will ap-
pear in the display, confirming that the built-
in Electronic Keyer is now active.
4. Rotate the
[
SPEED
]
knob to set the
desired sending speed (4 ~ 60 WPM).
Clockwise rotation of the
[
SPEED
]
knob will increase the keying speed.
ADVICE:
The Sub band (VFO-B) frequency display will show
the keying speed for 3 seconds whenever the
[
SPEED
]
knob is turned.
You may disable this feature (displaying the key-
ing speed) via Menu item “015 diSP LVL IND.”
See page 117 for details.
When you press either the “Dot” or “Dash” side of
your paddle, the transmitter will automatically be
activated.
5. If you press the
[
BK-IN
]
button, “semi-break-
in” operation (discussed previously) will be en-
gaged.
6. CW operation utilizing your paddle may now com-
mence.
ADVICE:
When you utilize your keyer paddle, the transmitter
will automatically be activated, and the CW charac-
ters (or a strong of dots and dashes) will be transmit-
ted. When you release the keyer paddle contacts, trans-
mission will cease after a brief delay; the delay time is
user-programmable, per the discussion on page 87.
ADVICE:
If you reduce power using the
[
RF PWR
]
knob, the ALC
meter reading will increase; this is normal and does not
indicate any problem whatsoever (because increased ALC
voltage is being used to lower the power).
Full Break-in (QSK) Operation
As shipped from the factory, the FT-2000D TX/
RX system for CW is configured for “Semi-break-
in” operation. However, using Menu item “060 A1A
BK-IN,” you may change this setup for full break-
in (QSK) operation, whereby the switching is quick
enough to hear incoming signals in the spaces be-
tween the dots and dashes of your transmission.
1. Press the
[
MENU
]
button to enter the Menu
mode.
2. Rotate the Main Tuning Dial knob to select
Menu item “060 A1A BK-IN.”
3. Rotate the
[
SUB VFO-B
]
knob to set this
Menu item to “
FuLLFuLL
FuLLFuLL
FuLL.”
4. Press and hold in the
[
MENU
]
button for two
seconds to save the new setting and exit.
[
CW
]
Button
[
B
]
Button
[
A
]
Button
[
BK-IN
]
Button
[
SPEED
]
Knob
[
KEYER
]
Button
 Loading...