User Guide for the SIP-T46G IP Phone
42
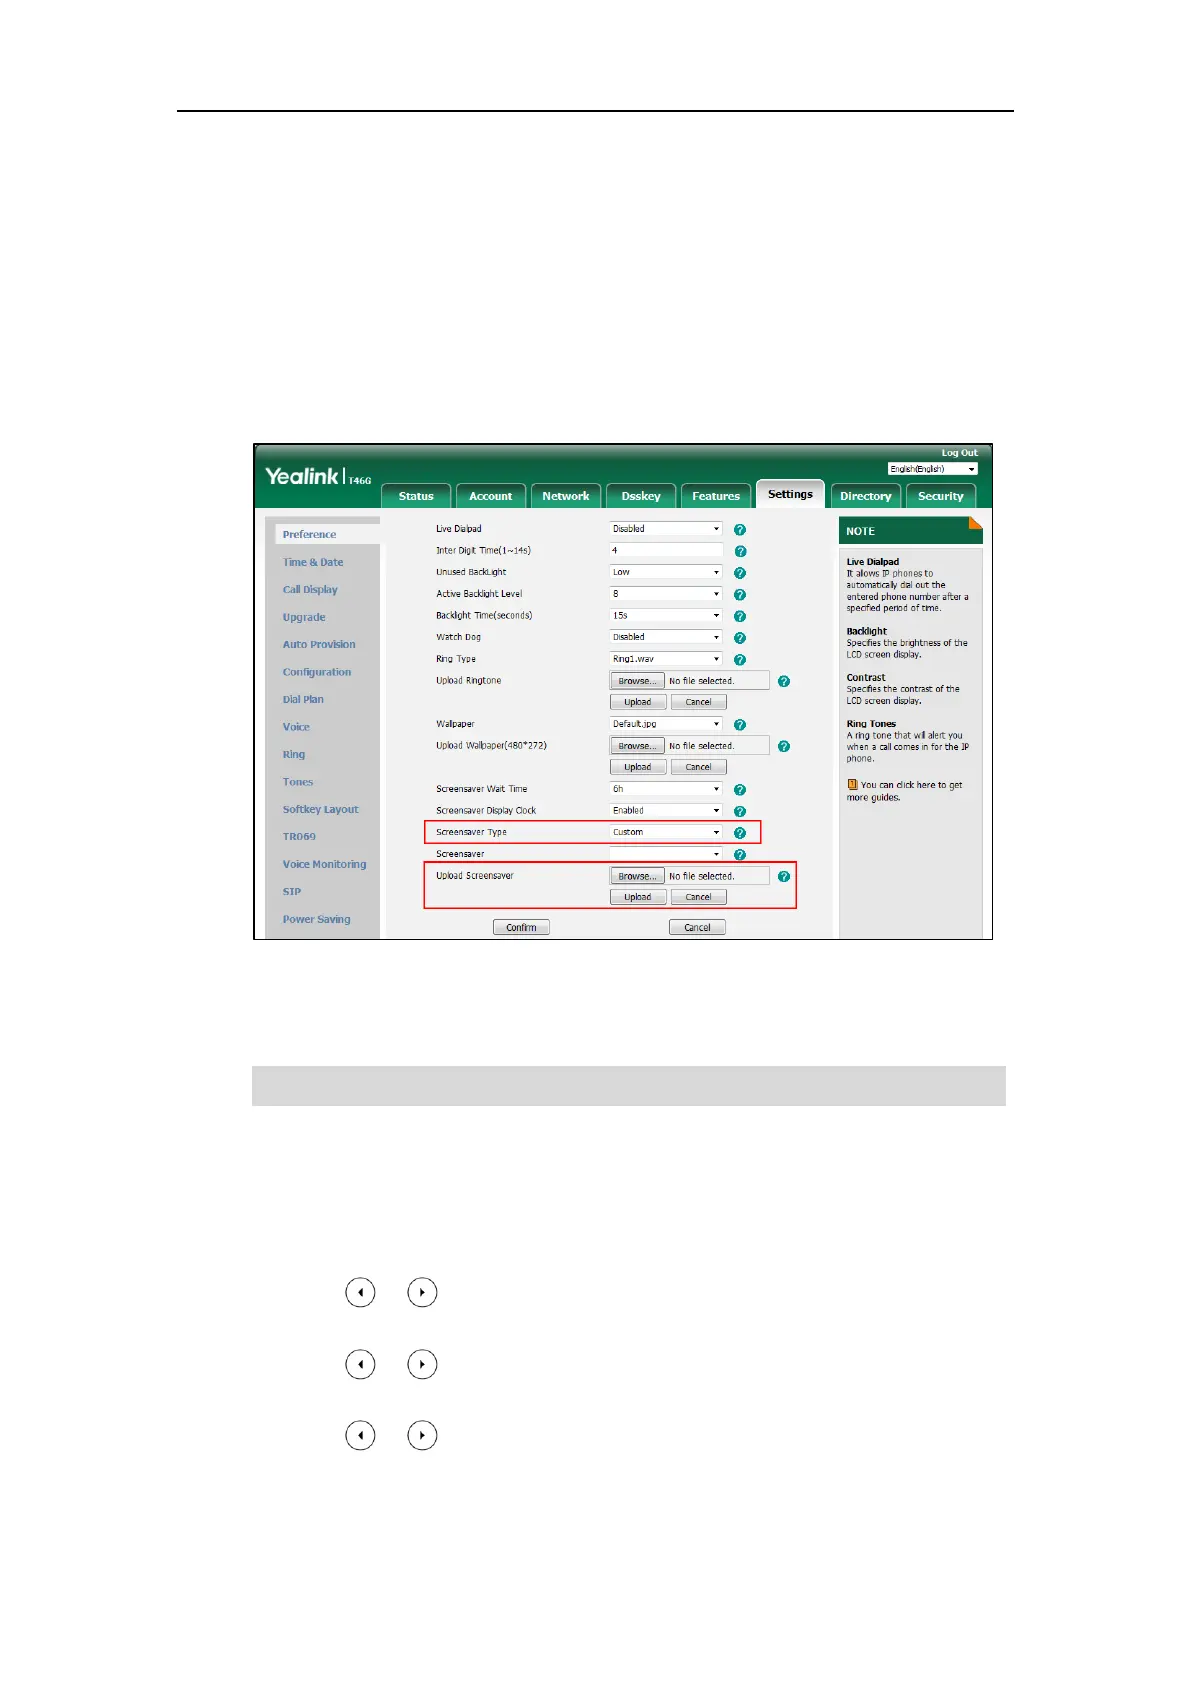
Uploading the Custom Picture via Web User Interface
To upload a custom picture via web user interface:
1. Click on Settings->Preference.
2. Select Custom from the pull-down list of Screensaver Type.
3. In the Upload Screensaver field, click Browse to locate the custom picture from your local
system, and then click Upload.
This field appears only if Screensaver Type is set to Custom.
The custom picture appears in Screensaver list. You can only delete the custom picture by
clicking Del in the Screensaver field.
Note
Configuring the Screen Saver
To configure the screen saver via phone user interface:
1. Press Menu->Basic->Display->Screensaver.
2. Press or , or the Switch soft key to select the desired wait time from the Wait
Time field.
3. Press or , or the Switch soft key to select the desired value from the Display
Clock field.
4. Press or , or the Switch soft key to select the desired screen saver type from the
Screensaver Type field.
You can only upload one custom image at a time via web user interface.
 Loading...