40 PowerFlex® 700S Drives - Phase I Control (Frame Sizes 9 & 10)
Step 9: Verifying the
Start-up Check List
This section describes how you start-up the PowerFlex 700S drive.
Important: If you have a DriveLogix application, you must first connect the battery
before starting this section.
Before Applying Power to the Drive
1. Confirm that motor wires are connected to the correct terminals and are secure.
Note: Refer to “Power Terminal Specifications” for the appropriate drive frame
size for motor connection information.
2. Confirm that encoder wires are connected to the correct terminals and are secure.
3. Confirm that all control inputs are connected to the correct terminals and are
secure.
4. Verify that AC line power at the disconnect device is within the rated value of the
drive.
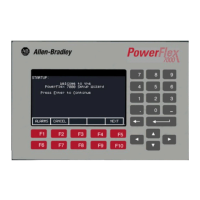
The remainder of this procedure requires a HIM (Human Interface Module) be
installed. If an operator interface is not available, remote devices should be used to
start-up the drive.
!
ATTENTION: Power must be applied to the drive to perform the following start-up
procedure. Some of the voltages present are at incoming line potential. To avoid electric
shock hazard or damage to equipment, only qualified service personnel should perform
the following procedure. Thoroughly read and understand the procedure before
beginning. If an event does not occur while performing this procedure, Do Not Proceed.
Remove Power including user supplied control voltages. User supplied voltages may
exist even when main AC power is not applied to then drive. Correct the malfunction
before continuing.
V
L1
L2
L3
 Loading...
