Designing Touch Panel Pages
34
4" Color Touch Panels with Audio
Setting the level code
Level buttons set the device and number codes for the touch panel.
1. Press
DEV to open a keypad and set the device number.
2. Enter 1, 2, 3, or 4 in the keypad. The programming software uses device codes
1 - 4 to identify the touch panel.
3. Press
ENTER to save the level device number, close the keypad, and return to the Button
Properties page.
4. Press
NUM to open a keypad and set the level number assigned to the device.
5. Enter a number 1 – 8. Each device can have from 1 – 8 levels except joysticks, where the range
is 1 – 7.
6. Press
ENTER to save, close the keypad, and return to the Button Properties page.
Using the Adjust Sensors Setup Page
The button illumination, infrared, microphone, speakers, and light sensors on the CP4/A panels
come factory defaulted with values that can be changed by each user to suit their needs. Refer to
the Programming section on page 41 for more detailed information on commands.
This page is used to configure the various features and parameters for the CP4/A panel sensors. To
access the Sensors Setup page:
1. From the Main page press the
SETUP button.
2. Press
ADJUST SENSORS from the Setup page (FIG. 26 on page 29).
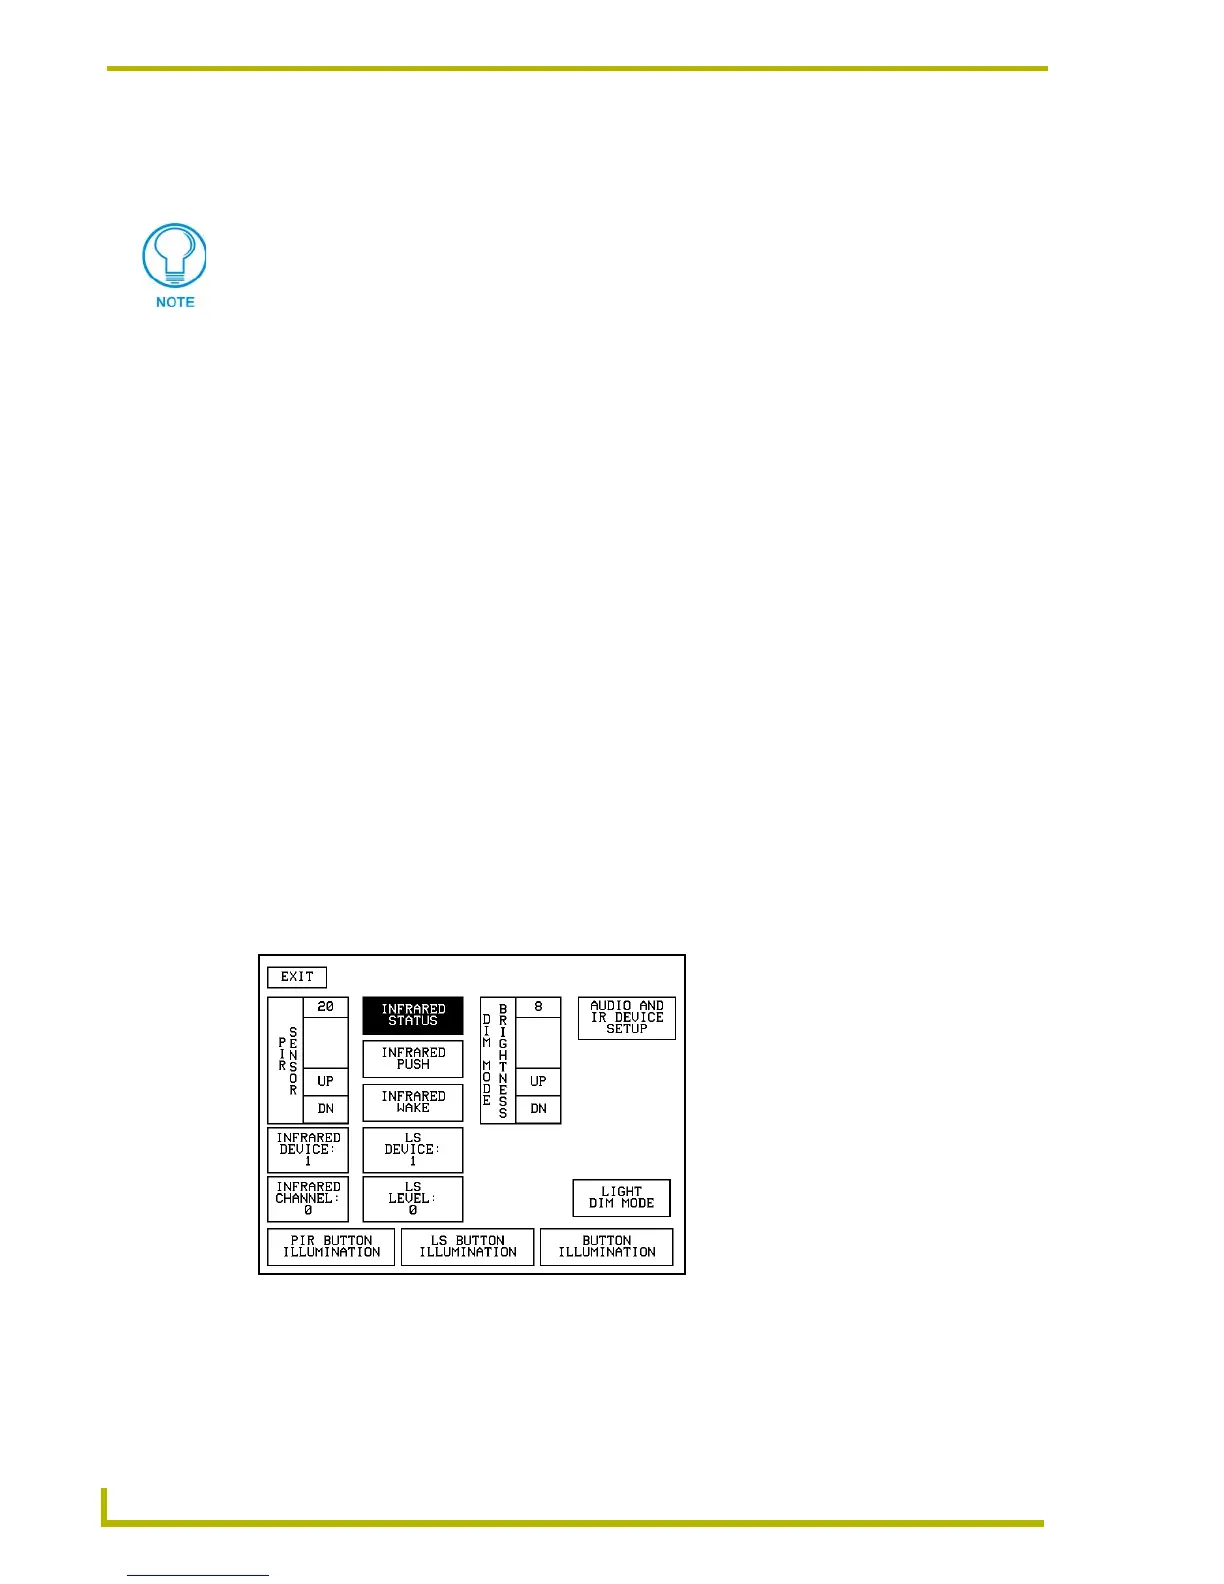
3. Choose from any of the sensor setup buttons on the Adjust Sensors page (FIG. 30).
4. Calibrate the following sensors before the system is used.
PIR SENSOR adjusts the effective sensitivity (physical detection range) of the Passive
Infrared Sensor. The activation threshold range of the
PIR SENSOR is 1 - 20. An
Joysticks use two level numbers. The first is for the X-axis and the second for the
Y-axis. You only need to specify the first level.
FIG. 30 Adjust Sensors page
 Loading...