Upgrading the Firmware
67
4" Color Touch Panels with Audio
Upgrading the Firmware
To upgrade the firmware, your PC must be connected to the program port, on the Master, using a
DB9 programming cable. The panel must also be connected to the Controller via an AXlink or
2.5 mm connector inserted into the Programming jack on the side of the panel.
If power is lost during the download process, the unit powers up with the same set of code prior to
the download.
Communication Methods for CP4/A Firmware Update
There are three-ways to communicate to the CP4/A touch panel:
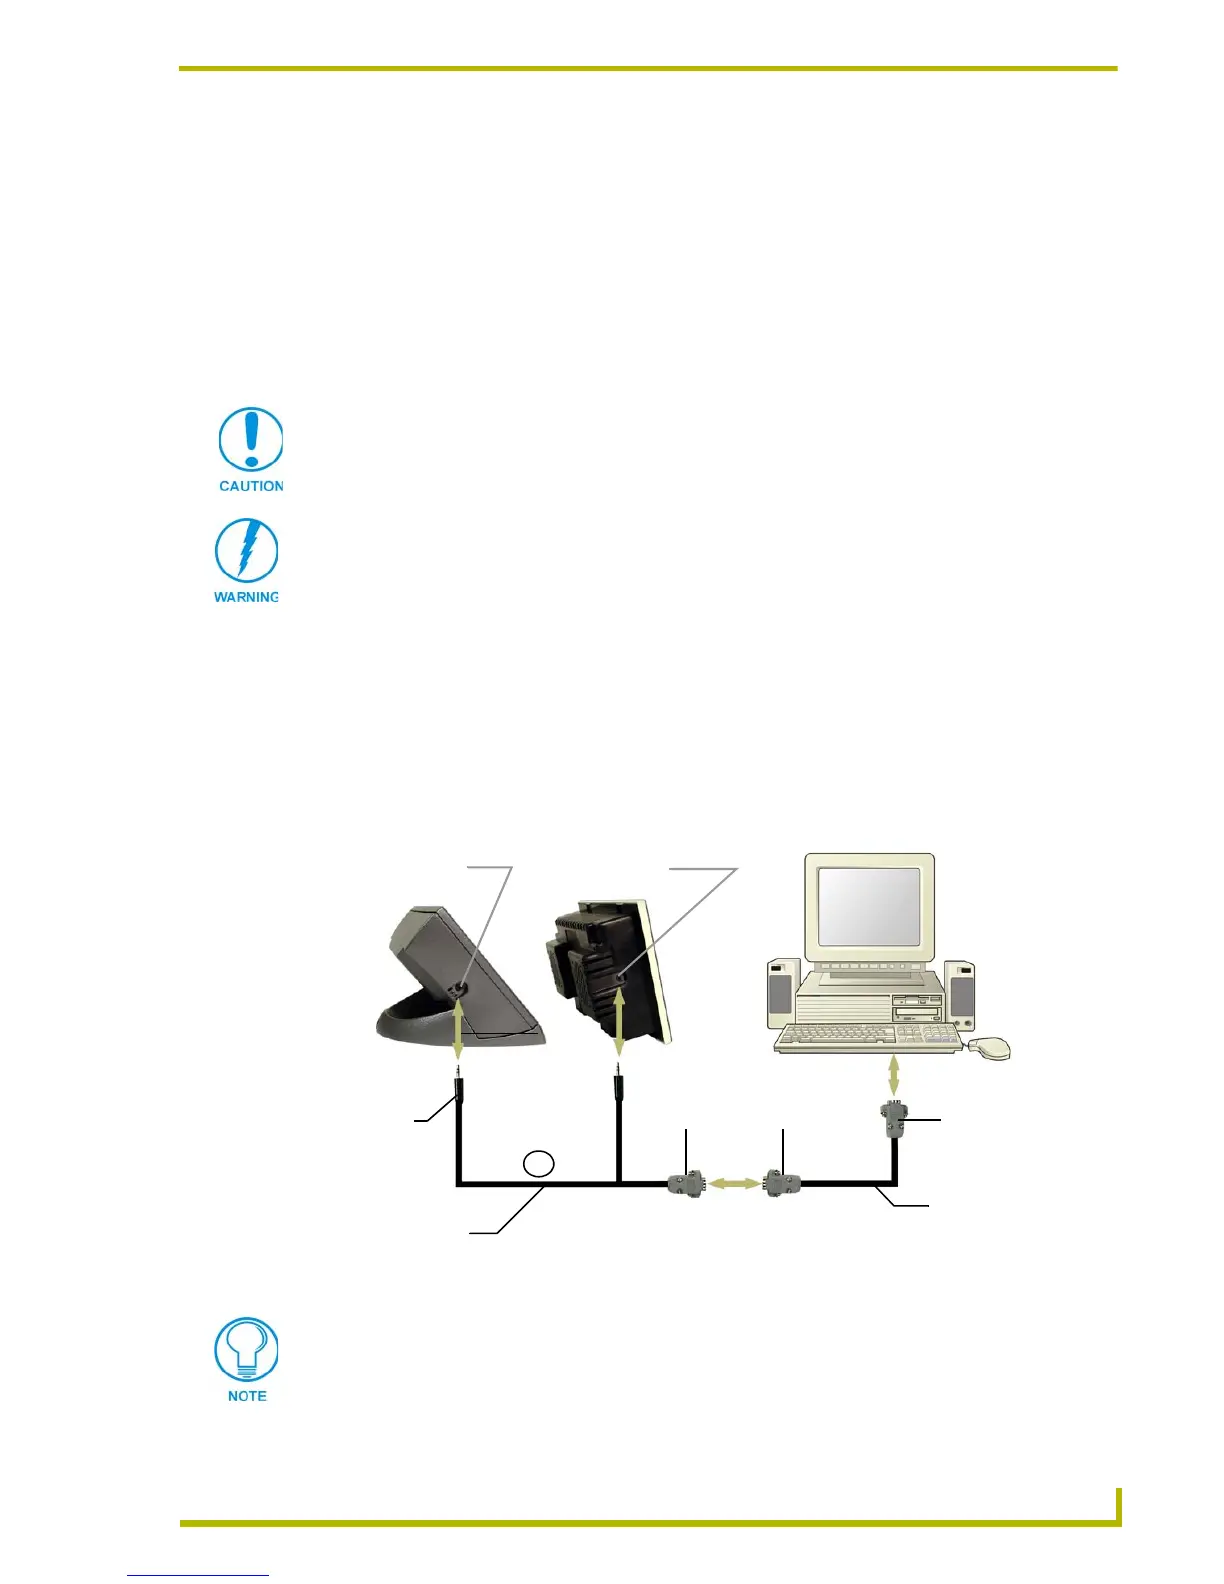
RS-232 from the PC (FIG. 32): In this method, a user connects one end of the Axcess
programming cable (FG10-727) DB9 female to the PC COM port (male) and the other
DB9 female end to the CP4/A programming cable (FG10-817). The 2.5 mm stereo plug
on this cable is then inserted into the CP4/A programming jack.
There is a small window during which a loss of power can be catastrophic. If power is
lost between the erase of flash memory and the completion of copying the new boot
code from RAM to flash memory, the unit will not operate at all when power returns.
Verify the TPDesign3 program being used is Version 3.16 build 193 or higher.
The Updated EXE for TPDesign3 can be found at AMX.com > Tech Center >
Downloadable Files > Application FIles > TPDesign3. Earlier versions of TPD3
will not correctly function with these panels.
FIG. 32 CP4/A communication - RS-232 from PC
AXT Programming
Stereo plug
male DB9
Axcess Programming
CP4/A panel
to DB9
programming
cable (FG10-817)
jack
AXD Programming
jack
(male)
or
female DB9
female DB9
goes to your PC’s
rear male RS-232
cable - FG10-727
port
Refer to the Using the CP4/A Programming Jacks section on page 25 for more
information on the procedures involved in this method.
 Loading...