Replacing the Battery
77
4" Color Touch Panels with Audio
AXD-CP4/A Battery Replacement
1. Carefully remove the attached AMX faceplate/bezel from the main AXD unit by gripping the
faceplate from the notches (located along the underside of the plate) and pulling with gentle
force.
2. Removing the main unit:
From the CB-CP4/A conduit/wallbox, carefully unscrew the four-#4-40 screws from the
threaded inserts located along the sides of the housing. Refer to FIG. 5 on page 9 for
more information.
From solid/flat surface, carefully unscrew the four- solod-surface screws from the
threaded inserts located along the sides of the housing. Refer to FIG. 11 on page 14 for
more information.
From a plasterboard (drywall) surface, carefully unscrew the two #6 screws from the
drywall clips. Once these drywall clips are separated from their screws, the drywall clip
set must be re-order from AMX before the unit can be mounted to this type of surface
again. Refer to FIG. 7 on page 11 for more information.
3. Carefully removed any connectors from the rear of the AXD unit.
4. Remove the four #4-20 securing screws (FIG. 43) by using a screwdriver to turn the screws
counter-clockwise. Place these four screws aside until after the battery has been replaced.
5. Carefully rotate the entire unit over and place the LCD onto a soft cloth to prevent scratching
during the component removal process.
6. Carefully pull the plastic housing (backbox) upwards until the unit slides out from the housing.
7. Carefully pry the battery out of its socket and insert the new battery.
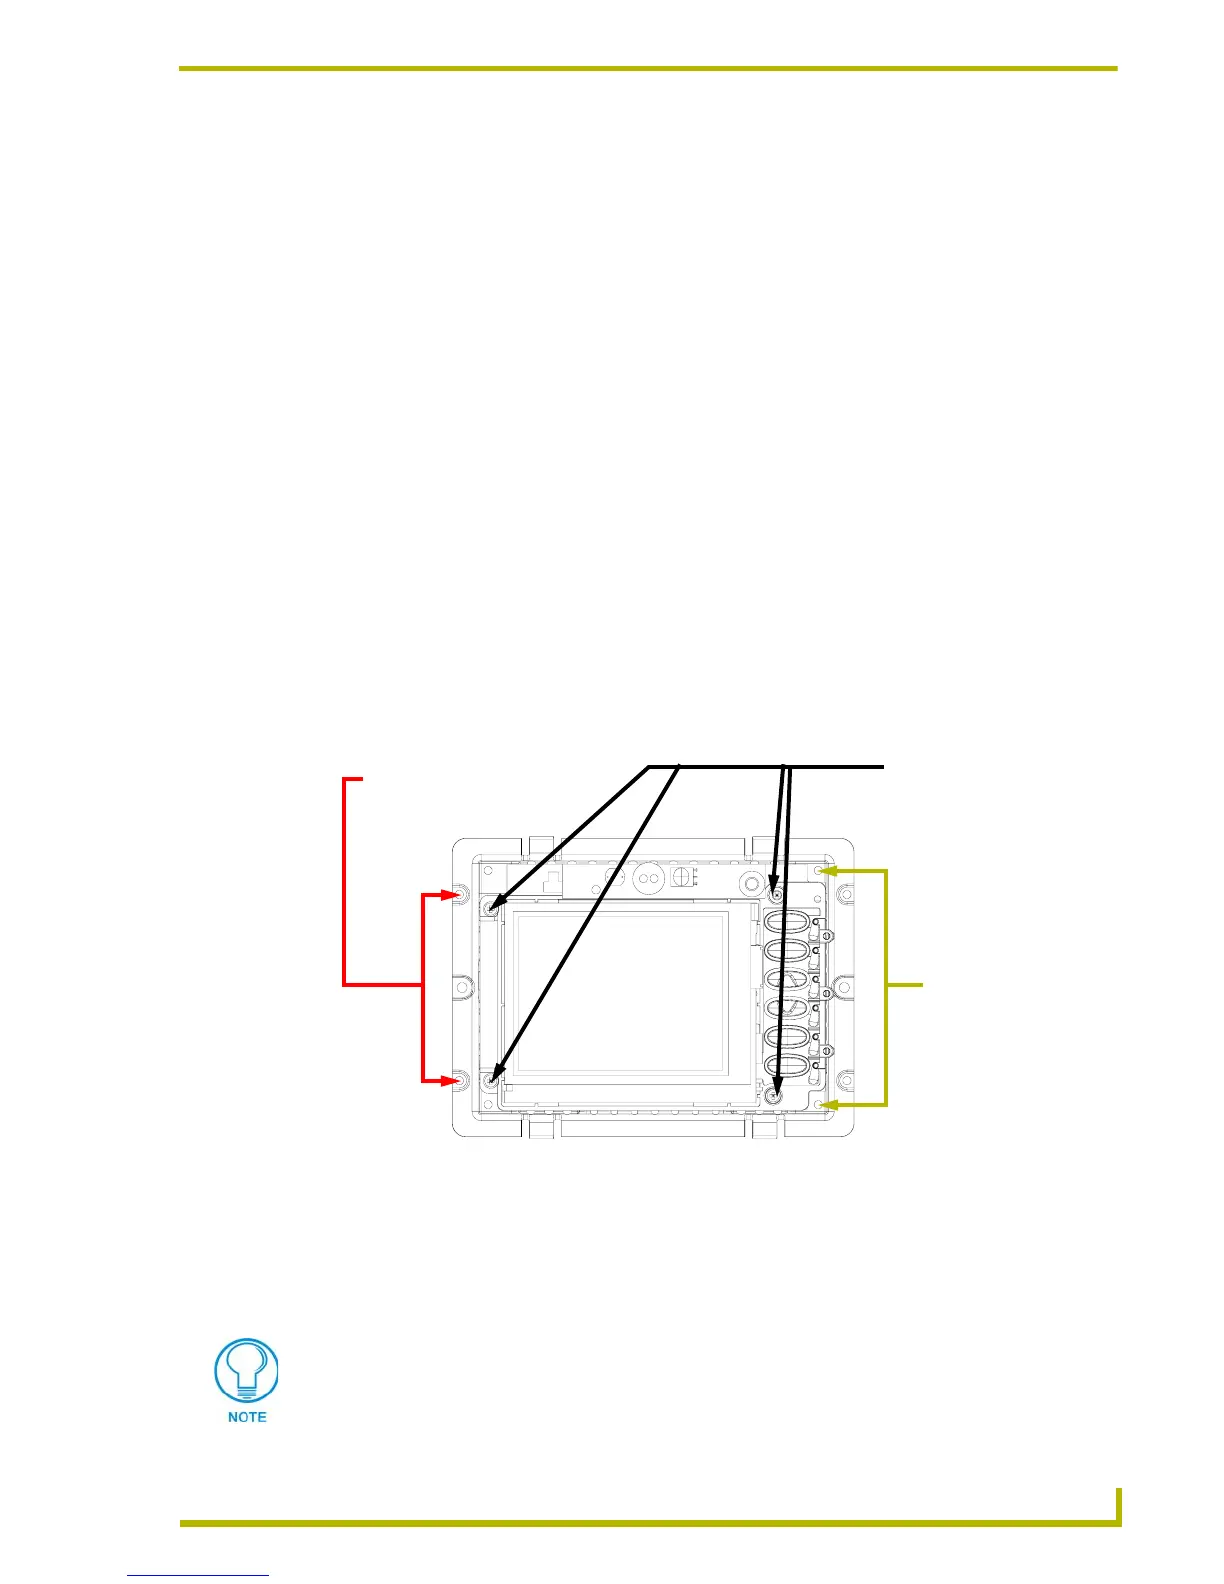
FIG. 43 Wall Mount panel (AXD) showing the 4 securing screws
Four (4) #4-20 screws
(thread-forming screws)
- these are used to secure
the internal components
to the housing
Four (4) #4-40 screws
(machine screws)
- these are used to
secure the housing to
a CB-CP4/A
Four Solid Surface
screws are used here
to secure the
housing/unit to a solid
surface
The battery information and (+) icon should be facing up.
 Loading...