Device Setup Pages
Raising and Lowering the Charge LED Brightness
1.
Select Remote & Display Settings from the Setup Page.
2. Under Charge LED, use the Up/Down arrows to adjust the LED brightness in one-point increments, to a minimum
of 0 and a maximum of 100.
3. Select the Back button until you are out of the Setup Menu.
Setting the Home Hold Time
1.
Select Remote & Display Settings from the Setup Page.
2. Under Home Hold Time, use the Up/Down arrows to adjust the home hold time in one-second increments, to a
maximum of 6.
3. Select the Back button until you are out of the Setup Menu.
Changing the Remote Inactivity Page Flip
1.
Select Remote & Display Settings from the Setup Page.
2. Under Inactivity, use the Up/Down arrows to adjust the page flip time in increments, to a maximum of 240.
3. Select the Back button until you are out of the Setup Menu.
Checking Remote Display Settings
1.
Select Remote & Display Settings from the Setup Page.
2. Use the device’s arrow down to navigate to the fourth and fifth Display Settings pages.
3. Select the Back button until you are out of the Setup Menu.
Date/Time Settings
The date and time can be set on the device or you can use the NetLinx Master to establish the time and format used. Use
the up and down arrows to scroll from viewable page to page.
A setting of 0 has special meaning: it disables the “home” function on button hold,
allowing the back/home button to operate like other external buttons.
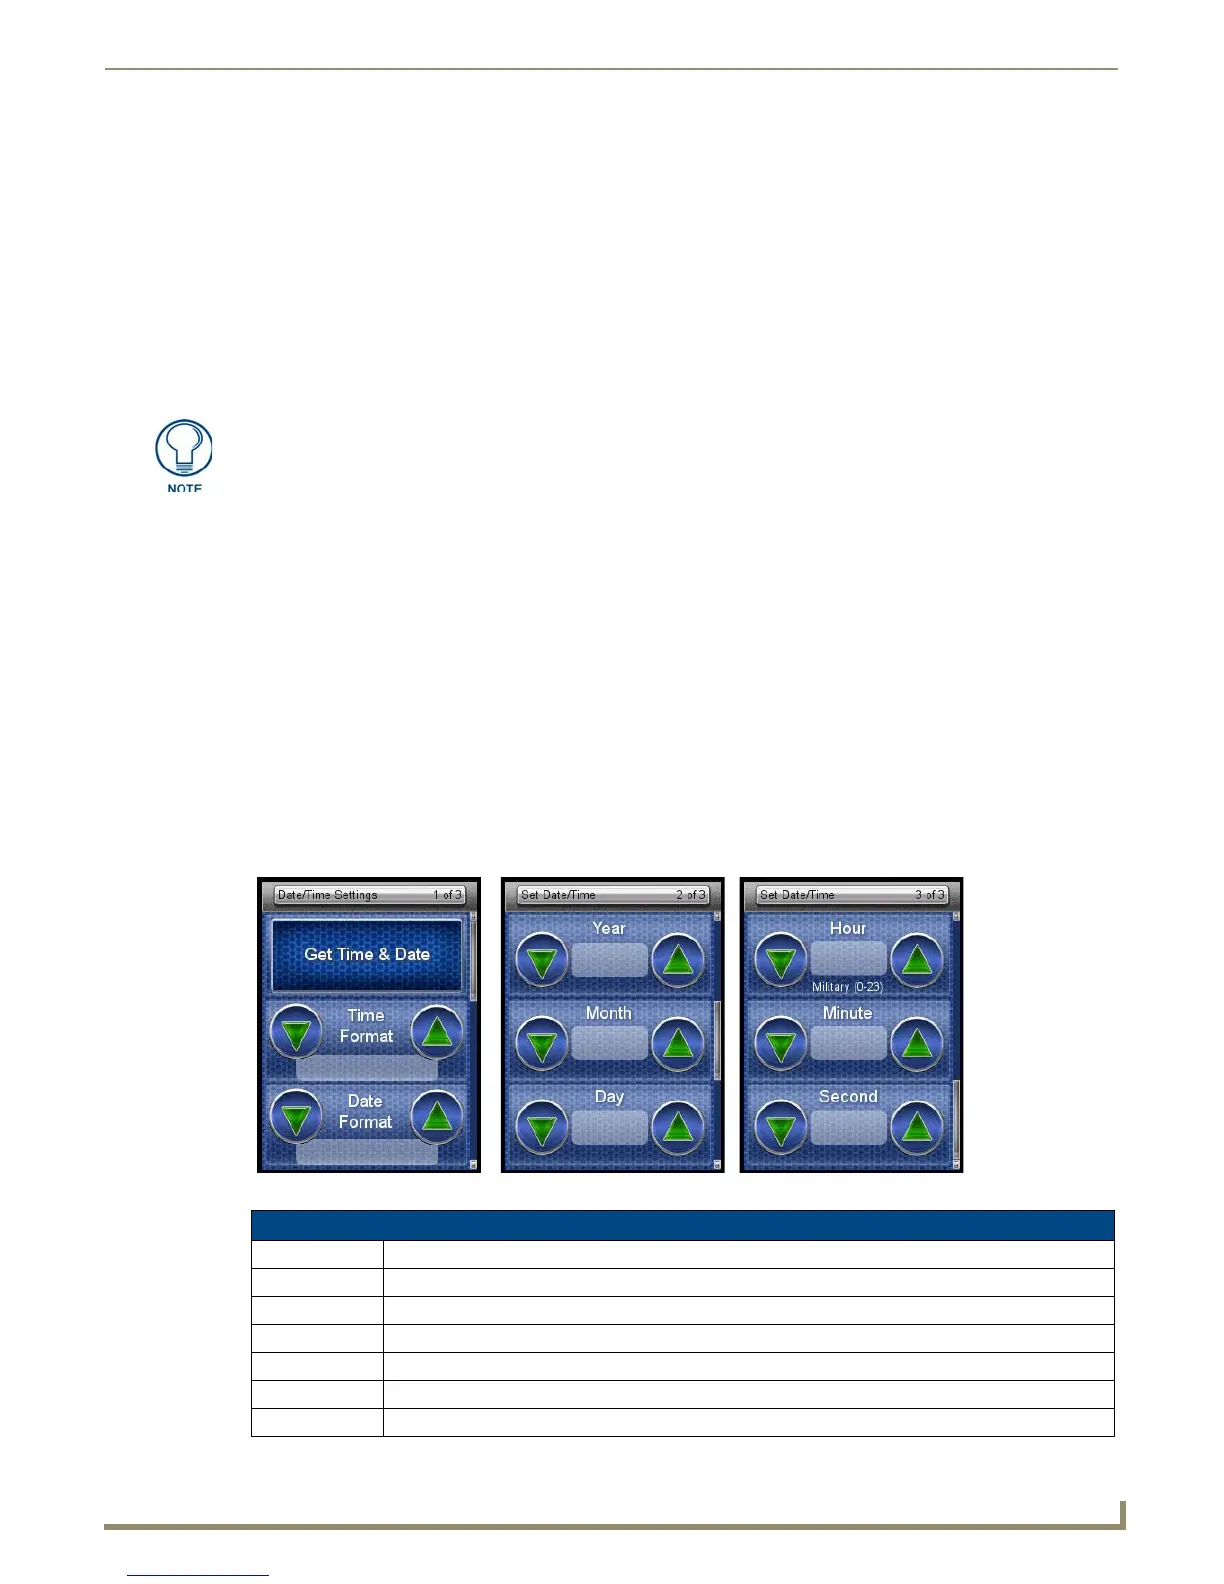
FIG. 8 Date/Time Settings Pages
Date/Time Settings
Get Time & Date Allows the user to get date and time information from the NetLinx master.
Time Format Selects between displayed standard and military time formats.
Date Format Selects displayed date format.
Year Selects the chosen year for the date.
Month Selects the chosen month for the date.
Day Selects the chosen day for the date.
Hour Selects the chosen hour for the time.
 Loading...


