Axon Fleet 2 Installation Manual
Axon Enterprise, Inc. Page 28 of 39
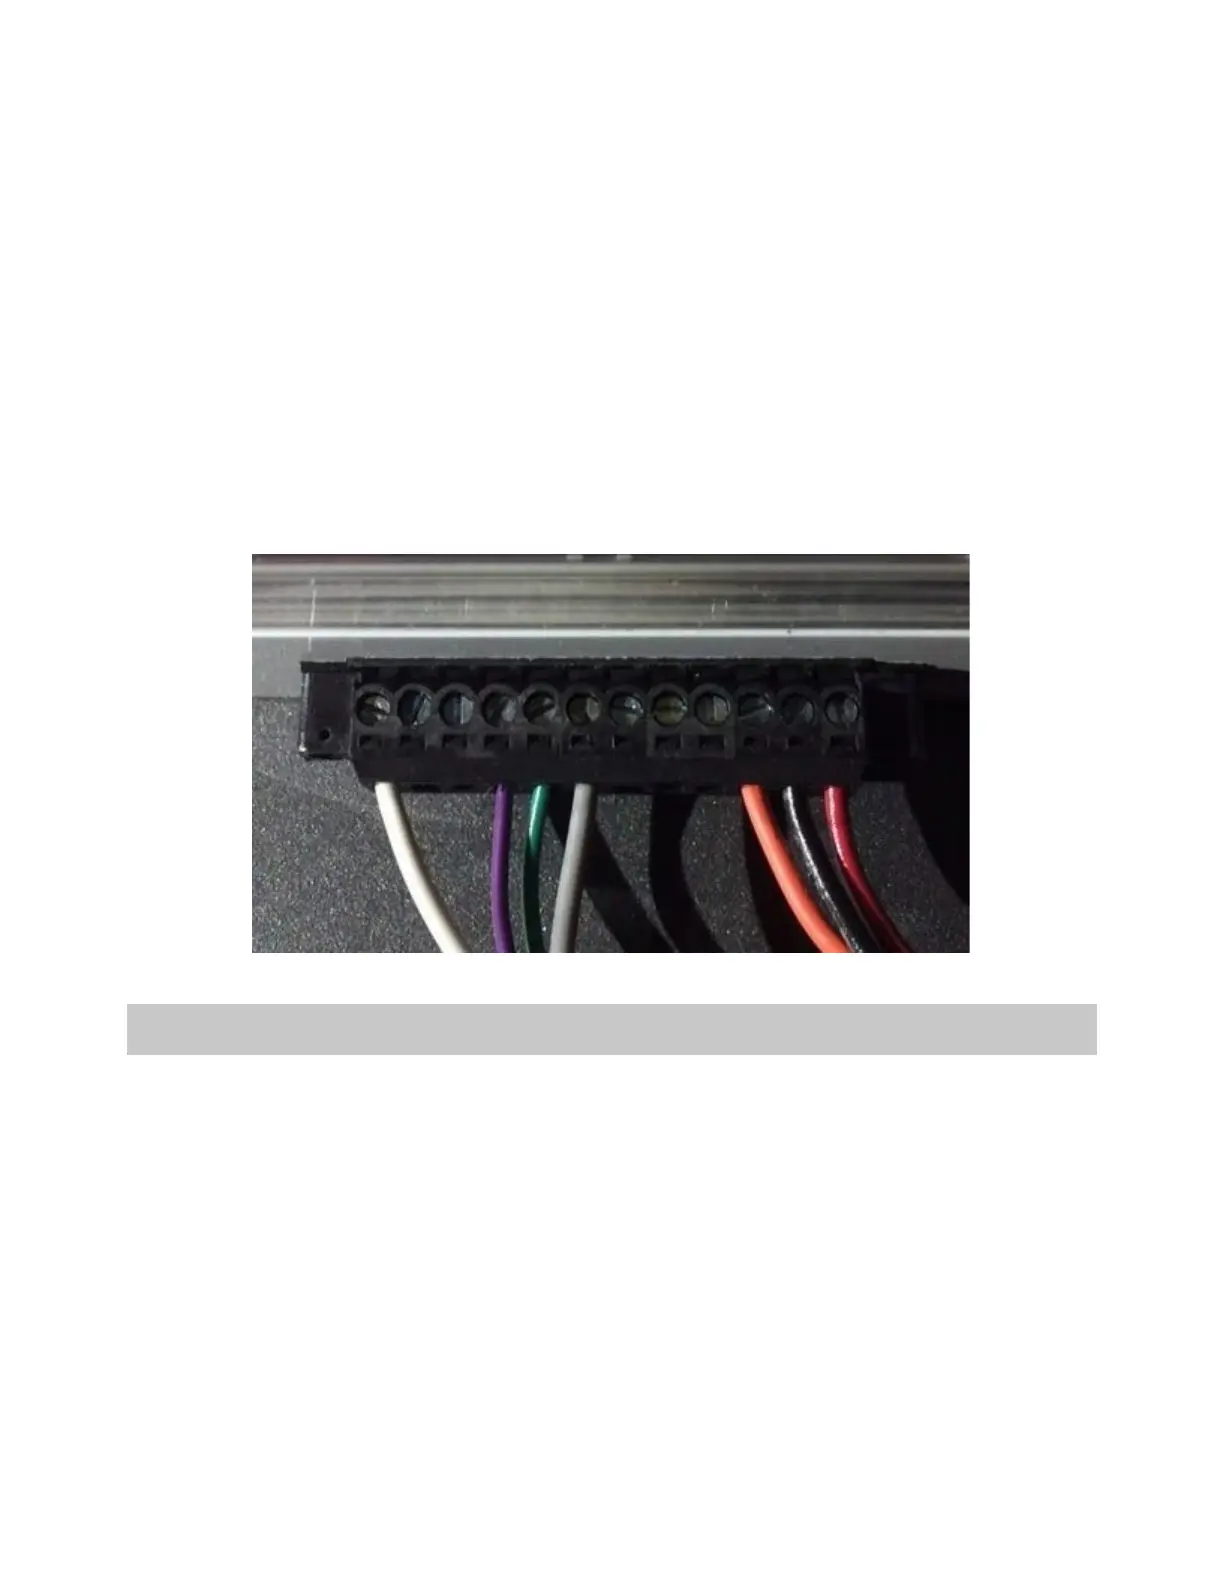
• White – 12
• Violet – 9
• Green – 8
• Gray – 7
4. Tighten down the set screws.
5. Reconnect the male connector to the power unit.
6. Secure the male connector using the small set screws on either end of the connector.
Note: When all 7 wires are installed, the power unit should look like this:
Affix the Front Camera Mount
Choose the appropriate mount location. The mount should be placed approximately 1-1/2” –
2” (3.8–5 cm) from the head liner.
The front camera can be in the mount while initially positioning the mount, but it is
recommended that it be removed when affixing the mount.
1. Ensure the camera is looking straight ahead and that the mount is level.
Notes:
• Consider the curvature of the windshield when positioning the mount.
2. Prepare the windshield by cleaning the area for the mount.
 Loading...