Axon Fleet 2 Installation Manual
Axon Enterprise, Inc. Page 30 of 39
3. Peel the top protective layer from the adhesive strip and affix the mount to the area.
4. Hold the mount in place for 10 seconds to ensure adhesion.
5. Connect the power unit to controller mount cable to the mount.
6. Use a cable tie through the slotted opening to hold the cable to the mount. Cut off
excess cable tie material.
7. Attach the rear camera facing into the prisoner compartment using the rear camera
mount with the provided ½-inch #6-32 screws. This requires pre-drilling holes using a
#31 or 3mm drill bit.
Use the provided 4-40 screws to secure the rear camera to the mount and tighten the
screws to hold the camera at the preferred angle.
8. Connect the USB-C cable from the rear camera to the rear camera controller.
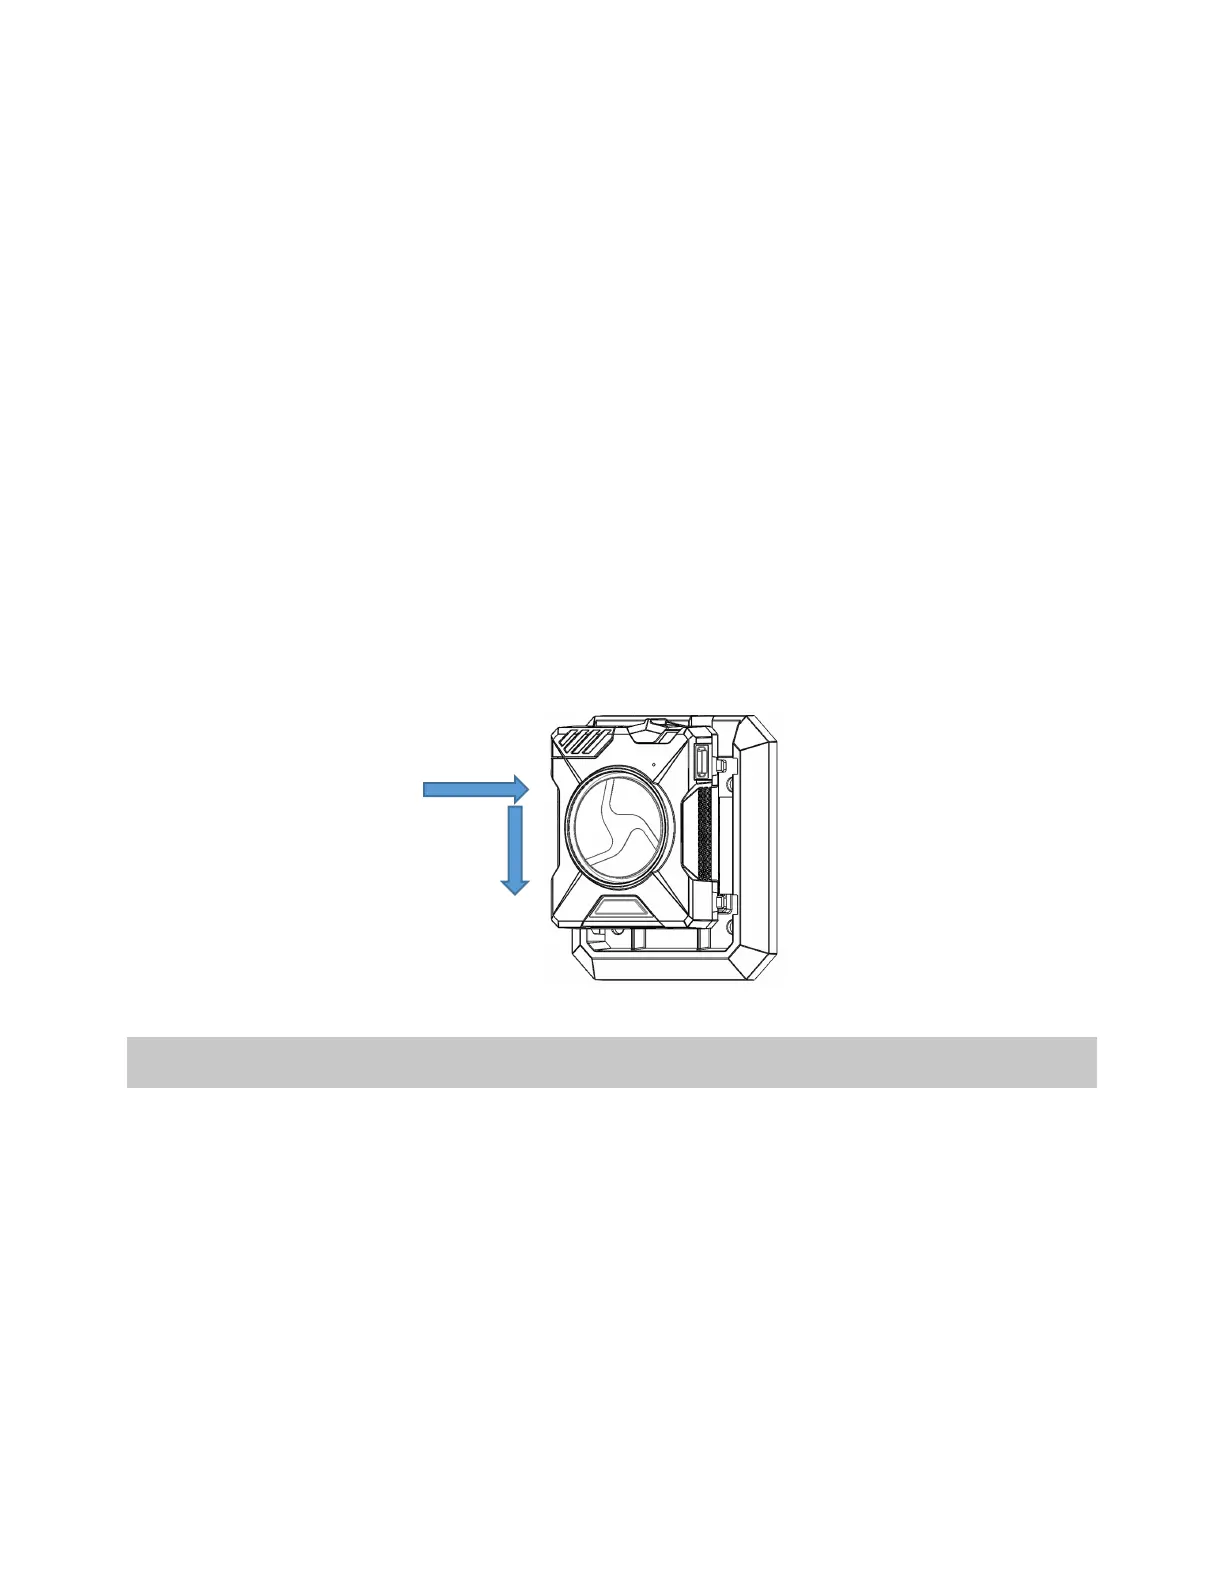
9. Insert the rear camera controller in the mount. Align the tabs on the controller with the
mount, push the controller into the mount, and then slide downward.
Affixing the Power Unit
1. Tuck all wires and the power unit safely away.
Note: Do not crimp or pinch any wiring.
2. After ensuring all wires are securely attached, affix the power unit to the predetermined
mounting location.
3. Secure the power unit in its location by using robust adhesive (such as 3M VHB tape), 3M
Dual Lock re-closeable fasteners, double-sided Velcro straps, or bolts.
4. Repeat steps 1–3 for a second power unit as necessary.
 Loading...
