Axon Fleet 2 Installation Manual
Axon Enterprise, Inc. Page 37 of 39
• Drill with a No. 16 (.1770”) drill bit – if installing the in-car charging dock to the vehicle
partition.
• 5/16” wrench – if installing the in-car charging dock to the vehicle partition.
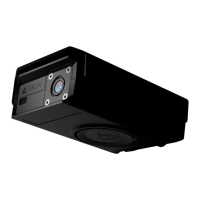
Affix the Junction Box
Choose the appropriate location on the vehicle’s front windshield to mount the junction box.
The junction box contains the antenna and receiving circuitry for the wireless microphone RF
link. Junction box placement and orientation are important for ensuring best performance.
The junction box should be mounted as close to the top and center of the front windshield
as possible. The wire connections should face upward.
When positioning the junction box, take into account:
• The position of wiring to and from the junction box
• The curvature of the windshield
1. Prepare the windshield by cleaning the area for the junction box.
• Use 3M Silane Glass Treatment AP 115 for maximum adhesion.
• Wipe off excess Silane glass treatment with a paper towel before it is allowed to dry.
2. Peel the top protective layer from the adhesive strip and affix the junction box to the
windshield.
3. Hold the junction box in place for 10 seconds to ensure adhesion.
4. Connect the junction box to the Axon Fleet power unit and to the front camera.
Connecting the Junction Box
The junction box connects in series between the Axon Fleet Power Unit and the Axon Fleet 2
front camera. The power unit to camera cable is connected to the junction box, instead of
the front camera, and then the junction box cable is connected to the front camera.
1. Connect the power unit to camera cable to the junction box.
2. Connect the junction box cable to the front camera.
Installing the In-Car Charging Dock
There are three options for installing the in-car charging dock: on a flat surface using VHB
tape, on the partition between the front and rear seats, or on a carpeted area with sheet
metal backing.

 Loading...