111
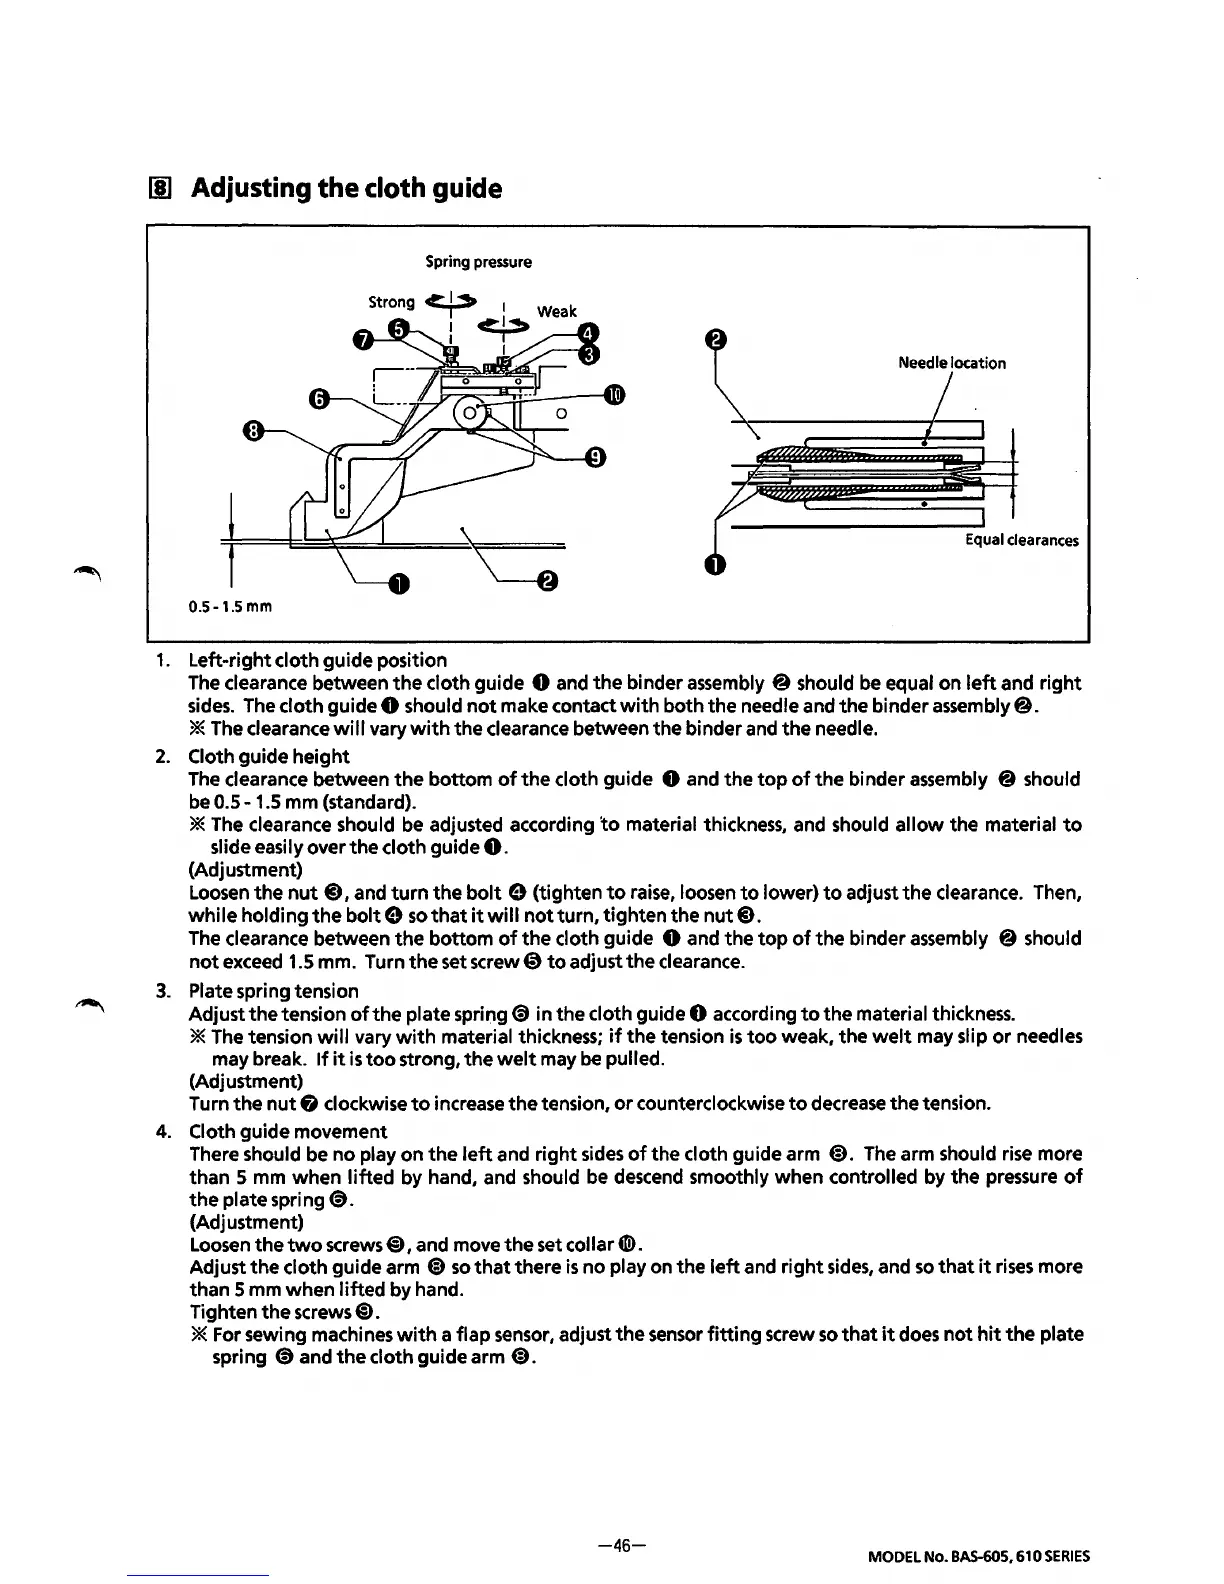
Adjusting
the
cloth
guide
Spring
pressure
Needle location
Equal
clearances
0.5-1.5
mm
1.
Left-right cloth guide position
The
clearance between
the
cloth guide 0 and
the
binder assembly @ should be equal on
left
and
right
sides.
The cloth guide 0 should
not
make contact
with
both the needle and
the
binder assembly@.
*
The clearance
will
vary
with
the
clearance between the binder and
the
needle.
2.
Cloth guide
height
The clearance between
the
bottom
of
the
cloth guide 0 and the
top
of
the
binder assembly @ should
be
0.5-
1.5 mm (standard).
*The
clearance should be adjusted according 'to material thickness, and should
allow
the material
to
slide easily over
the
cloth guide
0.
(Adjustment)
Loosen
the
nut
8 I and
turn
the
bolt
e (tighten
to
raise, loosen
to
lower)
to
adjust
the
clearance. Then,
while
holding
the
bolt
e
so
that
it
will
not
turn, tighten the
nut
8.
The clearance between
the
bottom
of
the
cloth guide 0 and
the
top
of
the
binder assembly @ should
not
exceed 1.5 mm. Turn
the
set
screw~
to
adjust
the
clearance.
3.
Plate spring tension
Adjustthe
tension
ofthe
plate spring
€)
in the cloth guide 0 according
to
the
material thickness.
*The
tension
will
vary
with
material thickness;
if
the
tension
is
too
weak, the
welt
may slip
or
needles
may break.
If
it
is
too
strong,
the
welt
may be pulled.
(Adjustment)
Turn
the
nut
8 clockwise
to
increase
the
tension,
or
counterclockwise
to
decrease
the
tension.
4.
Cloth guide movement
There
should be no play on
the
left
and
right
sides
of
the cloth guide arm
@).
The arm should rise more
than
5 mm
when
lifted
by hand, and should be descend smoothly when controlled by
the
pressure
of
the
plate spring
€).
(Adjustment)
Loosen
the
two
screws@), and move
the
set collar
4ID.
Adjust
the
cloth guide arm
@)
so
that
there
is
no
play on the
left
and
right
sides,
and
so
that
it
rises
more
than
5 mm
when
lifted
by hand.
Tighten
the
screws@).
*For
sewing machines
with
a flap sensor, adjust
the
sensor
fitting
screw
so
that
it
does
not
hit
the
plate
spring
€)
and
the
cloth guide arm
@).
-46-
MODEL
No.
BAS-605,
610
SERIES