Using the Settings Key 149
6
6
Repeat steps 2 through 5 to specify colors
for the other boxes.
• To change the color specified in a box,
delete the previous color, and then specify a
new one.
Memo
● (“Appliqué Material”),
(“Appliqué Position”) and
(“Appliqué”) cannot be specified in the
custom thread.
■ Changing the color thread table
Set “DISPLAY EXPANDED THREAD COLOR” to
“ON”, and then select the color thread. Refer to
page 146.
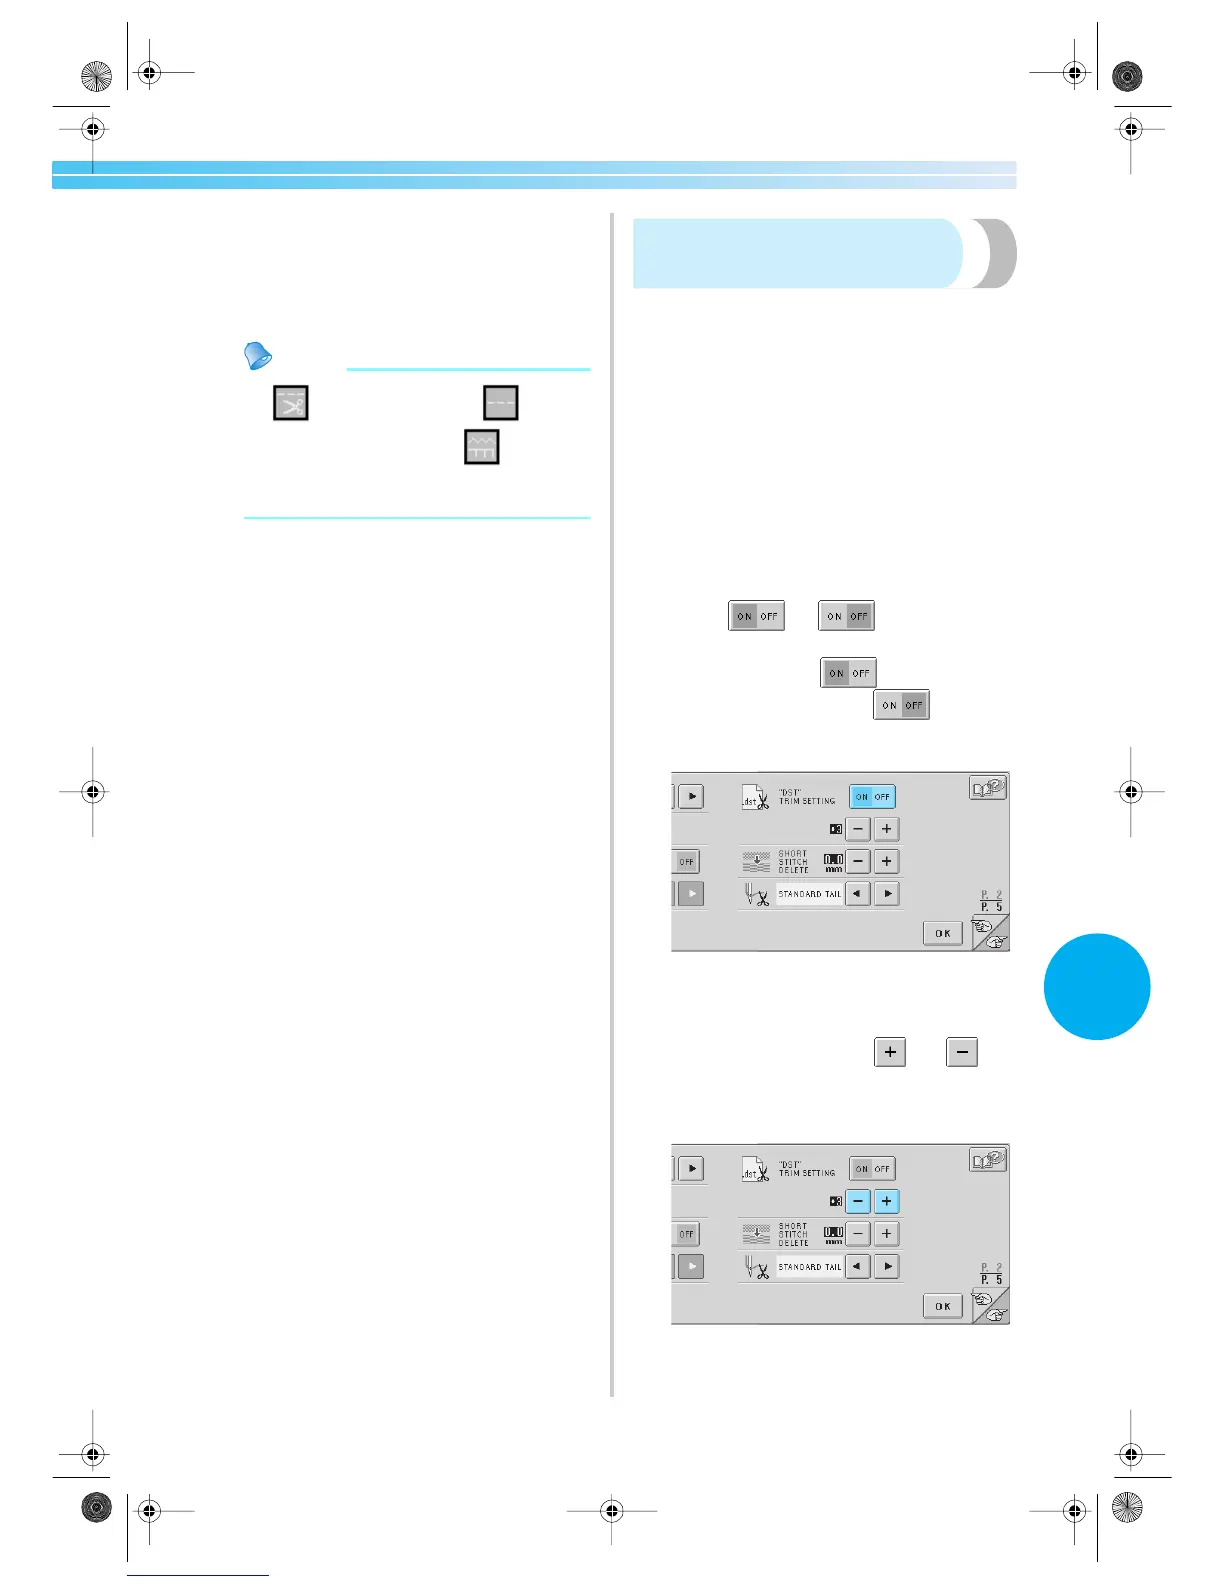
Specifying “DST” thread
trimming
When using Tajima embroidery data (.dst), you can
specify whether connected jump (sometime cold
feed) codes are converted to one thread trim code or
not. If connected jump codes are to be converted to
one trim code, specify the number of connected
jump codes.
ON: The machine convert the jump code to trim
code, based on the number specified on the next
line.
OFF: Not converted to thread trim codes
When the embroidery machine is purchased, “ON”
is selected and the number of jumps is set to “3”.
The “DST” thread trim settings can be specified from
the second page of the settings screen.
1
Touch (or ) and select the
desired setting.
The key appears as when “ON” is
selected, and it appears as when
“OFF” is selected.
• Each touch of the key turns the setting either
on or off.
2
If “ON” is selected, touch and to
select the number of feed codes.
The desired setting is displayed.
Sapphire.book Page 149 Friday, August 1, 2003 9:12 AM

 Loading...